This Easy Gluten Free Artisan Bread is a simple no-fuss loaf that gives you a crisp crust and tender crumb without complicated equipment. I’ve made this loaf dozens of times for weeknight dinners and weekend toasts, and it consistently delivers bakery-style results at home. For background on techniques and flour choices, I often cross-reference an artisan gluten-free bread guide I trust.
Why Make This Recipe
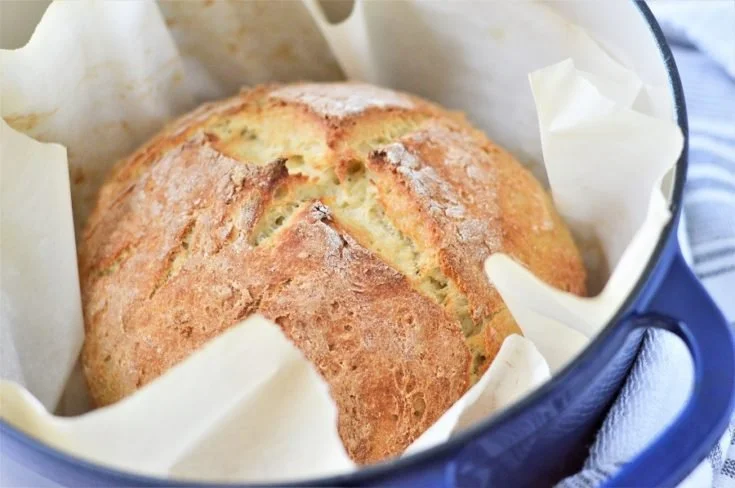
- It produces a crunchy, golden crust and moist interior—texture you usually miss in gluten-free loaves.
- It’s fast to mix (about 10 minutes active), so it’s convenient for busy cooks.
- The recipe uses pantry-friendly ingredients and a single-batch method—no complicated laminations.
- It freezes and reheats very well, making it practical for make-ahead meals.
- Personal note: I love this loaf because the crust sings when you slice it—small culinary victories like that make weekday bread feel special. Also see a collection of specialty artisan breads for inspiration.
Recipe Overview
- Prep time: 10 minutes active, 1–1.5 hours rise
- Cook time: 35–40 minutes (450°F / 230°C)
- Total time: ~1 hour 45 minutes (including rising)
- Servings: 8 (one medium round loaf)
- Difficulty: Easy
- Method: No-knead, stir-and-rise, baked in a preheated Dutch oven (covered then uncovered) to develop crust.
My Experience Making This Recipe
I tested this version on different flours and found a blend with a binder (xanthan or psyllium) gives the most reliable crumb. The biggest discovery was baking in a hot, preheated Dutch oven—steam from the dough creates a crisp, artisan crust every time. I tweaked hydration and resting times until the loaf rose predictably in my home oven.
How to Make Easy Gluten Free Artisan Bread
This is a straightforward no-knead recipe: you mix dry ingredients, add warm water and oil, stir until a wet dough forms, let it rise until puffy, then shape and bake in a hot Dutch oven. Key techniques are measuring by weight when possible, using warm water around 110°F (43°C) to activate yeast, and preheating the Dutch oven to 450°F (230°C) for a strong oven spring. Expect a loose, sticky dough rather than a firm ball—that’s normal for gluten-free artisan-style loaves.
Basic ingredient proportions (tested):
- 3 cups (420 g) gluten-free all-purpose flour blend (if your blend lacks binder, add 1 tsp xanthan gum)
- 2 1/4 tsp (1 packet / 7 g) instant yeast
- 1 tbsp (12 g) sugar or honey
- 1 1/2 tsp (9 g) fine sea salt
- 1 tbsp (9 g) psyllium husk powder OR 1 tsp xanthan gum (if your blend is gum-free)
- 1 3/4 cups (420 ml) warm water, 105–115°F (40–46°C)
- 2 tbsp (30 ml) olive oil
Step summary:
- Whisk dry ingredients together in a large bowl.
- Add warm water and oil, stir until uniformly wet. The dough will be sticky and shaggy.
- Cover and let rise 60–90 minutes at room temperature until puffy.
- Preheat a 4–5 quart Dutch oven to 450°F (230°C) for 30 minutes.
- Turn dough onto parchment, shape into a round with lightly oiled hands, transfer on parchment into the hot Dutch oven.
- Bake covered 25 minutes, then uncovered 10–15 minutes until deep golden and internal temp reads 205–210°F (96–99°C). Cool at least 30 minutes before slicing.
For a cheesy twist, I often consult a tested recipe like this cheesy gluten-free artisan bread to add mix-ins successfully.
Expert Tips for Success
- Measure by weight when possible: 420 g flour gives consistency across different blends and cups. A small digital scale is a worthwhile investment.
- Use psyllium husk for structure: 1 tablespoon binds moisture and mimics gluten elasticity better than xanthan in many high-hydration gf loaves.
- Preheat the Dutch oven: a thoroughly preheated pot (30+ minutes) produces the best oven spring and crust. If you don’t have a Dutch oven, bake on a preheated baking stone with a metal pan of hot water for steam.
- Watch internal temperature: aim for 205–210°F (96–99°C) for fully baked crumb—this avoids gummy centers.
- Hydration matters: gluten-free doughs look wetter than wheat doughs. Resist the urge to add too much extra flour—crumb will be denser.
Also check this savory variation for rosemary technique notes on a rosemary bread page.
How to Serve Easy Gluten Free Artisan Bread
- Serve warm with salted butter and a drizzle of good olive oil for brunch or breakfast.
- Use this loaf for hearty sandwiches—its crust stands up to fillings like roasted vegetables and grilled cheese.
- Present sliced on a wooden board with small bowls of olive oil, balsamic, and flake salt for a casual appetizer.
- Make croutons: cube, toss with oil and herbs, and roast at 375°F (190°C) for 12–15 minutes.
For quick, breakfast-friendly swaps, try ideas from an easy oat quick bread adaptation.
Storage and Reheating Guide
- Short-term: store whole loaf loosely wrapped at room temperature for up to 48 hours in a paper bag or bread box to preserve crust.
- Refrigeration: avoid refrigerating if possible—it dries the bread. If you must, wrap tightly and use within 3 days.
- Freezing: slice and wrap individual portions in plastic wrap and foil, or vacuum seal. Freeze up to 3 months.
- Reheating: restore crust by reheating slices in a 375°F (190°C) oven for 6–8 minutes, or whole loaf 10–12 minutes. For a fast method, toast slices directly.
Recipe Variations
- Dairy-free: this recipe is naturally dairy-free; use olive oil or melted coconut oil instead of butter.
- Seeded loaf: fold in 1/3 cup each of sunflower and pumpkin seeds to the dough for texture—reduce water by 1–2 tbsp if needed.
- Herb or garlic: mix 2 tbsp chopped fresh rosemary or 2 tsp garlic powder into dry mix for savory notes.
- Lower-sugar option: omit the 1 tbsp sugar—yeast will still activate with warm water, though rise may be a touch slower.
Nutritional Highlights
- Whole-picture carbs: this loaf is primarily carbohydrate-based and provides quick energy—choose portion sizes (1–2 slices) based on your dietary needs.
- Fiber boost: using a blend with brown rice or oat flour, or adding psyllium, raises soluble fiber content.
- Allergen note: contains gluten-free flour but may include soy or egg-free depending on your blend; always check ingredient labels. This recipe is naturally dairy-free and can be nut-free if your flour blend is.
Troubleshooting Common Issues
- Dense or gummy center: bake until internal temp reaches 205–210°F (96–99°C) and allow a 30-minute cool; underbaking or too-low oven temp causes gumminess.
- Little rise or flat loaf: check yeast freshness and water temperature (105–115°F / 40–46°C). If you used chilled water or expired yeast, the rise will be weak.
- Crust too soft: cool uncovered on a rack to let steam escape; a hotter initial bake or longer uncovered bake time (10–15 min) deepens crust.
Frequently Asked Questions
Q1: Can I substitute active dry yeast for instant yeast?
A1: Yes—use 25% more active dry yeast and proof it in warm water with a pinch of sugar for 5–10 minutes until foamy before mixing with dry ingredients. Instant yeast can be mixed straight into the dry mix.
Q2: Do I need psyllium husk or xanthan gum?
A2: If your gluten-free flour blend already contains a binder, you can skip extra gum. If it doesn’t, add 1 tsp xanthan gum or 1 tbsp psyllium husk powder for structure and moisture retention. Psyllium tends to give a more elastic, less crumbly crumb.
Q3: Can I make smaller loaves or rolls with this dough?
A3: Yes—divide dough into smaller portions, shape gently, and bake on a parchment-lined sheet. Reduce baking time to 20–25 minutes at 425°F (218°C) for rolls; check internal temperature for doneness.
Q4: Why is my dough very wet and sticky—shouldn’t bread dough be firm?
A4: Gluten-free artisan doughs are intentionally high-hydration and sticky because they lack gluten to form a firm network. Work with wet hands or lightly oiled tools, and trust the rise and baking times rather than texture cues from wheat dough.
Conclusion
For a reliable home-baked loaf that delivers a crisp crust and soft, enjoyable crumb, this Easy Gluten Free Artisan Bread is a dependable choice. For the original inspiration and a tested step-by-step, check out Easy Gluten Free Artisan Bread – The Healthy Home Cook (https://www.thehealthyhomecook.com/easy-gluten-free-artisan-bread/).
Print
Easy Gluten Free Artisan Bread
A simple no-fuss loaf that delivers a crisp crust and tender crumb without complicated equipment, perfect for busy cooks.
- Total Time: 105 minutes
- Yield: 8 servings 1x
Ingredients
- 3 cups (420 g) gluten-free all-purpose flour blend
- 2 1/4 tsp (1 packet / 7 g) instant yeast
- 1 tbsp (12 g) sugar or honey
- 1 1/2 tsp (9 g) fine sea salt
- 1 tbsp (9 g) psyllium husk powder or 1 tsp xanthan gum
- 1 3/4 cups (420 ml) warm water, 105–115°F (40–46°C)
- 2 tbsp (30 ml) olive oil
Instructions
- Whisk dry ingredients together in a large bowl.
- Add warm water and oil, stir until uniformly wet. The dough will be sticky and shaggy.
- Cover and let rise 60–90 minutes at room temperature until puffy.
- Preheat a 4–5 quart Dutch oven to 450°F (230°C) for 30 minutes.
- Turn dough onto parchment, shape into a round with lightly oiled hands, transfer on parchment into the hot Dutch oven.
- Bake covered for 25 minutes, then uncovered for 10–15 minutes until deep golden and internal temp reads 205–210°F (96–99°C).
- Cool at least 30 minutes before slicing.
Notes
For added texture, fold in seeds or herbs. This recipe is naturally dairy-free.
- Prep Time: 10 minutes
- Cook Time: 35 minutes
- Category: Bread
- Method: Baking
- Cuisine: Gluten-Free
- Diet: Dairy-Free
Nutrition
- Serving Size: 1 slice
- Calories: 180
- Sugar: 1g
- Sodium: 200mg
- Fat: 5g
- Saturated Fat: 1g
- Unsaturated Fat: 4g
- Trans Fat: 0g
- Carbohydrates: 34g
- Fiber: 3g
- Protein: 4g
- Cholesterol: 0mg