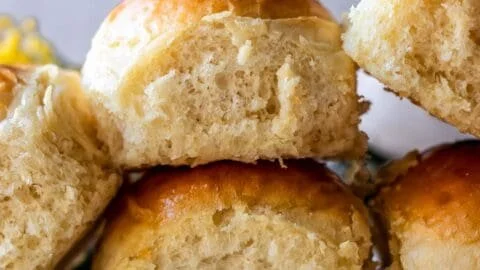
These gluten-free dinner rolls are soft, slightly chewy, and perfect for weeknight meals or holiday tables. I first developed this recipe while testing different flour blends until I found the balance of tenderness and structure that really works. For a quick comparison of top methods, see this roundup of best gluten-free dinner rolls.
Why Make This Recipe
- They deliver the soft, pull-apart texture people expect from classic rolls without gluten.
- They come together with everyday pantry staples and bake in about 20 minutes.
- Gluten-free rolls pair well with soups, grilled proteins, and holiday spreads.
- They freeze and reheat well, so you can make a batch ahead and save time.
- Personal insight: I love making these because they disappear fast at family dinners — even gluten eaters ask for the recipe.
See how to adapt them for dairy-free diets in this guide to dairy-free gluten-free dinner rolls.
Recipe Overview
Prep time: 30 minutes active (plus 60–90 minutes rising).
Cook time: 18–22 minutes at 375°F (190°C).
Total time: About 2 hours including rising.
Servings: Makes 12 medium rolls.
Difficulty: Easy — a little patience with proofing is the only real requirement.
Method: Mix, proof the dough once at warm room temperature, shape into rolls, then bake until golden. If you prefer machine-assisted mixing, these rolls also adapt well to a bread machine approach.
My Experience Making This Recipe
I tested this over multiple sessions, adjusting hydration and starch ratios until the crumb held together without tasting gummy. The key discovery was a moderate rise at about 80–85°F (27–29°C) and a 375°F (190°C) bake to set the exterior while keeping the inside tender. Switching between psyllium husk and xanthan gum changed the chew, so I note both options below.
How to Make Gluten-Free Dinner Rolls
Start by warming liquids to 105–110°F (40–43°C) to activate the yeast, then whisk into the dry mix until a sticky, slightly batter-like dough forms. Let the dough rise in a warm draft-free spot until nearly doubled (about 60–90 minutes). Gently divide and shape into 12 even rolls, place them close together on a baking sheet or in a skillet for pull-apart texture, let them proof 20–30 minutes, then bake at 375°F (190°C) until golden and 200–205°F (93–96°C) internal. Brush warm rolls with melted butter or olive oil for shine and flavor.
Expert Tips for Success
- Use a digital scale for accuracy when measuring flours and starches; gluten-free flours vary widely by brand.
- Hydration matters: aim for a slightly sticky dough — more water yields a less crumbly crumb. For details on hydration, this article is helpful: gluten-free dinner rolls hydration.
- Proof in a slightly warm environment (80–85°F / 27–29°C). If your kitchen is cold, place the bowl in an oven with the light on.
- For best texture, use a blend of rice flour, tapioca or potato starch, and a binder (xanthan gum or psyllium husk). Psyllium yields a more elastic, bread-like crumb.
- Use an instant-read thermometer: rolls are done when internal temp hits 200–205°F (93–96°C).
How to Serve Gluten-Free Dinner Rolls
- Serve warm with compound butter (herbs and garlic) or a drizzle of olive oil for dipping.
- Use as slider buns for pulled pork, roasted chicken, or meatless sandwiches.
- Pair with soups and stews — they’re great for sopping up broths.
- For a cheesy twist, try these gluten-free cheddar dinner rolls served hot from the oven.
Storage and Reheating Guide
Store cooled rolls in an airtight container or zip-top bag at room temperature for up to 2 days. For longer storage, freeze in a single layer on a sheet pan, then transfer to a freezer bag for up to 3 months. Reheat from frozen in a 350°F (175°C) oven for 12–18 minutes wrapped loosely in foil, or from thawed at 300°F (150°C) for 8–10 minutes. For quick reheating, microwave a single roll wrapped in a damp paper towel for 12–18 seconds, then finish briefly in a warm oven to restore crust.
Recipe Variations
- Dairy-free: substitute melted olive oil or vegan butter for dairy butter; see dairy-free tips in the earlier link.
- Cheesy rolls: fold grated cheddar into the dough or sprinkle on top before baking for a golden crust.
- Herb and garlic: incorporate 1–2 teaspoons dried herbs and 1 tsp garlic powder into the dry mix.
- Seeded or whole-grain: add 10–20% sorghum or buckwheat flour for flavor; increase moisture slightly to compensate.
Nutritional Highlights
- Naturally gluten-free, suitable for people with celiac disease or gluten sensitivity when made with certified gluten-free ingredients.
- Can be made dairy-free or egg-free depending on the recipe version and substitutions.
- Portion guidance: one medium roll is a reasonable serving for most adults; calorie count varies by fat and add-ins but typically ranges 120–180 kcal per roll.
Troubleshooting Common Issues
- Dense rolls: likely under-proofed or the yeast was old. Ensure liquids are 105–110°F and yeast is active; give the dough adequate time to double.
- Gummy interior: usually underbaked or too much moisture. Check internal temp (200–205°F) and bake a few minutes longer if needed.
- Crumbly, dry texture: too much rice flour or not enough binder/hydration. Reduce dry flour slightly and add xanthan gum or psyllium husk.
Frequently Asked Questions
Q: Can I make these rolls without eggs?
A: Yes — substitute each egg with 1/4 cup applesauce plus 1 tablespoon oil, or use a commercial egg replacer. Expect a slightly different crumb and add a touch more binder (psyllium or xanthan).
Q: Do I need psyllium husk or xanthan gum?
A: You need some binder to mimic gluten’s structure. Psyllium gives a more elastic, bread-like texture; xanthan gum works well too and is easier to source. Use 1 tsp xanthan or 1–1.5 tbsp psyllium per batch and test which you prefer.
Q: Can I shape these in a cast-iron skillet for pull-apart rolls?
A: Yes — placing rolls snugly in a skillet encourages soft sides and easy pulling. Brush tops with butter before baking for a glossy finish.
Q: How do I know when the dough has proofed enough?
A: It should be puffy and hold a light indentation when gently pressed; if it springs back immediately, it needs more time. Aim for nearly doubled volume before shaping.
Conclusion
If you want an alternate pull-apart style or a dairy-free tweak, check this tested recipe for Gluten-free Pull-Apart Dinner Rolls {dairy-free option}: Gluten-free Pull-Apart Dinner Rolls {dairy-free option}.
Print
Gluten-Free Dinner Rolls
Soft, slightly chewy gluten-free dinner rolls perfect for weeknight meals or holiday tables.
- Total Time: 110 minutes
- Yield: 12 servings 1x
Ingredients
- 2 1/2 cups gluten-free flour blend
- 1/2 cup tapioca or potato starch
- 1 tsp xanthan gum or psyllium husk
- 1 packet (2 1/4 tsp) active dry yeast
- 1 tsp salt
- 1 tbsp sugar
- 1 1/2 cups warm water (105–110°F)
- 4 tbsp melted butter or olive oil
Instructions
- Warm the liquids to 105–110°F to activate the yeast and whisk into the dry mix until a sticky dough forms.
- Let the dough rise in a warm draft-free spot until nearly doubled (about 60–90 minutes).
- Gently divide the dough into 12 even portions and shape into rolls.
- Place the rolls close together on a baking sheet and let them proof for 20–30 minutes.
- Bake at 375°F until golden and the internal temperature reaches 200–205°F (about 18–22 minutes).
- Brush warm rolls with melted butter or olive oil before serving.
Notes
For best results, use a digital scale for measuring flours and proof the dough in a warm environment. These rolls freeze well for easy reheating.
- Prep Time: 90 minutes
- Cook Time: 20 minutes
- Category: Bread
- Method: Baking
- Cuisine: American
- Diet: Gluten-Free
Nutrition
- Serving Size: 1 roll
- Calories: 150
- Sugar: 1g
- Sodium: 250mg
- Fat: 6g
- Saturated Fat: 2g
- Unsaturated Fat: 4g
- Trans Fat: 0g
- Carbohydrates: 22g
- Fiber: 2g
- Protein: 3g
- Cholesterol: 10mg