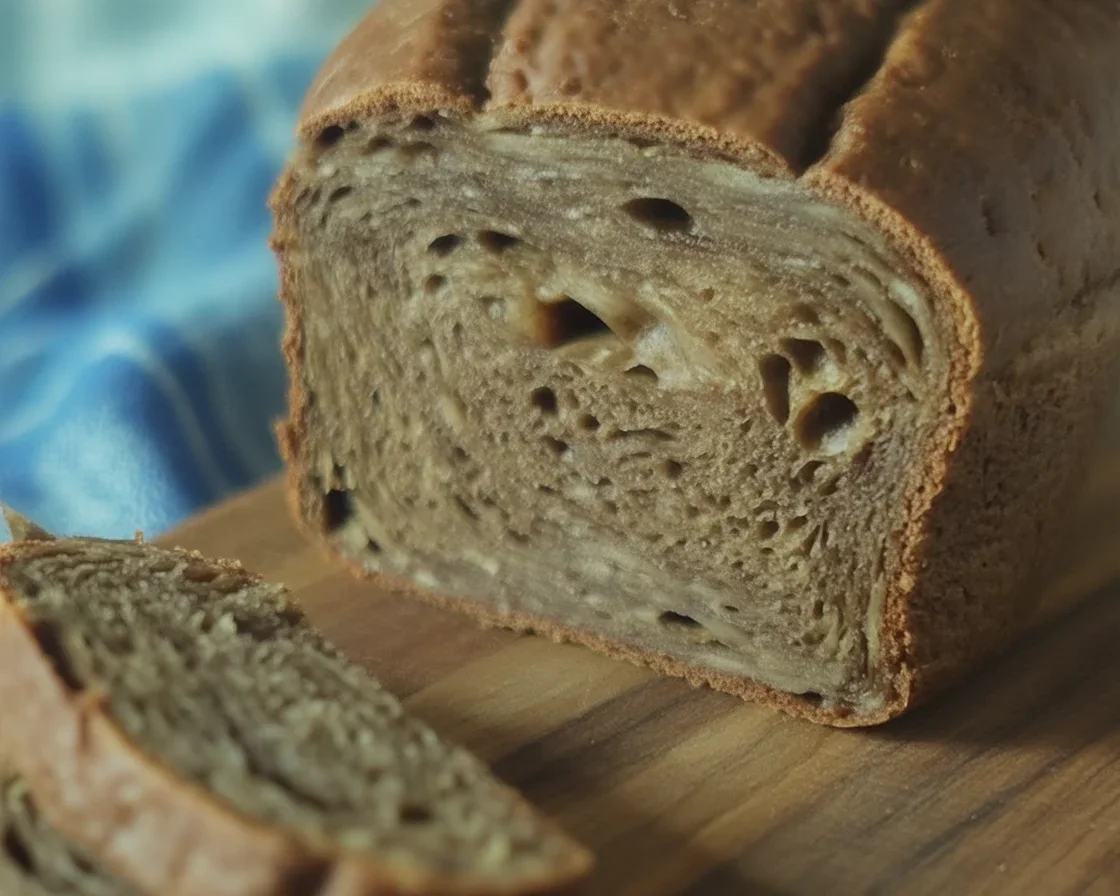
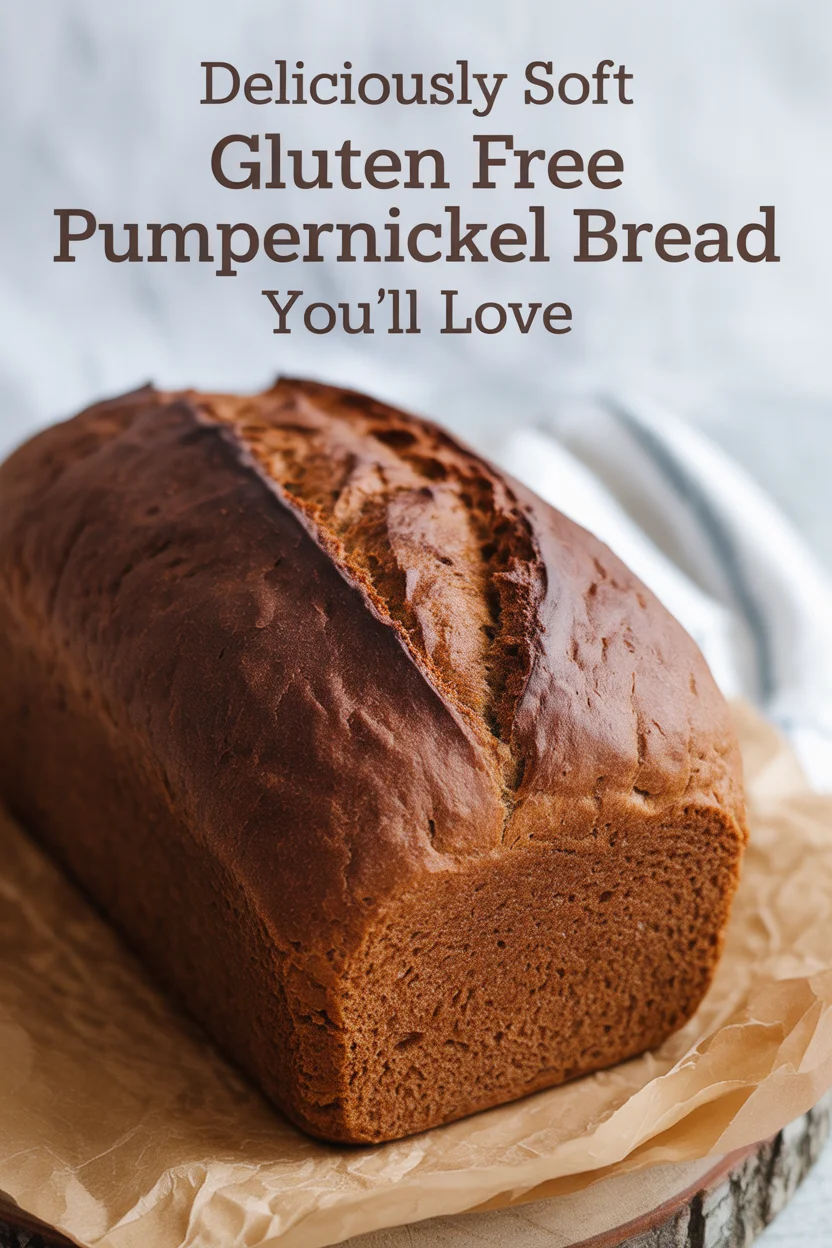
gluten free pumpernickel bread can feel like a myth when you are craving that deep, malty flavor and plush texture. I get it. Traditional loaves rely on rye, which is a no-go if you are gluten-free. After a lot of trial and error, I landed on a version that is soft, sliceable, and honestly tastes like the real deal. The color is dark and cozy, the crumb is tender, and the aroma makes the kitchen smell like a bakery. If you have been hunting for Deliciously Soft Gluten Free Pumpernickel Bread You’ll Love, this one is for you.
What is Pumpernickel Bread?
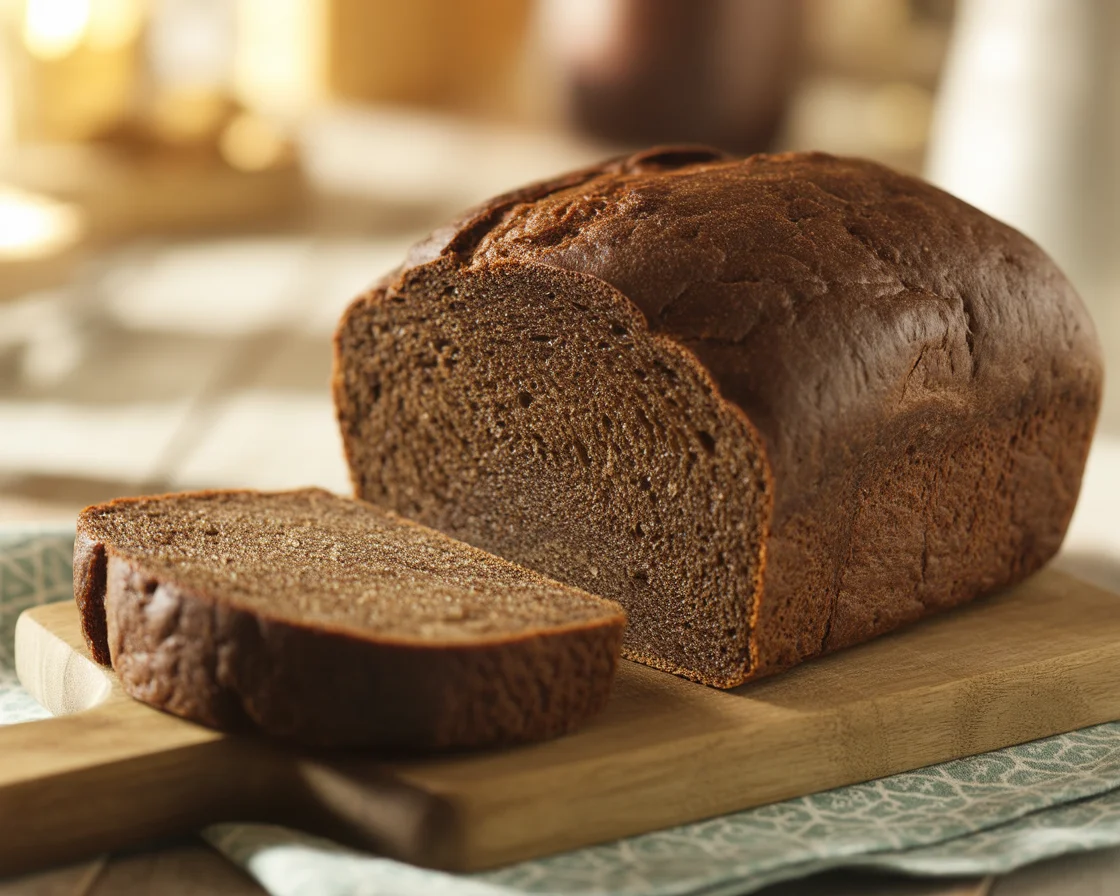
Pumpernickel is a dark, richly flavored bread that traditionally comes from Germany. Bakers usually get that signature color and taste from rye flour, a low and slow bake, and a little molasses. The result is hearty and earthy with a hint of sweetness. It is amazing with butter, soups, and all kinds of sandwiches.
Because rye is the star in classic versions, many of us think we must skip it forever. But here is the fun part. You can recreate the flavor with gluten-free grains and a few smart flavor helpers. Think strong coffee, dark cocoa, and blackstrap molasses. When these come together with the right flours and a good method, you get a loaf that hits the same notes.
If you want to see how rye vibes translate in gluten-free baking, this guide to a rye-style loaf is super helpful: gluten-free artisan rye bread. It gives great context for flavor building without actual rye.
Make this once and you will understand why I call it Deliciously Soft Gluten Free Pumpernickel Bread You’ll Love.
Is Pumpernickel Gluten-Free?
Classic pumpernickel is not gluten-free. Rye contains gluten, so any bread made with rye flour is off the table for folks with celiac or gluten sensitivity. That said, you can capture the beloved taste and color using gluten-free flours and pantry staples that boost depth and richness.
In gluten-free baking, your flour blend matters a lot. The right mix gives you structure while keeping the crumb soft. If you are comparing options or swapping based on what you already have, check out this very practical resource on flour and milk choices: best flours and milks for gluten-free and dairy-free bread. It is a smart place to start before you bake.
So no, traditional pumpernickel is not gluten-free. But this version brings all the personality you love in a way your body will thank you for.
A Gluten-Free Version of Pumpernickel
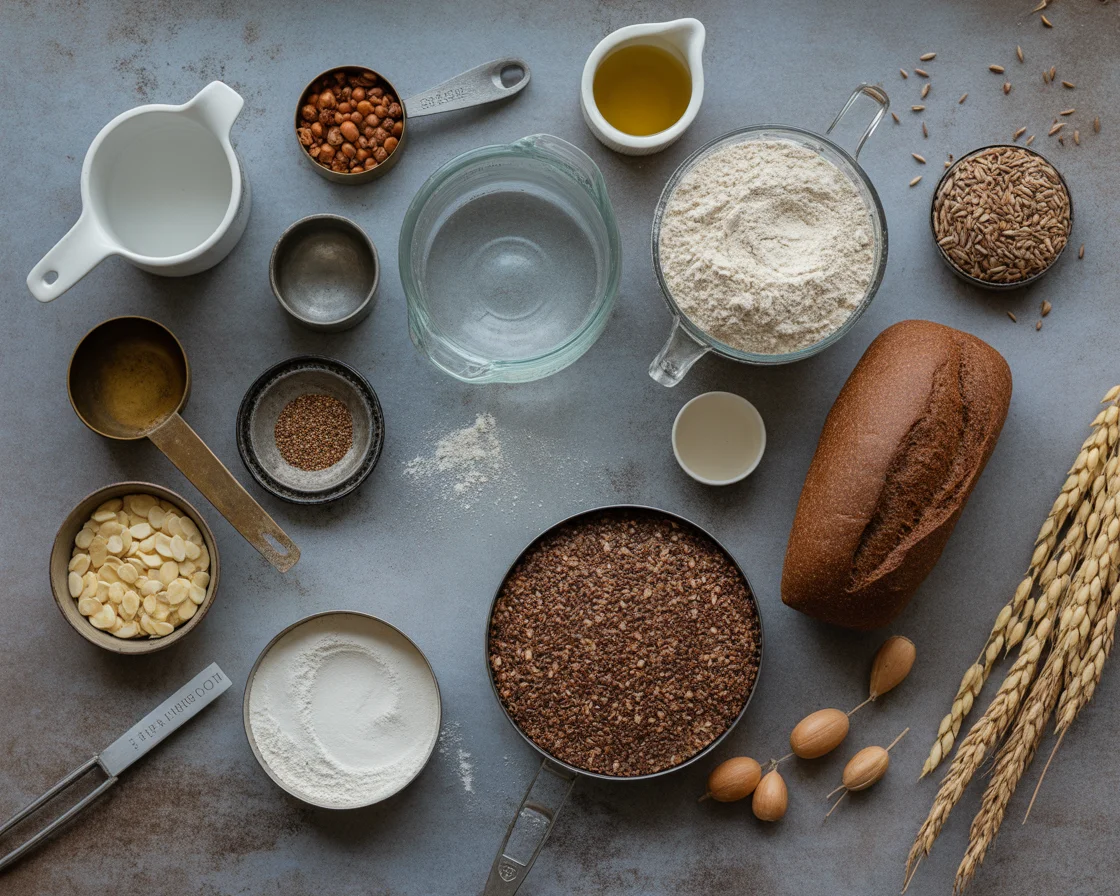
Let’s talk about what makes this loaf taste like pumpernickel without rye. The magic is in the blend. I use a mix of whole-grain gluten-free flours and starches for structure and softness. Then I layer in classic flavors. Strong brewed coffee adds roasty depth. Dark cocoa provides color and a subtle chocolate note that mimics rye’s bitterness. Blackstrap molasses brings gentle sweetness and that signature dark hue. A pinch of caraway seeds ties it all together if you enjoy that deli vibe.
For flours, I love sorghum and buckwheat as the base, backed up by tapioca and potato starch for tenderness. A small amount of almond flour softens the crumb even more, but you can skip it if you are nut-free. The binder here is psyllium husk powder, which gives a structured, bouncy crumb that slices cleanly.
If you enjoy unique loaves that still feel like comfort food, browse the fun lineup in my favorite collection of specialty breads: specialty gluten-free artisan breads. It is full of flavor-forward ideas.
This recipe consistently bakes up as Deliciously Soft Gluten Free Pumpernickel Bread You’ll Love. Once you try it, you will see how simple ingredients can create something that tastes familiar and comforting.
Why This Recipe Works
Gluten-free bread tastes best when it balances moisture with structure. This loaf leans into that balance. Hydration comes from warm water and coffee, while oil and molasses bring tenderness and depth. Psyllium husk powder is the game-changer. It forms a gel that traps steam, helping the bread rise and stay soft. No gummy centers here.
The flavor stack is simple and effective. Coffee and cocoa mimic rye’s earthy tone. Molasses delivers color without making the bread overly sweet. Caraway is optional, but if you like classic deli flavor, do not skip it.
Finally, steam during baking keeps the crust supple so the loaf can expand. You can create steam with a hot water pan, or cover the loaf for part of the bake. Either way, you get that tender bite that pumpernickel should have.
“I served this with soup and my gluten-eating family finished half the loaf before I could blink. The texture is soft, the flavor is spot on, and it slices beautifully for sandwiches.”
If you want a deeper look at technique, I put together a friendly guide that covers mixing, hydration, and shaping with confidence: artisan gluten-free bread guide. It helps you understand the why behind the steps so you get repeatable results.
Stick with the method below and you will get Deliciously Soft Gluten Free Pumpernickel Bread You’ll Love every time.
How to Make Gluten-Free Pumpernickel Bread (Step by Step)
Ingredients
- 1 cup warm water, about 110 F
- 3/4 cup strong brewed coffee, cooled to warm
- 2 and 1/2 teaspoons instant yeast
- 1 tablespoon sugar or maple syrup
- 2 tablespoons blackstrap molasses
- 2 tablespoons dark cocoa powder
- 140 grams sorghum flour
- 120 grams buckwheat flour
- 100 grams tapioca starch
- 60 grams potato starch
- 40 grams almond flour, optional
- 18 to 20 grams psyllium husk powder
- 2 large eggs, room temperature
- 3 tablespoons neutral oil
- 1 teaspoon apple cider vinegar
- 1 and 1/4 teaspoons fine sea salt
- 1 teaspoon caraway seeds, optional
Equipment
- 9×5 inch loaf pan
- Stand mixer with paddle or sturdy hand mixer
- Parchment paper
- Instant-read thermometer, optional
- Small baking pan for steam
Step by Step
- Prep the pan: Line a 9×5 inch loaf pan with parchment, leaving flaps to lift the bread out later. Lightly oil any exposed sides.
- Wake up the yeast: In a mixing bowl, combine warm water, warm coffee, sugar, and yeast. Stir and let it sit 5 to 7 minutes until lightly foamy.
- Make the flavor base: Whisk in molasses, oil, vinegar, and eggs. Sprinkle in the cocoa and whisk again until smooth. You should see a deep brown color.
- Mix the dry ingredients: In another bowl, whisk sorghum, buckwheat, tapioca, potato starch, almond flour, psyllium powder, salt, and caraway if using. Break up any lumps.
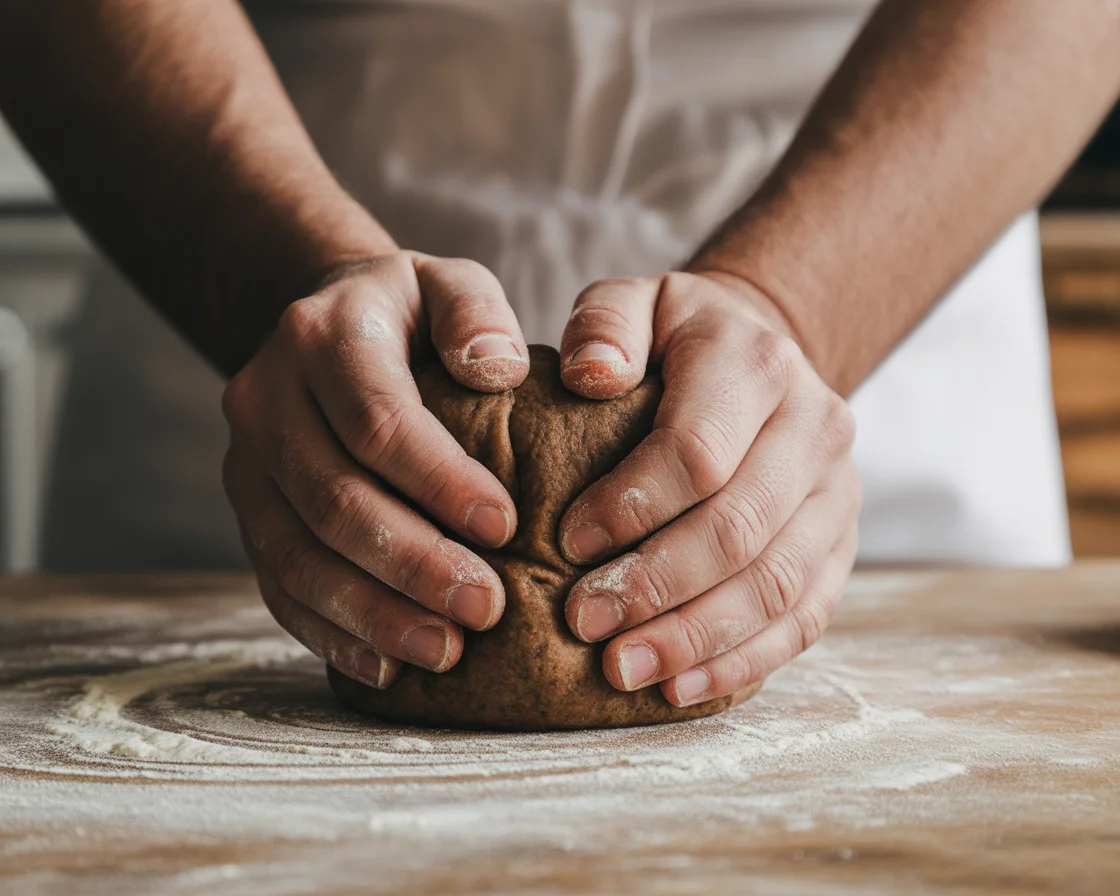
- Combine and beat: Add the dry mix to the wet mix. Beat on medium for 2 full minutes. The dough will look like a thick batter. It should hold gentle peaks without being stiff. If it is very thick, add 1 to 2 teaspoons warm water.
- Pan and smooth: Scrape into the prepared pan. Smooth the top with a wet spatula. Sprinkle a few extra caraway seeds if you like.
- Proof: Cover loosely and let rise in a warm spot until the dough peaks about 3/4 inch above the pan rim. This usually takes 35 to 50 minutes, depending on your room temperature.
- Set the oven for steam: Place a small pan on the lower rack and preheat to 375 F. When you are ready to bake, pour 1 cup hot water into the pan to create steam.
- Bake: Put the loaf on the center rack and bake 45 to 55 minutes. Tent with foil if the top is browning too quickly. The loaf is done when it feels set, sounds hollow when tapped, and an instant-read thermometer reads about 205 to 208 F in the center.
- Cool completely: Lift out using the parchment and cool on a rack for at least 1 hour before slicing. This sets the crumb so it is soft but not gummy.
- Serve and store: Slice and enjoy. Store covered at room temperature for 24 hours, then refrigerate up to 4 days or freeze slices for quick toast later.
Ovens can be quirky. For help dialing in temperature and positioning, this guide is a lifesaver: baking gluten-free bread in different ovens. It covers common issues and easy fixes.
Pro tips for extra success:
Use gram measurements for accuracy, especially with psyllium and starches. Rest the dough a few minutes after mixing to hydrate the psyllium. Steam the oven for rise and a tender crust. And if you prefer a machine, this dough also works well in many bread makers on a gluten-free cycle.
Serve It Like You Mean It
I love this loaf with salty butter and flaky salt on warm slices. It is also amazing with smoked turkey, creamy mustard, and crunchy lettuce. The notes of coffee, cocoa, and molasses play well with sharp cheddar, pickled onions, and even tuna salad. Toast it lightly for breakfast with cream cheese and jam. If you want more ideas for anytime bread that toasts beautifully, peek at this roundup of favorites: best gluten-free sandwich bread.
If you are into flavor twists, you might enjoy a cheesy riff on artisan loaves too. This one is a keeper for snack boards and soup nights: cheesy gluten-free artisan bread.
Ready to Bake a Loaf You’ll Crave Again
You now have everything you need to bake Deliciously Soft Gluten Free Pumpernickel Bread You’ll Love. The method is simple, the ingredients are easy to find, and the flavor is pure comfort. If you want to compare styles or troubleshoot, I also found these helpful and approachable: Gluten Free Pumpernickel Recipe: super soft & flavorful | gfJules and Gluten-Free Pumpernickel Bread (Dairy-Free) – Dish by Dish. Give it a try, then come back and tell me how your kitchen smelled and how your first sandwich turned out. I have a feeling this will be the Deliciously Soft Gluten Free Pumpernickel Bread You’ll Love that lives on repeat at your house.
Print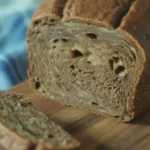
Soft Gluten Free Pumpernickel Bread
A delightful gluten-free version of traditional pumpernickel bread, rich in flavor and soft in texture, perfect for sandwiches and toasting.
- Total Time: 70 minutes
- Yield: 1 loaf 1x
Ingredients
- 1 cup warm water (about 110°F)
- 3/4 cup strong brewed coffee (cooled to warm)
- 2 and 1/2 teaspoons instant yeast
- 1 tablespoon sugar or maple syrup
- 2 tablespoons blackstrap molasses
- 2 tablespoons dark cocoa powder
- 140 grams sorghum flour
- 120 grams buckwheat flour
- 100 grams tapioca starch
- 60 grams potato starch
- 40 grams almond flour (optional)
- 18 to 20 grams psyllium husk powder
- 2 large eggs (room temperature)
- 3 tablespoons neutral oil
- 1 teaspoon apple cider vinegar
- 1 and 1/4 teaspoons fine sea salt
- 1 teaspoon caraway seeds (optional)
Instructions
- Line a 9×5 inch loaf pan with parchment, leaving flaps to lift the bread out later. Lightly oil any exposed sides.
- In a mixing bowl, combine warm water, warm coffee, sugar, and yeast. Stir and let sit for 5 to 7 minutes until lightly foamy.
- Whisk in molasses, oil, vinegar, and eggs. Sprinkle in cocoa and whisk until smooth.
- In another bowl, whisk sorghum, buckwheat, tapioca, potato starch, almond flour, psyllium powder, salt, and caraway (if using).
- Add the dry mix to the wet mix. Beat on medium for 2 minutes. The dough will look like a thick batter; add water if too thick.
- Scrape into the prepared pan and smooth the top.
- Cover loosely and let rise in a warm spot until the dough peaks about 3/4 inch above the pan rim (35 to 50 minutes).
- Preheat the oven to 375°F, placing a small pan on the lower rack with 1 cup hot water for steam.
- Bake on the center rack for 45 to 55 minutes. Tent with foil if browning too quickly. The loaf is done when it feels set and sounds hollow when tapped.
- Lift out using the parchment and cool on a rack for at least 1 hour before slicing.
Notes
For best results, use gram measurements for accuracy, especially with psyllium and starches. Steam in the oven for a tender crust.
- Prep Time: 15 minutes
- Cook Time: 55 minutes
- Category: Bread
- Method: Baking
- Cuisine: German
- Diet: Gluten Free
Nutrition
- Serving Size: 1 slice
- Calories: 200
- Sugar: 8g
- Sodium: 250mg
- Fat: 5g
- Saturated Fat: 0.5g
- Unsaturated Fat: 4g
- Trans Fat: 0g
- Carbohydrates: 35g
- Fiber: 5g
- Protein: 6g
- Cholesterol: 70mg