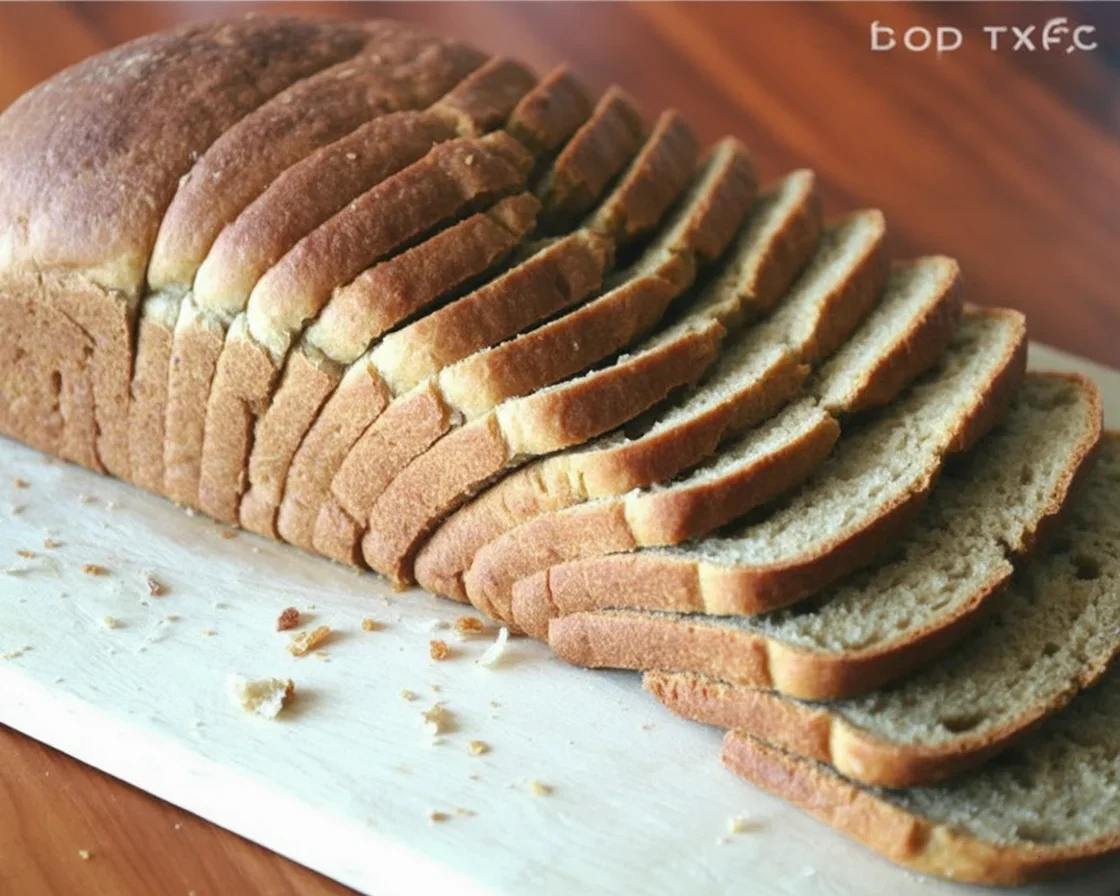
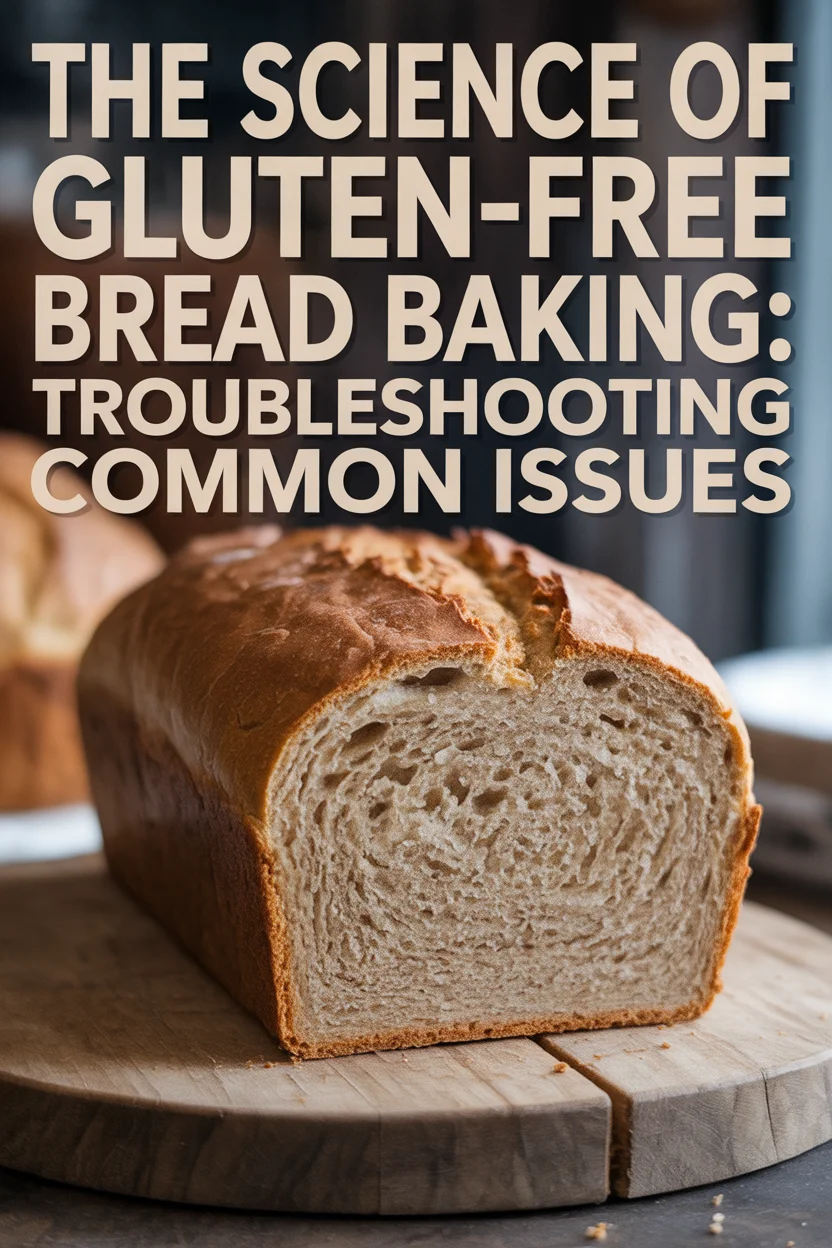
Gluten-free bread troubleshooting got me the first time I tried to bake a loaf for my family. I thought if you just swapped out wheat flour, you’d end up with… pretty much the same thing. Not true. My first bread was weirdly heavy, almost wet inside, and nothing like that fluffy bakery bread. If you’ve ended up with flat, gummy, or just-plain-strange gluten-free bread, trust me — you’re not alone. Let’s break it down right here so you can actually get a loaf you’ll want to brag about.
Why Science Matters in Gluten-Free Baking
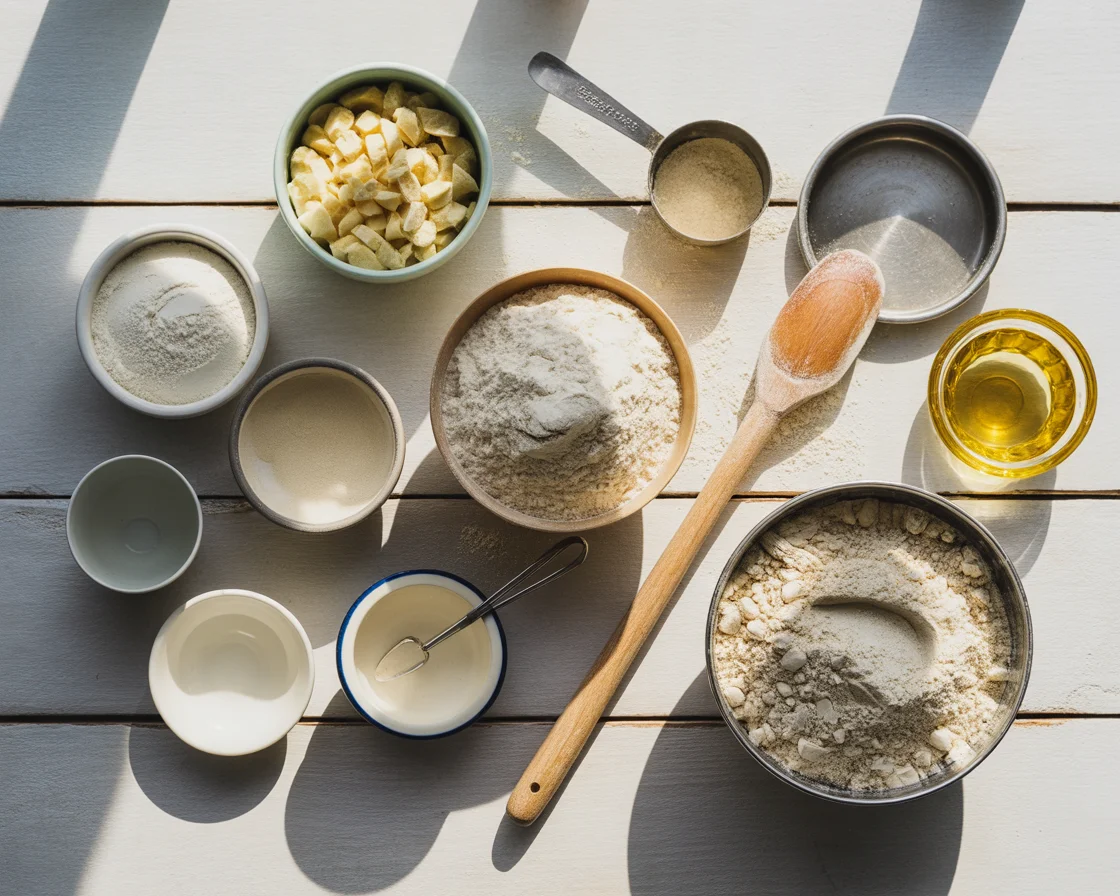
Okay, so here’s one of those things no one tells you: gluten-free bread is its very own science project. Wheat bread is all about gluten (duh), which gives bread that stretchy, chewy thing we all crave. With gluten-free, you’re basically MacGyvering the same texture with totally different tools. You need the right combo of flours — like rice, sorghum, maybe even a sneaky bit of almond meal — plus something to stick it all together. Xanthan gum or psyllium husk are the usual culprits.
Now, don’t tune out if this feels technical — the bottom line is you’re rebuilding the very foundation of bread here. If you’re off, even by a little, your bread can be dense, crumbly, or what I call “sad sandwich bread.” But once you get this science part down? Your gluten-free bread can honestly rival any five-star restaurant bread basket, pinky promise.
“I never thought I’d enjoy baking after switching to gluten-free. Learning a little science really changed everything. My kitchen smells amazing now and my bread actually rises!” — Ellie R., Vermont home baker
Understanding Gluten-Free Bread Structure
Let’s chat structure — stay with me, it’s not boring, I promise. Regular bread stands up tall and light because gluten acts like a net, catching all the air from yeast bubbles. Gluten-free flours? No built-in net. You’ve gotta “fake” it with substitutes that trap air, like eggs, gums, or even starches like tapioca (which, by the way, sounds silly but totally works).
Think of it this way: gluten-free bread acts almost like a soufflé. The right mix of starches, binders, and a bit of fat will keep it rising and give that crumb you actually want. But mess up the balance — too little binder, your loaf falls apart; too much starch, you get a gummy business that won’t toast even after ten rounds in the toaster. It’s like juggling, but hey, you’ll get it with a little practice.
The Critical Role of Binding Agents
Speaking of binders, one of the most common questions I get is about xanthan gum specifically. Many bakers wonder if they’re using too much, too little, or if they even need it at all. Understanding the proper use of xanthan gum in gluten-free bread can solve a lot of texture issues before they even start. Getting the ratio right is crucial because too much creates that dreaded gummy texture, while too little leaves you with crumbly, falling-apart loaves. This binding agent knowledge is honestly the difference between frustrating failures and bakery-worthy successes.
Common Gluten-Free Bread Problems & Their Causes
If your gluten-free bread troubleshooting is making you want to toss your mixing bowl, here’s what might be behind those usual suspects:
- Sunken Loaf: Over-proofed dough or too much liquid can make your bread fall like a bad soufflé.
- Gummy Center: Not enough baking time, sometimes a heavy hand with psyllium or xanthan gum is to blame.
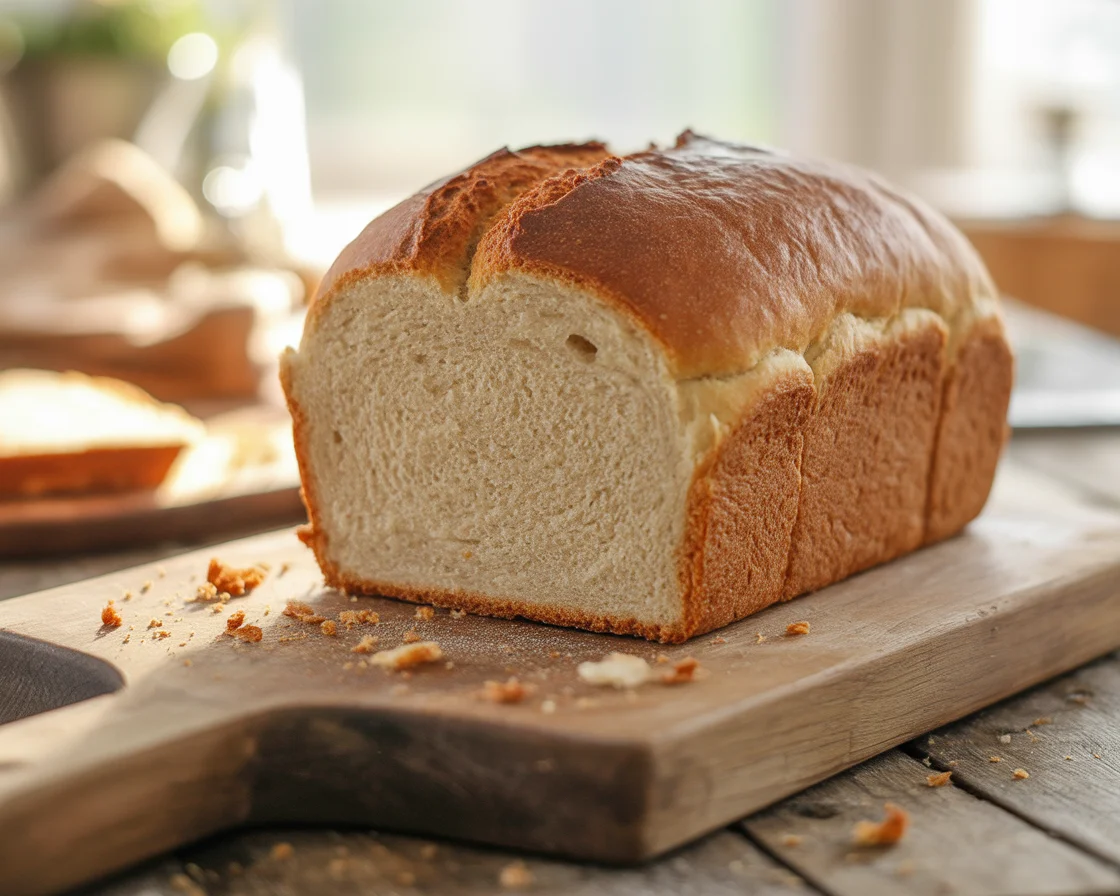
- Dry/Crumbling Bread: Not enough moisture, or sometimes not letting it cool fully before slicing (really, let it rest!).
- Dense + Heavy: Wrong flour mix or not enough yeast/eggs to lighten things up.
Ugh, I know—some of these happened to me, first few tries. That’s normal! Even the big bakeries occasionally botch it. Gluten-free bread troubleshooting is honestly a rite of passage for gluten-free bakers.
For an in-depth shaping fix, see Shaping Techniques for Gluten-Free Artisan Bread — it’s a game changer.

Troubleshooting Guide: Quick Diagnosis & Solutions
When gluten-free bread goes wrong, you need answers fast—not a science lecture. Here’s your quick-fix troubleshooting guide to get back on track without wasting more ingredients.
Quick Visual Diagnosis Table
| Problem | What You See | Most Likely Cause | Quick Fix |
|---|---|---|---|
| Sunken Loaf | Collapsed center, crater-like top | Over-proofed dough or too much liquid | Check yeast expiration; reduce rising time by 15 minutes |
| Gummy Center | Raw, sticky interior despite golden crust | Under-baked or too much moisture | Bake 10-15 minutes longer; internal temp should reach 205°F |
| Dry/Crumbling | Falls apart when sliced, chalky texture | Not enough moisture or over-baked | Add 2-4 tbsp more liquid next time; cool completely before slicing |
| Dense & Heavy | Brick-like texture, doesn’t rise properly | Wrong flour ratios or dead yeast | Test yeast first; increase eggs or add 1 tsp baking powder |
Step-by-Step Troubleshooting Flowchart
Bread Won’t Rise?
Start here → Test your yeast first
- Mix ¼ tsp yeast + 1 tsp sugar in ¼ cup warm water
- Wait 5-10 minutes: Should foam vigorously
- No foam? Your yeast is dead—get fresh yeast
- Good foam? Check water temperature (should feel warm on wrist, not hot)
Gummy or Wet Inside?
Visual check → Golden outside, gooey center
- First fix: Increase baking time by 10-15 minutes
- Pro tip: Use instant-read thermometer—internal temp must hit 205°F
- Still gummy? Your oven runs cool; try 25°F higher temperature
- Prevention: Don’t open oven door during first 45 minutes of baking
Crumbly & Falls Apart?
Texture check → Dry, chalky, won’t hold together
- Immediate fix: Brush with melted butter while still warm
- Next batch: Add 1 extra egg or 2 tbsp oil
- Binding boost: Increase xanthan gum by ¼ teaspoon
- Moisture check: Ensure ingredients are room temperature before mixing
Goes Stale Quickly?
Timeline check → Great day 1, cardboard by day 2
- Storage fix: Cool completely, then store in airtight container
- Long-term: Slice and freeze individual portions
- Revival trick: Wrap in damp paper towel, microwave 15-20 seconds
- Prevention: Add 1 tbsp honey or oil for longer-lasting moisture
Hydration Problems (Dense, Dry, or Crumbly Results)
These issues require understanding proper moisture ratios—the most common gluten-free baking challenge. For complete hydration troubleshooting including environmental factors, flour absorption rates, and advanced moisture retention techniques, see our comprehensive gluten-free dough hydration guide.
Quick Hydration Fixes:
- Too dry: Add liquid 1 tablespoon at a time until dough resembles thick brownie batter
- Too wet: Add flour 1 tablespoon at a time, but avoid over-mixing
- Inconsistent results: Weigh ingredients instead of using volume measurements
- Environmental issues: Adjust for humidity and altitude—dry climates need more liquid
Emergency Bread Rescue
Already baked and disappointed? Don’t throw it away:
For Dry Bread:
- Make breadcrumbs for coating or stuffing
- Cut into cubes for gluten-free croutons
- Slice and make French toast (extra egg wash helps)
For Dense Bread:
- Perfect for grilled sandwiches (weight helps with grilling)
- Cube and make bread pudding
- Toast slices—toasting improves texture dramatically
Remember: Every “failed” loaf teaches you something. Keep notes about what went wrong and what you tried—you’ll become a troubleshooting expert in no time.
Pro tip: Most gluten-free bread problems come down to three things: yeast health, proper hydration, and adequate baking time. Master these, and you’ll solve 90% of issues before they happen.
Advanced Fixes Based on Science
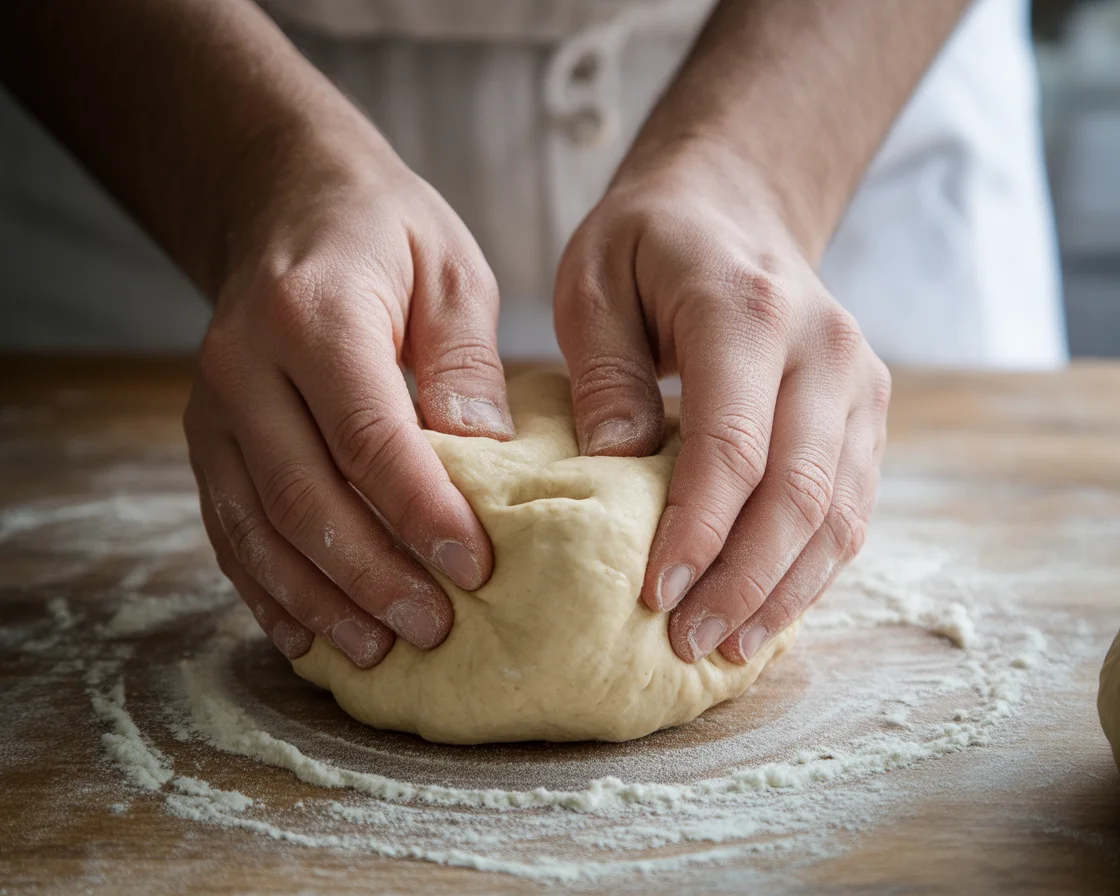
Okay, ready for the “secret sauce” stuff? If you’re obsessed like me and want your gluten-free bread to earn high-fives, try these. Double fermenting your dough, like letting it rise once before you stick it into the pan, can help trap more air for a lighter crumb. Mixing your dough longer (seriously, like 3-5 minutes with a mixer) really helps hydrate those odd flours and bind everything together.
Psyllium husk, when mixed well with warm water, forms a gel that mimics gluten’s stretch (kind of wild, right?). If you’re into experimenting, swapping 10 percent of your liquid with yogurt or applesauce seriously improves moisture and flavor. Don’t forget — everyone’s oven is a little different, so don’t be afraid to watch your bread like a hawk the first couple of bakes. Trust your nose, and if you’re not sure, that instant-read thermometer is your best friend.
Since oven differences can make or break your gluten-free bread success, understanding how to adapt your techniques for specific oven types is crucial. For detailed guidance on optimizing your results across conventional, convection, steam, and other oven types, check out this comprehensive guide on baking gluten-free bread in different ovens. Each oven type requires specific temperature, timing, and technique adjustments that can dramatically improve your results.
More pro tips in our Artisan Gluten-Free Bread Guide.
Prevention Tips for Perfect Gluten-Free Bread Every Time
So you want your gluten-free bread troubleshooting behind you for good? Here are my golden rules:
- Always measure ingredients carefully, a kitchen scale helps more than you’d think.
- Use room temperature eggs and milk to help yeast get moving.
- Let bread cool totally before slicing, or it’ll go mushy.
- If in doubt, bake a few minutes longer. Underbaked bread is, well, nobody’s favorite.
Once you feel like you’ve nailed the basics, try tweaking one thing at a time. Small changes make a huge difference.
If you’re completely new to gluten-free bread, start with this classic gluten-free sandwich bread recipe — simple, versatile, and a great base for experiments.
Common Questions
A: You might be using too much flour or not enough yeast. Check that you’re measuring right and try adding an extra egg or a little oil for lift.
A: Store it airtight. If it’s more than two days old, pop slices in the freezer and toast as needed. Fresh taste every time.
A: Sometimes, but each flour soaks up liquid differently. Changes could throw off your loaf, so experiment in small batches.
A: Try brushing the top with oil or milk before baking. Also, tent with foil halfway through so it doesn’t over-brown.
Go Bake That Bread — It’s Not Rocket Science (Well, Just a Bit)
You’ve got my playbook on gluten-free bread troubleshooting, and honestly, it’s okay if your first loaf or two looks a bit wild. Remember, baking these recipes takes more patience than your average banana bread, but the results are so worth it.
Follow these science-backed tips, dive in with both feet, and don’t be shy about experimenting. Every “failed” loaf teaches you something valuable about gluten-free baking.
Ready to master gluten-free bread? Start with one problem at a time, keep detailed notes about what works in your kitchen, and remember—even professional bakers had to troubleshoot their way to perfect loaves.
Your family is going to be amazed when you pull that first perfect, fluffy loaf out of the oven. Trust the process, trust the science, and most importantly, trust yourself to figure this out.
What’s your biggest gluten-free bread challenge? Drop a comment below—I love helping fellow bakers troubleshoot their way to bread success!

Gluten-Free Bread Troubleshooting
A comprehensive guide to troubleshooting common issues in gluten-free bread baking, ensuring you achieve a perfect loaf every time.
- Total Time: 75 minutes
- Yield: 1 loaf
Ingredients
- Rice flour
- Sorghum flour
- Almond meal
- Xanthan gum
- Psyllium husk
- Yeast
- Salt
- Warm water
- Eggs
- Oil or butter
Instructions
- Mix flour, xanthan gum, psyllium husk, and salt together in a bowl.
- In another bowl, combine warm water, yeast, and oil or butter.
- Add the wet mixture to the dry ingredients and stir until well combined.
- Incorporate eggs one at a time, mixing until smooth.
- Let the dough rise in a warm place until doubled in size.
- Shape the dough and place it in a greased loaf pan.
- Allow it to rise again before baking.
- Bake in a preheated oven until golden brown and cooked through.
- Let cool before slicing to avoid a gummy texture.
Notes
Always measure ingredients carefully and allow the bread to cool completely before slicing.
- Prep Time: 30 minutes
- Cook Time: 45 minutes
- Category: Baked Goods
- Method: Baking
- Cuisine: Gluten-Free
- Diet: Gluten-Free
Nutrition
- Serving Size: 1 slice
- Calories: 150
- Sugar: 1g
- Sodium: 200mg
- Fat: 6g
- Saturated Fat: 1g
- Unsaturated Fat: 3g
- Trans Fat: 0g
- Carbohydrates: 20g
- Fiber: 3g
- Protein: 4g
- Cholesterol: 30mg