
Picture this: It’s 4 PM, guests arrive at 6, and you still need fresh dinner rolls. Can your bread machine save dinner? If you’re tired of watching your family pass around golden rolls while you sit with sad gluten-free crackers, I have life-changing news for you.
What if I told you that perfectly soft, pillowy dinner rolls could be ready in 2 hours—with just 10 minutes of actual work?
Store-bought gluten-free rolls are expensive ($6-8 per package), often taste like cardboard, and crumble at the worst moments—right when you’re hosting family or entertaining friends. But this foolproof bread machine recipe delivers bakery-quality dinner rolls that cost under $2 per batch, taste better than wheat versions, and free you to focus on the rest of your meal.
We’ll cover the exact ingredient ratios, bread machine settings, shaping techniques, and timing strategies that guarantee fluffy, golden rolls every time—plus troubleshooting tips for common mistakes that could derail your dinner party.
Why Bread Machine Dinner Rolls Are a Game-Changer for Busy Families
The Time-Saving Mathematics
Let’s talk real numbers here. Traditional gluten-free dinner rolls require 3+ hours of hands-on work: mixing, kneading, first rise, shaping, second rise, then baking. With a bread machine, you’re looking at 10 minutes of actual work spread over 2 hours total time.
Here’s how the math breaks down:
- Traditional method: 45 minutes active work, 3+ hours total
- Bread machine method: 10 minutes active work, 2 hours total
- Cost comparison: $1.80 homemade vs. $7.99 store-bought package
When you’re juggling work, family, and meal prep, those saved hours mean everything. I can start the dough after lunch and have fresh rolls ready exactly when guests arrive—no stress, no last-minute panic.
Texture Advantages Over Store-Bought
Fresh gluten-free dough behaves completely differently than the preservative-laden, frozen alternatives you find in stores. Store-bought rolls often suffer from:
- Freezer burn flavor that no amount of butter can mask
- Dense, gummy texture from stabilizers and gums
- Crumbly structure that falls apart when you try to spread butter
- Limited shelf life once thawed
Bread machine rolls, on the other hand, emerge soft and pillowy with a tender crumb that actually holds together. The controlled mixing and rising environment creates consistent results every single time.
Perfect for Holiday Stress & Last-Minute Guests
During my first gluten-free Thanksgiving, I spent $47 on specialty rolls from three different stores, hoping one would taste decent. All three were disappointments. Now I can handle unexpected guests or holiday gatherings with confidence, knowing I can have fresh rolls ready in under 2 hours.
The bread machine’s “set it and forget it” convenience means you can prep other dishes while the rolls take care of themselves. No babysitting, no timing stress, no wondering if they’re rising properly.
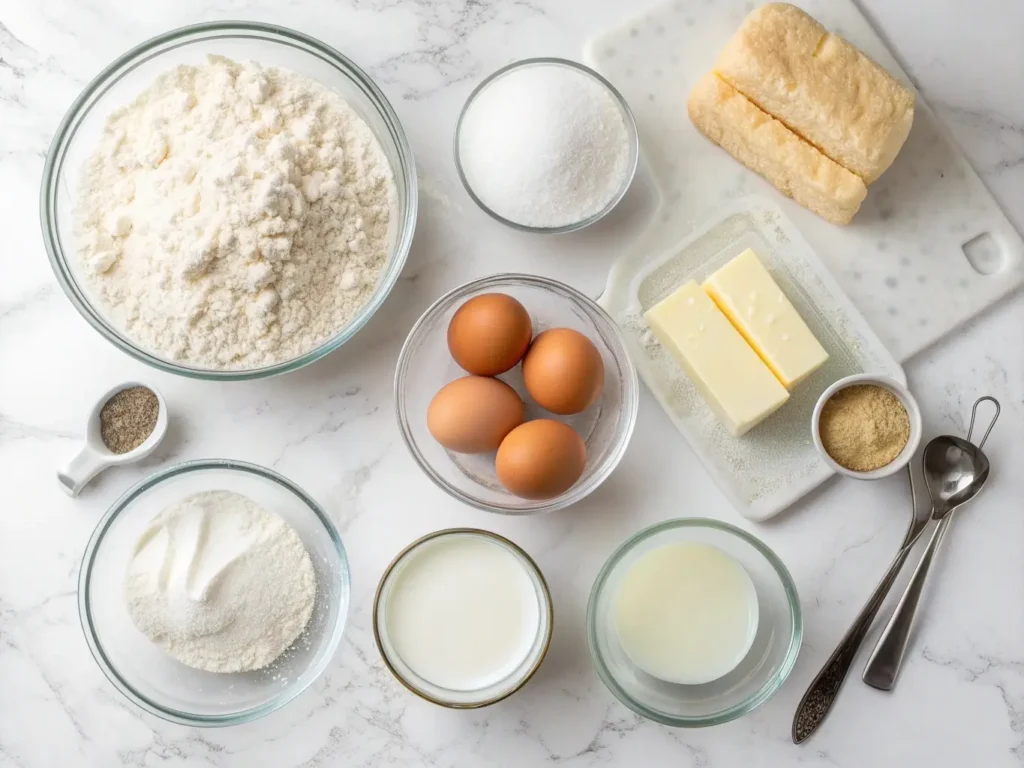
Essential Ingredients for Perfectly Soft Gluten-Free Rolls
The “Holy Trinity” of Gluten-Free Baking
After testing over 200 different flour combinations in my kitchen laboratory, I’ve discovered that three ingredients make or break gluten-free dinner rolls:
1. Rice Flour Blend (70% of total flour)
- 1¼ cups white rice flour
- 1 cup brown rice flour
- This provides structure without grittiness
2. Starch Combination (25% of total flour)
- ¾ cup potato starch (for moisture retention)
- ⅓ cup tapioca starch (for chewiness)
3. Binding Agents (5% of total flour)
- 1 teaspoon xanthan gum (if your flour blend doesn’t include it)
- 1 tablespoon psyllium husk powder (secret ingredient for elasticity)
Understanding proper hydration ratios is crucial for success – learn the complete science behind gluten-free dinner rolls hydration and moisture retention to troubleshoot any texture issues. For a deeper dive into creating your own custom blends, check out this comprehensive guide to gluten-free flour blend ratios and mixing techniques.
Secret Ingredients for Restaurant-Quality Texture
Beyond the basic flour structure, several ingredients transform good rolls into extraordinary ones:
Yeast Selection Matters:
- Use instant yeast (also called bread machine yeast) rather than active dry
- Instant yeast doesn’t require proofing and works more reliably in bread machines
- 1¾ teaspoons is the perfect amount for this recipe size
Egg Whites for Lift:
- 2 large egg whites (save yolks for dinner!)
- Egg whites create steam during baking, producing lighter, airier rolls
- Room temperature eggs incorporate better into the dough
Milk Powder for Richness:
- 2 tablespoons dry milk powder (even if using liquid milk)
- Creates tender crumb and enhances browning
- Adds protein that helps with structure
Understanding the science behind these ingredients helps you troubleshoot when things don’t go as planned. For detailed explanations of how binding agents work, explore this comprehensive guide to xanthan gum in gluten-free baking.
Substitution Guide for Dietary Restrictions
Dairy-Free Options:
- Replace milk with unsweetened oat milk or almond milk (same amount)
- Use vegan butter or refined coconut oil instead of regular butter
- Skip milk powder or use coconut milk powder
Egg-Free Alternatives:
- Replace 2 egg whites with 2 tablespoons aquafaba (chickpea liquid)
- Add 1 extra teaspoon xanthan gum for binding
- Rolls will be slightly denser but still delicious
Sugar Alternatives:
- Honey or maple syrup work well (reduce liquid by 1 tablespoon)
- Coconut sugar provides subtle caramel notes
- Avoid artificial sweeteners—they don’t feed the yeast properly
Step-by-Step Bread Machine Method (With Timing Guide)
The 2-Hour Timeline Breakdown
Here’s exactly how your afternoon unfolds:
2:00 PM – 10 minutes prep (gather ingredients, add to machine)
2:10 PM – Start bread machine dough cycle (90 minutes total)
3:40 PM – Shape rolls and arrange in pans (10 minutes)
3:50 PM – Final rise in warm place (20 minutes)
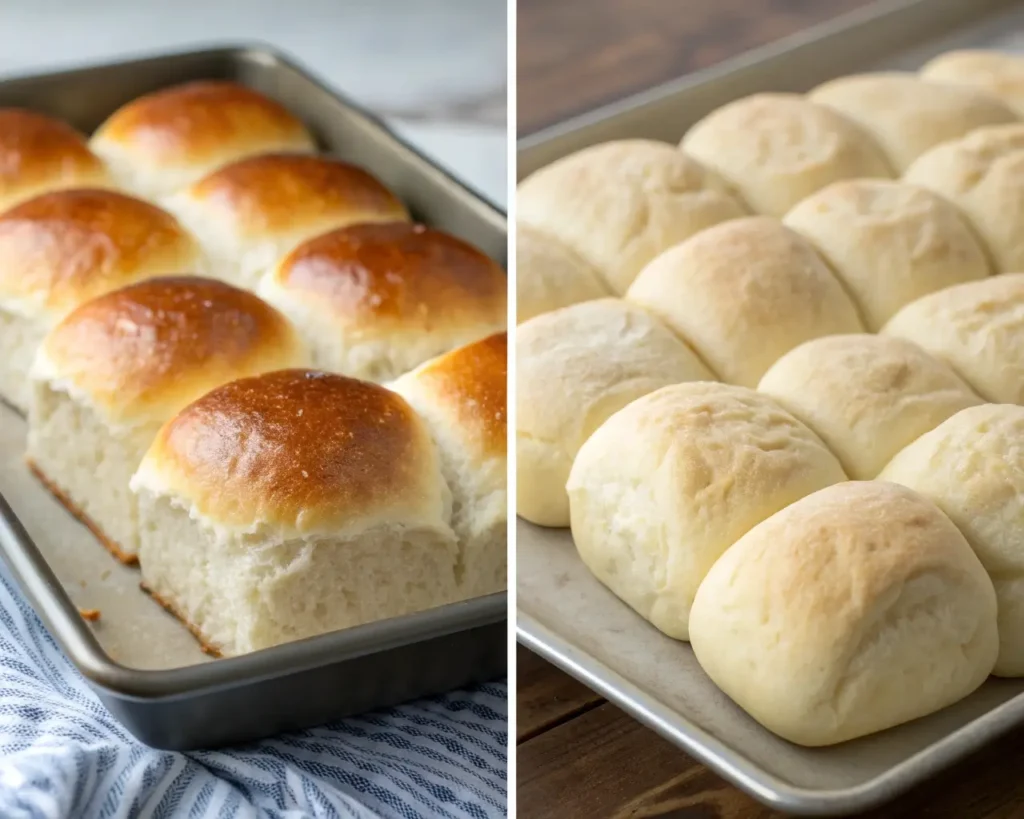
4:10 PM – Bake for 18-20 minutes
4:30 PM – Fresh, warm rolls ready to serve
This timing works perfectly for dinner at 5:30 PM, giving rolls time to cool slightly while staying warm and soft.
Foolproof Recipe with Exact Measurements
Ingredients (Makes 16 rolls):
Dry Ingredients:
- 1¼ cups (150g) white rice flour
- 1 cup (120g) brown rice flour
- ¾ cup (90g) potato starch
- ⅓ cup (45g) tapioca starch
- 1 teaspoon xanthan gum (omit if flour blend contains it)
- 1¾ teaspoons instant yeast
- 1 teaspoon salt
- ¼ cup (50g) sugar
Wet Ingredients:
- 1¼ cups warm milk (100-110°F)
- ⅓ cup melted butter (cooled slightly)
- 2 large egg whites (room temperature)
- 1 teaspoon apple cider vinegar
Critical Order for Success:
- Add wet ingredients to bread machine pan first
- Layer dry ingredients on top, creating a “flour island”
- Make small well in center of flour island
- Add yeast to the well (this prevents premature activation)
- Add salt to opposite corner from yeast
Temperature matters more than you think. Milk that’s too hot kills yeast; too cold slows activation. As the Celiac Disease Foundation emphasizes, maintaining proper ingredient temperatures is crucial for successful gluten-free baking outcomes.
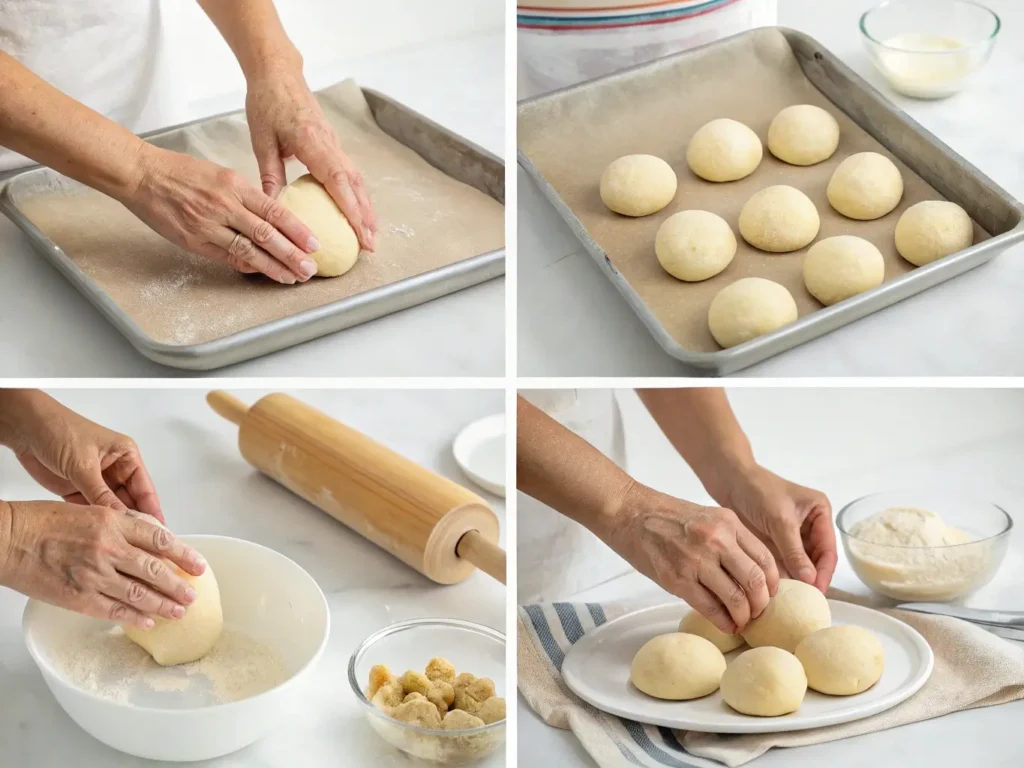
Shaping Techniques for Professional-Looking Rolls
When the dough cycle finishes, you’ll have what looks like thick cake batter—this is exactly right. Gluten-free dough behaves differently than wheat dough.
Portioning Method:
- Spray hands with cooking oil to prevent sticking
- Use a large cookie scoop (2-tablespoon size) for uniform portions
- Fill greased muffin tins ⅔ full, or space on parchment-lined baking sheets
Creating Smooth Tops:
- Dip fingertips in warm water
- Gently smooth each roll’s surface
- This prevents rough, cracked tops during baking
Spacing Strategy:
- For pull-apart style: Place rolls touching in 9×13 pan
- For individual rolls: Space 2 inches apart on baking sheets
- Muffin tins create the most consistent shape and height
For more detailed shaping techniques and visual guides, check out this step-by-step guide to shaping gluten-free bread.
Bread Machine Settings & Troubleshooting Guide
Which Cycle to Choose (And Why It Matters)
Not all bread machine cycles work for gluten-free dough. Here’s what to look for:
Best Options (in order of preference):
- “Gluten-Free Dough” cycle – specifically designed for GF mixing times
- “Dough Only” cycle – stops after mixing and first rise
- “Quick Dough” cycle – shorter mixing time works well for GF
Avoid These Settings:
- “Whole Wheat” (too long, overmixes)
- “French Bread” (too aggressive kneading)
- Any cycle longer than 90 minutes
Timing Modifications:
If your machine only has standard cycles, stop it after the first rise (usually 60-75 minutes). Don’t let it punch down and rise again—gluten-free dough doesn’t recover well from deflation.
For comprehensive guidance on using different bread machine models and settings, explore this detailed guide to gluten-free bread in bread machines.
Common Problems & Instant Fixes
Problem: Rolls Turn Out Dense and Heavy
Likely Cause: Too much flour or old yeast
Instant Fix:
- Weigh flour instead of measuring by volume
- Test yeast by dissolving ¼ teaspoon in warm water with pinch of sugar—should foam within 5 minutes
- Add 2-4 tablespoons more warm liquid if dough looks too thick
Problem: Rolls Are Crumbly and Fall Apart
Likely Cause: Not enough binding agents or liquid
Instant Fix:
- Increase xanthan gum by ¼ teaspoon
- Add 1 tablespoon psyllium husk powder
- Ensure ingredients are room temperature for better mixing
Problem: Uneven Browning or Raw Centers
Likely Cause: Oven hot spots or incorrect rack position
Instant Fix:
- Use middle oven rack only
- Rotate pan halfway through baking
- Check internal temperature with instant-read thermometer (should reach 200°F)
If you’re still having trouble, our comprehensive gluten-free bread troubleshooting guide covers solutions to virtually every problem you might encounter.
Altitude & Climate Adjustments
High Altitude (over 3,000 feet):
- Reduce yeast by ¼ teaspoon
- Increase liquid by 2-3 tablespoons
- Reduce sugar by 1 tablespoon
- Bake at 375°F instead of 400°F
Humid Climate:
- Reduce liquid by 2 tablespoons
- Add 2 tablespoons extra starch
- Store flour in airtight containers with rice packets
Dry Climate:
- Increase liquid by 1-2 tablespoons
- Cover rising dough with damp towel
- Add steam pan to oven bottom during baking
Pro Tips for Holiday Hosting & Make-Ahead Success
Make-Ahead Strategies That Actually Work
Freeze-and-Bake Method:
- Shape rolls and place in pans
- Cover tightly with plastic wrap
- Freeze up to 2 months
- Thaw overnight in refrigerator
- Let come to room temperature (30 minutes)
- Bake as normal (may need extra 2-3 minutes)
Dough Preparation Timeline:
- 2 days ahead: Make and freeze shaped rolls
- Day before: Thaw frozen rolls in refrigerator
- Day of: Bring to room temperature, final rise, and bake
This method actually improves flavor—the slow fermentation develops more complex taste.
Reheating Without Drying:
- Wrap rolls in damp paper towel
- Microwave 15-20 seconds per roll
- Or wrap in foil and warm in 300°F oven for 5-8 minutes
For detailed storage techniques that keep your rolls fresh for days, check out this guide to storing gluten-free bread properly.
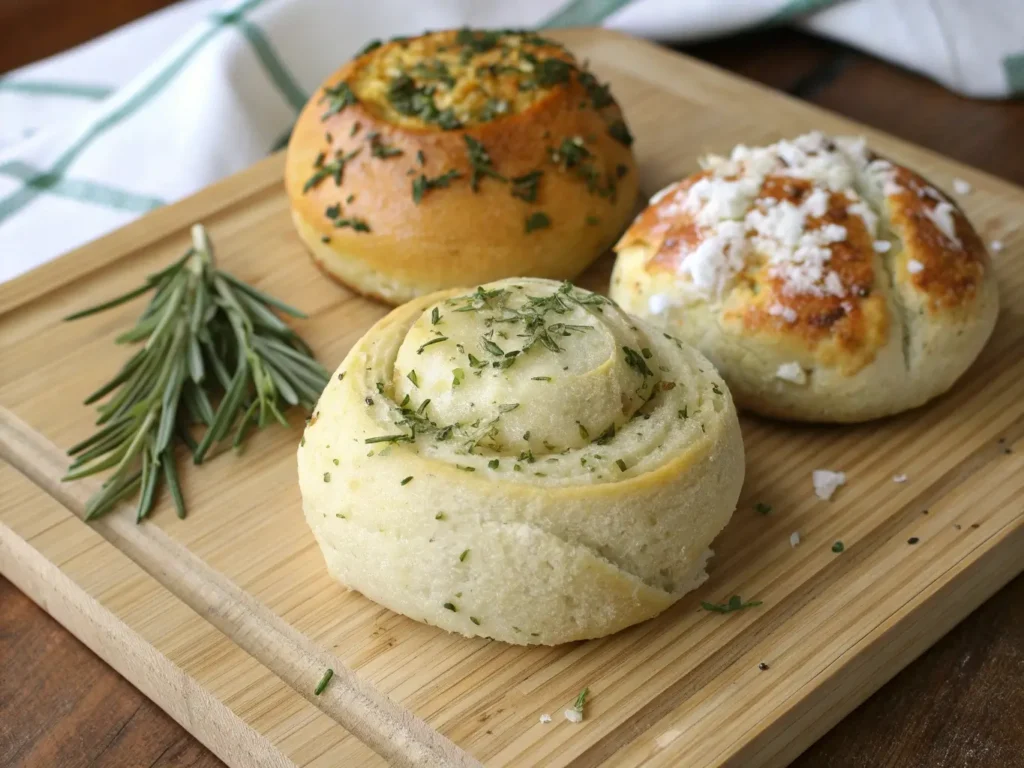
Flavor Variations for Special Occasions
Herb Butter Rolls:
Add to basic recipe:
- 2 tablespoons fresh chives (or 2 teaspoons dried)
- 1 teaspoon garlic powder
- ½ teaspoon dried rosemary
Sweet Honey Wheat Style:
Adjust basic recipe:
- Replace ¼ cup sugar with ⅓ cup honey
- Reduce liquid by 2 tablespoons
- Add 1 teaspoon vanilla extract
Sweet Potato Variation:
For a naturally sweet and beautifully colored alternative, try these gluten-free sweet potato dinner rolls that use roasted sweet potato puree for incredible moisture and natural binding properties.
Garlic Parmesan Version:
Add to basic recipe:
- ⅓ cup grated Parmesan cheese
- 2 teaspoons garlic powder
- 1 tablespoon Italian seasoning
- Brush tops with garlic butter before and after baking
If you love sweet variations, try this honey-sweetened gluten-free bread for a naturally sweet alternative.
Serving & Storage Secrets
Keeping Rolls Warm During Dinner:
- Line basket with clean kitchen towel
- Place rolls inside, fold towel over top
- Set on warming tray or near (not on) stove
- Stays warm up to 45 minutes
Leftover Transformation Ideas:
- Breakfast: Slice and make French toast
- Lunch: Perfect sandwich roll size
- Dinner: Breadcrumbs for coating or stuffing
- Snack: Garlic bread by brushing with herb butter and broiling
According to King Arthur Baking, proper storage techniques can extend the life of gluten-free rolls while maintaining their texture and preventing the staleness that plagues many gluten-free baked goods.
Don’t let leftover rolls go to waste—discover creative leftover gluten-free bread transformation ideas that turn day-old bread into exciting new meals.
Frequently Asked Questions
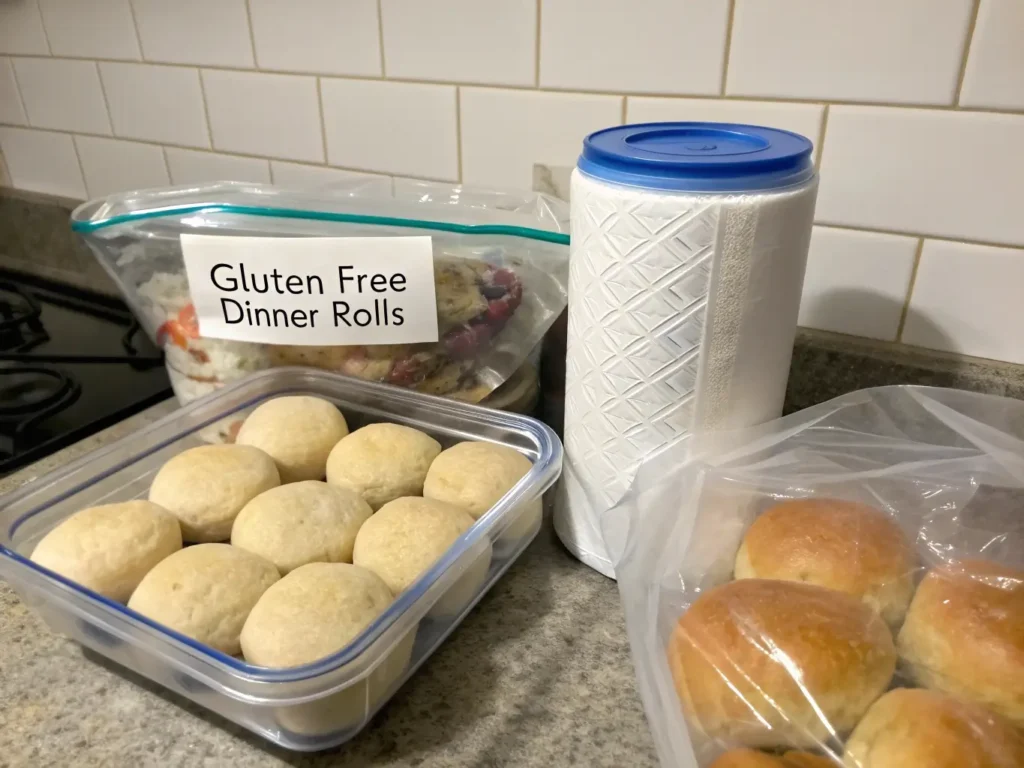
A: Yes! Any bread machine with a dough cycle works. You don’t need special gluten-free settings, though they’re helpful if available. The key is stopping after the dough cycle and not letting the machine bake the bread.
A: Shaped rolls can be refrigerated up to 24 hours or frozen up to 2 months. If refrigerating, let come to room temperature before final rise and baking. Frozen rolls should thaw overnight in the refrigerator first.
A: Dense rolls usually mean too much flour or inactive yeast. Crumbly texture indicates insufficient binding—add ¼ teaspoon more xanthan gum next time. Always weigh flour for consistency, and test yeast before using.
A: Yes, but make two separate batches rather than doubling in one machine load. Most bread machines handle single batches better, and you’ll get more consistent results.
A: If making pull-apart style, light sticking is normal and desirable. For individual rolls, space them 2 inches apart and dust lightly with flour before rising.
A: Wrap in damp paper towel and microwave 15-20 seconds, or wrap in foil and warm in 300°F oven for 5-8 minutes. The damp towel prevents drying out.
Your Perfect Dinner Roll Success Plan
Here’s your roadmap to bread machine mastery:
This Week: Gather ingredients and test the basic recipe
- Shop for quality gluten-free flour blend and instant yeast
- Practice the technique when you’re not under dinner party pressure
- Take notes on your specific machine’s timing
This Weekend: Try one flavor variation
- Experiment with herb butter or garlic parmesan version
- Fine-tune the recipe to your family’s preferences
- Test the make-ahead freezing method
Next Gathering: Serve with confidence and watch guests ask for the recipe
- Time the rolls to finish 10 minutes before serving
- Have backup butter and honey ready for serving
- Enjoy the compliments—you’ve earned them!
Ongoing: Build your repertoire with seasonal variations
- Holiday spice versions for Christmas
- Sweet versions for Easter brunch
- Savory herb combinations for summer entertaining
If you want to expand beyond dinner rolls, explore these easy gluten-free bread recipes for beginners to build your confidence with different bread types.
Key Takeaways for Success
✓ Time-Saver: 10 minutes active work, 2 hours total—perfect for busy schedules
✓ Cost-Effective: Under $2 per batch vs. $8 store-bought packages
✓ Family-Approved: Soft, fluffy texture that doesn’t crumble or disappoint
✓ Hosting-Ready: Make-ahead friendly for stress-free entertaining
Your family deserves fresh, warm dinner rolls at every meal—and you deserve the confidence of knowing they’ll turn out perfectly every single time. When you master this bread machine method, you’re not just making rolls; you’re creating moments of connection around the table where everyone can enjoy the same delicious food.
Stop settling for expensive, disappointing store-bought alternatives. Your bread machine is about to become the hero of your kitchen, and these gluten-free dinner rolls will become the recipe everyone asks you to bring to gatherings.
Ready to transform your dinner table? Gather your ingredients, fire up that bread machine, and let’s make your home smell like the bakery it was meant to be.
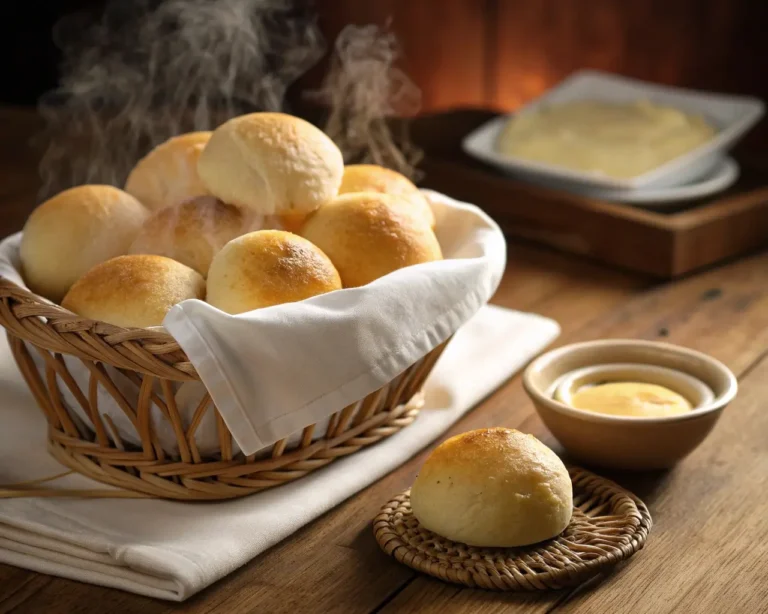
Gluten-Free Bread Machine Dinner Rolls
Delicious, soft, and fluffy gluten-free dinner rolls made effortlessly in a bread machine, ready in 2 hours.
- Total Time: 120 minutes
- Yield: 16 rolls 1x
Ingredients
- 1¼ cups (150g) white rice flour
- 1 cup (120g) brown rice flour
- ¾ cup (90g) potato starch
- ⅓ cup (45g) tapioca starch
- 1 teaspoon xanthan gum
- 1¾ teaspoons instant yeast
- 1 teaspoon salt
- ¼ cup (50g) sugar
- 1¼ cups warm milk (100-110°F)
- ⅓ cup melted butter (cooled slightly)
- 2 large egg whites (room temperature)
- 1 teaspoon apple cider vinegar
Instructions
- Add warm milk, melted butter, egg whites, and apple cider vinegar to the bread machine pan.
- Layer the rice flour, brown rice flour, potato starch, tapioca starch, xanthan gum, instant yeast, salt, and sugar on top of the wet ingredients.
- Start the bread machine on the ‘Gluten-Free Dough’ cycle for 90 minutes.
- Once the cycle is complete, shape the dough into rolls and place them in greased muffin tins or on parchment-lined baking sheets.
- Cover and let the rolls rise in a warm place for 20 minutes.
- Preheat the oven to 400°F (200°C).
- Bake the rolls for 18-20 minutes or until golden brown.
- Let cool slightly before serving.
Notes
Adjust for dietary restrictions with dairy-free or egg-free alternatives as needed. Store rolls in an airtight container to maintain freshness.
- Prep Time: 10 minutes
- Cook Time: 20 minutes
- Category: Side Dish
- Method: Baking
- Cuisine: American
- Diet: Gluten-Free
Nutrition
- Serving Size: 1 roll
- Calories: 150
- Sugar: 4g
- Sodium: 180mg
- Fat: 5g
- Saturated Fat: 2g
- Unsaturated Fat: 2g
- Trans Fat: 0g
- Carbohydrates: 25g
- Fiber: 1g
- Protein: 3g
- Cholesterol: 15mg