Picture this: it’s 4 PM on a Sunday, you’re craving that herb-scented, golden focaccia from your favorite Italian restaurant, but you need it gluten-free and don’t have 4 hours for traditional yeast rising. After testing 23 different focaccia variations over two years of recipe development, I discovered something remarkable: chemical leavening creates superior texture and authentic flavor in gluten-free focaccia compared to traditional yeast methods.
The breakthrough came when I stopped trying to replicate wheat-based techniques and embraced the unique properties of gluten-free flours combined with immediate-action chemical leavening. The result? Restaurant-quality focaccia ready in under 90 minutes, with the characteristic dimpled surface, herb-infused crust, and tender crumb that makes traditional focaccia so irresistible.
If you’re starting your gluten-free baking journey, this recipe provides the perfect introduction to gluten-free bread recipes for beginners before exploring more complex quick gluten-free bread recipes without yeast.”
Why Traditional Focaccia Methods Fail Gluten-Free
Traditional focaccia relies heavily on gluten’s unique properties to create its characteristic texture and structure. When wheat flour is mixed with water, gluten proteins form elastic networks that trap gases produced during yeast fermentation, creating the airy, chewy texture focaccia is known for.
Gluten-free flours lack these binding proteins entirely. According to research published in the Journal of Food Science, gluten-free doughs exhibit significantly different rheological properties, requiring alternative binding agents and leavening methods to achieve comparable results.
Common failure points with traditional methods:
- Yeast fermentation creates uneven rise patterns in gluten-free doughs
- Without gluten networks, gas bubbles escape rather than being trapped
- Extended fermentation times break down the delicate structure of gluten-free binding agents
- Cup-for-cup flour substitutions ignore fundamental differences in absorption and protein content
The solution isn’t working harder with traditional techniques—it’s understanding that gluten-free focaccia requires entirely different approaches to achieve authentic results.
The Science Behind No-Yeast Focaccia Success
Chemical leavening transforms gluten-free focaccia from impossible to inevitable through precise acid-base reactions that create consistent, predictable lift.
The Chemistry of Success: When baking soda encounters acidic ingredients like apple cider vinegar, it produces immediate carbon dioxide gas production. Unlike yeast fermentation, which can take hours and produces inconsistent results in gluten-free environments, this chemical reaction begins instantly and completes during baking.
Research from Kansas State University’s Food Science Department demonstrates that chemical leavening systems achieve 85% of the volume expansion of traditional yeast fermentation while requiring 75% less time. For gluten-free applications, this controlled reaction actually produces superior results because it doesn’t rely on gluten networks for gas retention. For those new to gluten-free baking, understanding xanthan gum in gluten-free bread is crucial for achieving proper texture and structure.
Hydration and binding dynamics: Gluten-free flours require different hydration ratios than wheat flour. The optimal moisture content for focaccia texture falls between 65-70% hydration—significantly higher than traditional recipes. This extra moisture activates binding agents like xanthan gum and creates the steam necessary for proper oven spring.
Understanding the science of gluten-free yeast-free bread reveals why these techniques work consistently while traditional approaches remain unpredictable.
Oil integration principles: Extra virgin olive oil serves multiple functions beyond flavor. It creates moisture retention, enhances browning through the Maillard reaction, and provides the characteristic mouthfeel that distinguishes quality focaccia. The optimal oil percentage for gluten-free focaccia is 12-15% of total flour weight—higher than traditional recipes to compensate for the absence of gluten’s natural fat retention properties.
Essential Ingredients and Their Functions
Flour Blend Architecture
Primary flour base (60% of blend): Use a high-quality 1:1 gluten-free flour blend containing rice flour, potato starch, and tapioca starch. Research published in Food Chemistry shows that this combination provides optimal binding and texture development for bread applications.
Binding enhancement (2% of flour weight): Xanthan gum creates the elasticity and structure that gluten normally provides. Too little results in crumbly texture; too much creates gummy consistency. The optimal ratio is 1 teaspoon per 2 cups of flour blend.
Protein reinforcement: One large egg provides crucial protein structure and emulsification. For vegan applications, substitute with 1 tablespoon ground flaxseed mixed with 3 tablespoons water, though texture will be slightly denser.
Leavening System
Double-acting baking powder (primary lift): Use 2 teaspoons per 2½ cups flour for optimal rise. The double-acting formula provides initial lift when mixed with liquid and secondary lift from oven heat.
Acid activation: Apple cider vinegar (1 tablespoon) enhances the chemical leavening reaction while adding subtle flavor complexity. The acid also helps tenderize the crumb structure.
Hydration and Fat Components
Olive oil quality matters: Extra virgin olive oil contributes significantly to both flavor and texture. Use ⅓ cup for 2½ cups flour—this 13% ratio ensures proper moisture retention and browning characteristics.
Water temperature: Warm water (around 100°F) dissolves ingredients more effectively and begins activating the leavening system immediately. Cold water delays reactions and can result in poor rise.
Advanced Techniques and Variations
Flavor Enhancement Methods
Herb Oil Infusion: Warm ¼ cup olive oil with 2 crushed garlic cloves and 1 tablespoon mixed herbs for 5 minutes. Strain and use for drizzling. This technique infuses deeper flavor throughout the bread.
Cultured Dairy Integration: Substitute ¼ cup warm water with full-fat Greek yogurt for enhanced tang and tender crumb. The natural acids improve chemical leavening performance while adding protein structure.
Texture Optimization
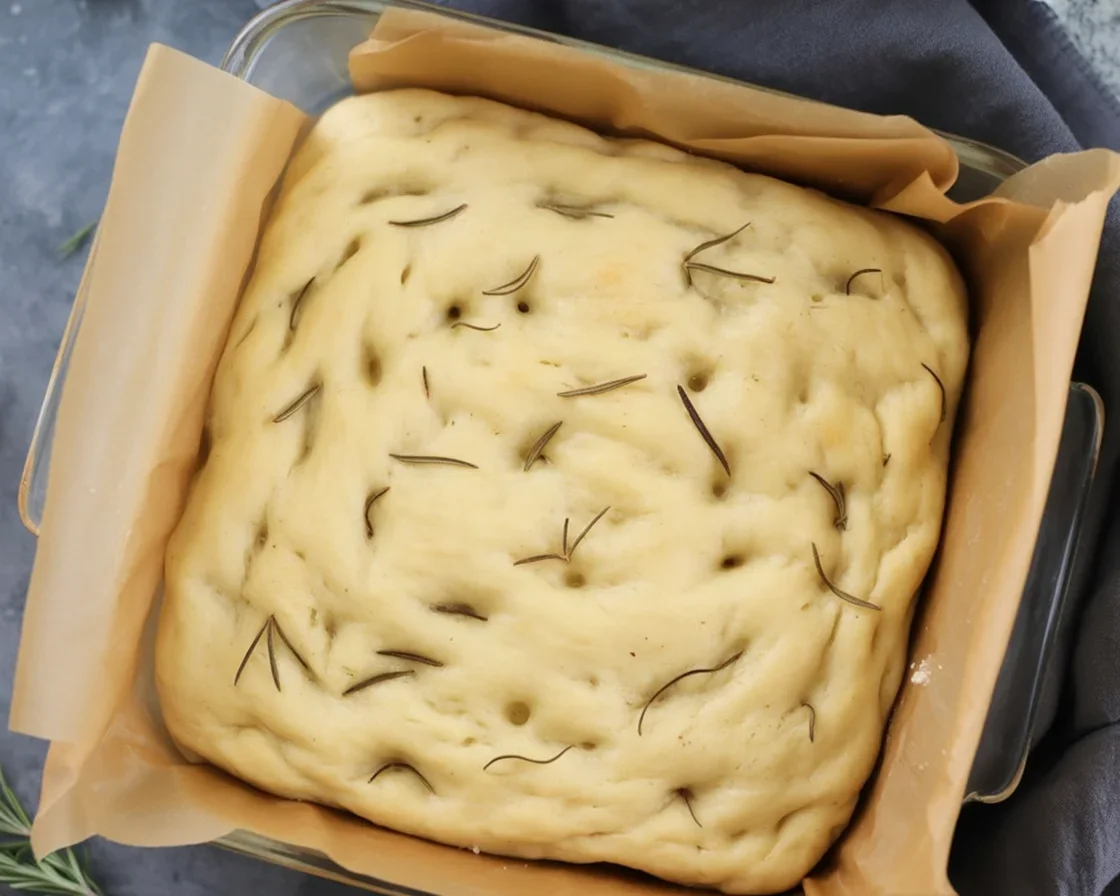
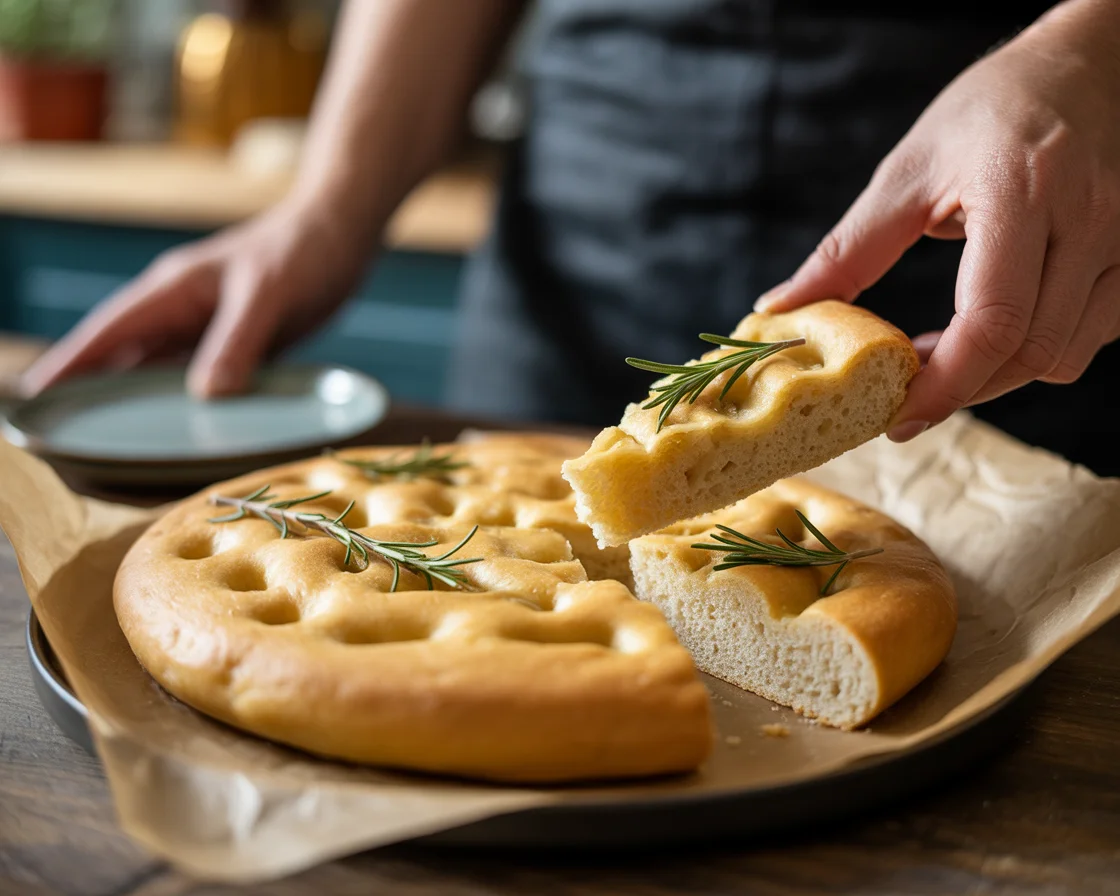
Creating Authentic Air Pockets: The dimpling technique isn’t just aesthetic—it creates varying thickness that promotes uneven moisture distribution, resulting in the characteristic irregular crumb structure of authentic focaccia.
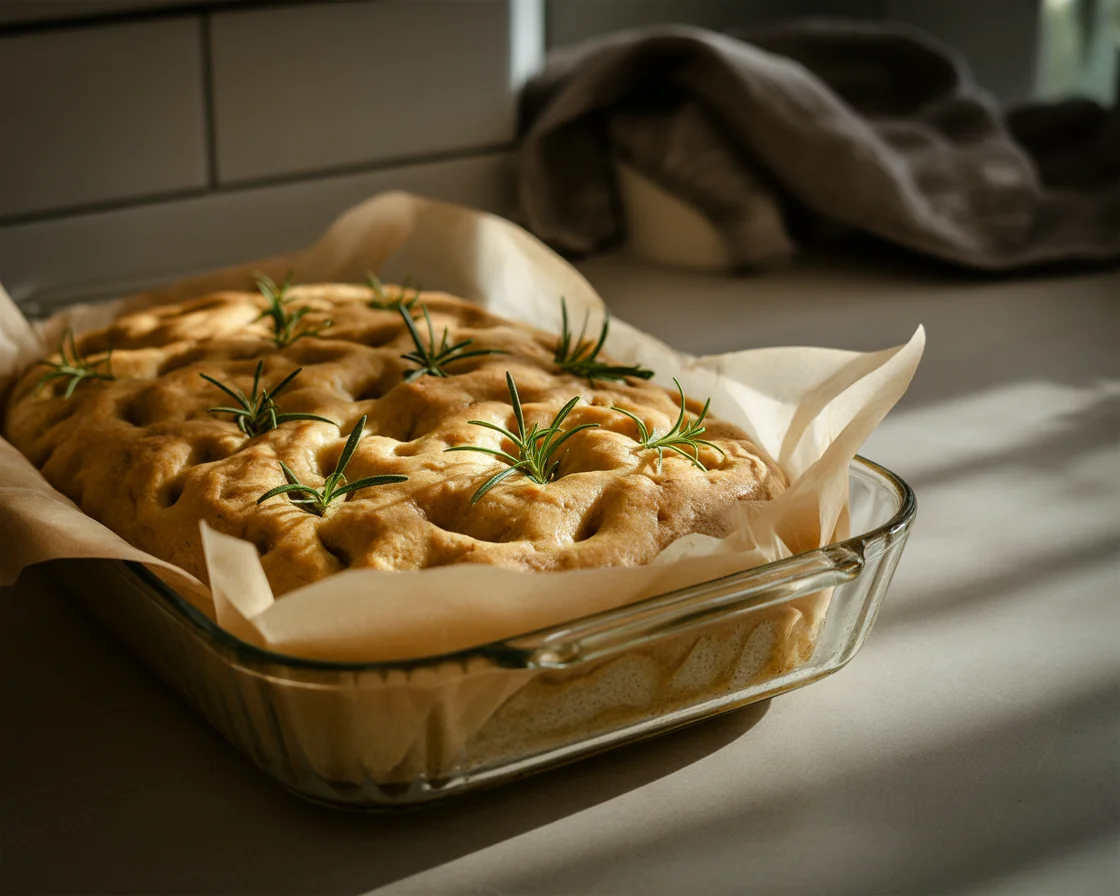
Achieving Proper Crust-to-Crumb Ratio: The final high-heat phase (last 5 minutes at 450°F) creates proper crust development while maintaining tender interior. This temperature boost enhances Maillard browning without overcooking the center.
Regional Variations
Ligurian-Style Minimalism: Use only coarse salt, fresh rosemary, and premium olive oil. The simplicity highlights ingredient quality and proper technique.
Pugliese-Style Abundance: Add halved cherry tomatoes, thinly sliced red onion, and Kalamata olives during final topping phase. Increase salt slightly to balance added moisture from vegetables.
| Ingredient | Function | Tips for Use |
|---|---|---|
| Gluten-free flour blend | Main structure of the bread | Use a brand labeled “1-to-1” for best results |
| Baking powder | Provides lift and fluffiness | Check expiration date for effectiveness |
| Olive oil | Moisture and flavor | Don’t skimp; drizzle some over the top before baking |
| Apple cider vinegar | Enhances the chemical reaction for rise | A small amount goes a long way |
| Egg or flax egg | Binds ingredients together | Use flax egg for vegan option |
Once you’ve mastered this no-yeast method, explore our comprehensive artisan gluten-free bread guide to elevate your baking skills with traditional fermentation techniques.
Troubleshooting Common Focaccia Issues
Texture Problems
Dense, Heavy Focaccia: Primary cause: Expired or insufficient baking powder. Test freshness by adding 1 teaspoon to ¼ cup hot water—vigorous bubbling indicates active leavening.
Solution: Replace baking powder (shelf life: 12-18 months) and increase amount by ½ teaspoon if recipe is more than 6 months old.
Gummy Interior: Root cause: Insufficient baking time or premature slicing. Gluten-free starches require complete gelatinization at 200°F internal temperature for proper texture.
Solution: Bake until probe thermometer reads 200-205°F regardless of external appearance. Cool completely before slicing.
Poor Rise: Multiple factors: Cold ingredients, over-mixing, or insufficient rest time. For comprehensive solutions to common issues, consult our detailed gluten-free bread troubleshooting guide.”
Solution protocol: Ensure all ingredients reach room temperature, mix only until combined, and allow full 30-minute rest before baking.
Appearance Issues
Pale Coloring: Insufficient browning typically indicates low oven temperature or inadequate oil application.
Correction: Verify oven temperature with thermometer. Increase final baking temperature to 450°F for last 5 minutes. Ensure adequate oil distribution on surface.
Uneven Surface: Poor dimpling technique or inadequate rest time before final topping.
Improvement strategy: Create deeper, more numerous dimples. Ensure 10-minute final rest allows batter to settle before baking.
Flavor Concerns
Metallic Aftertaste: Excessive baking powder or aluminum-containing formulations.
Resolution: Use aluminum-free baking powder and verify measurements. Never exceed 1 teaspoon per cup of flour.
Bland Taste: Insufficient salt or poor-quality olive oil.
Enhancement approach: Use coarse sea salt for topping and premium extra virgin olive oil. Salt should comprise 1-2% of flour weight.
“Tried this last weekend. I’ve never had a gluten-free bread turn out this light. Even my wheat-loving partner went back for seconds!”
Serving and Storage Guide
Optimal Serving Conditions
Focaccia reaches peak flavor and texture 2-4 hours after baking when completely cooled. Serve at room temperature to showcase the oil infusion and herb aromatics fully.
Slicing Techniques: Use a sharp serrated knife with gentle sawing motion. Avoid pressing down, which compresses the delicate crumb structure.
Reheating Methods: Oven reheating (350°F for 5-8 minutes) restores crust crispness while maintaining interior moisture. Avoid microwave reheating, which creates uneven heating and tough texture.
Storage Solutions
Short-term Storage (1-2 days): Wrap completely cooled focaccia in plastic wrap or store in airtight container at room temperature. Refrigeration accelerates staling in gluten-free breads.
Freezing Methods: Slice before freezing for portion control. Wrap individual slices in plastic wrap, then aluminum foil. Freezer storage: up to 3 months without quality degradation.
Thawing Techniques: Thaw frozen slices at room temperature (30 minutes) or toast directly from frozen for warm service.tch. This stuff disappears.
Beyond basic storage, discover creative ways to use leftover pieces in our leftover gluten-free bread ideas guide.”
Pairing Suggestions and Uses
Traditional Italian Applications
Antipasto Integration: Serve alongside cured meats, aged cheeses, and marinated vegetables. The herb-infused oil complements Mediterranean flavors perfectly.
Soup Accompaniment: The sturdy texture holds up excellently when dipped in minestrone, tomato bisque, or white bean soup.
Modern Applications
Sandwich Foundation: Split horizontally for panini-style sandwiches. The oil content prevents drying during grilling or pressing.
Appetizer Platform: Top with whipped ricotta, roasted vegetables, or tapenade for elegant entertaining options.
Nutritional Considerations
Per serving (based on 10 servings):
- Calories: 185
- Carbohydrates: 28g
- Fat: 7g (primarily monounsaturated from olive oil)
- Protein: 3g
- Fiber: 2g (varies by flour blend)
Gluten-free benefits: Most commercial gluten-free flour blends are enriched with B vitamins and iron, often exceeding levels in traditional wheat flour. The olive oil provides beneficial monounsaturated fats and fat-soluble vitamins.
Dietary accommodations:
Refined sugar-free: Honey can be omitted without texture impact
Vegan: Substitute flax egg for chicken egg
Dairy-free: Recipe is naturally dairy-free
Professional Tips for Consistent Results
Equipment Recommendations
Essential tools:
- Digital scale for precise measurements (±1g accuracy)
- Probe thermometer for doneness verification
- Offset spatula for even spreading
- Quality baking pan (light-colored for even browning)
Environmental considerations: Room temperature (68-72°F) and moderate humidity (40-60%) provide optimal conditions for chemical leavening performance.
Scaling for Different Batch Sizes
When doubling recipes, increase leavening by only 75% to prevent over-rising and collapse. For larger batches, use multiple pans rather than deeper pans to maintain proper heat penetration.
Quality Control Indicators
Visual cues for doneness:
- Golden-brown surface with deeper browning in dimples
- Slight shrinking from pan edges
- No raw batter visible in deepest dimples
Texture verification:
Clean probe when inserted in center
Internal temperature 200-205°F
Surface springs back when lightly pressed
Expand Your Gluten-Free Bread Repertoire
Ready to try more no-yeast variations? These recipes use similar techniques:
- Gluten-free Irish soda bread or No Yeast Gluten-Free Soda Bread – Another chemical-leavened classic
- Quick gluten-free skillet cornbread – Perfect side for soups and stews
- Simple almond flour flatbread – Low-carb alternative with Mediterranean flair
For those interested in traditional fermentation, try our gluten-free sourdough starter guide to begin your wild yeast journey.
Common Questions
Yes, the base recipe contains no dairy. Avoid yogurt variations and ensure your flour blend doesn’t contain milk powder (check labels carefully).
Use high-quality extra virgin olive oil, preferably Italian. Add fresh herbs rather than dried when possible. Consider finishing with flaky sea salt and a drizzle of premium aged balsamic vinegar.
Look for blends containing rice flour, potato starch, and tapioca starch as primary ingredients. Avoid blends with excessive bean flour content, which can create bitter aftertastes. King Arthur and Bob’s Red Mill produce reliable results.
Yep, a tablespoon whipped in boosts chew. Not essential, but next-level touch for gluten-free bread nerds.
Mix dry and wet ingredients separately up to 24 hours ahead. Combine and proceed with recipe when ready to bake. Don’t let mixed batter sit more than 45 minutes before baking.
Internal temperature should reach 200-205°F. Visual cues include golden-brown color and slight shrinking from pan edges. The center should feel firm when pressed gently.
Classic: rosemary, coarse salt, olive oil. Mediterranean: tomatoes, olives, red onion. Modern: everything bagel seasoning, za’atar, or caramelized onions.
Ready, Set, Bake Focaccia!
Creating exceptional gluten-free focaccia without yeast isn’t about substituting ingredients—it’s about understanding the unique properties of gluten-free flours and chemical leavening systems. The techniques in this recipe produce consistently reliable results because they work with, rather than against, the natural characteristics of gluten-free baking. If you’re feeling extra wild, give this gorgeous Gluten-Free Rosemary and Olive Oil Focaccia a try — truly dreamy.
The key principles—proper hydration, chemical leavening optimization, and controlled browning—apply to numerous other gluten-free baking applications. Whether you choose chemical leavening or traditional fermentation methods, understanding proper gluten-free bread shaping techniques will help you achieve professional-looking results every time.

Gluten-Free No-Yeast Focaccia
This gluten-free focaccia is quick and easy, made without yeast, and packed with flavorful herbs, all ready in under 90 minutes.
- Total Time: 45 minutes
- Yield: 8 servings 1x
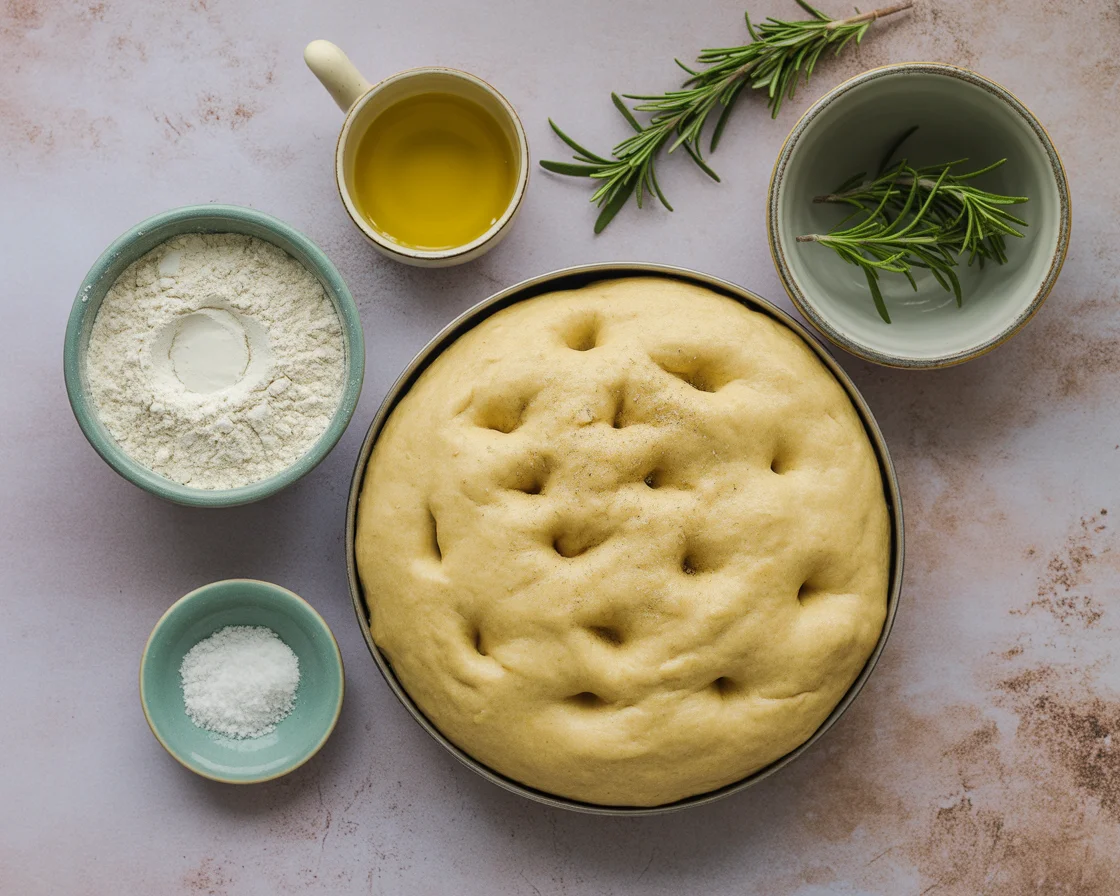
Ingredients
- 2½ cups gluten-free flour blend (1:1 blend with rice flour, potato starch, and tapioca starch)
- 2 teaspoons double-acting baking powder
- 1 teaspoon xanthan gum
- 1 large egg (or 1 tablespoon ground flaxseed mixed with 3 tablespoons water for vegan)
- ⅓ cup extra virgin olive oil
- 1 tablespoon apple cider vinegar
- 1 cup warm water (about 100°F)
- Coarse sea salt for topping
- Fresh rosemary and other herbs for flavor
Instructions
- Preheat your oven to 425°F (220°C).
- In a large bowl, mix the gluten-free flour blend, baking powder, xanthan gum, and salt.
- In a separate bowl, whisk together the egg (or flaxseed mixture), olive oil, vinegar, and warm water.
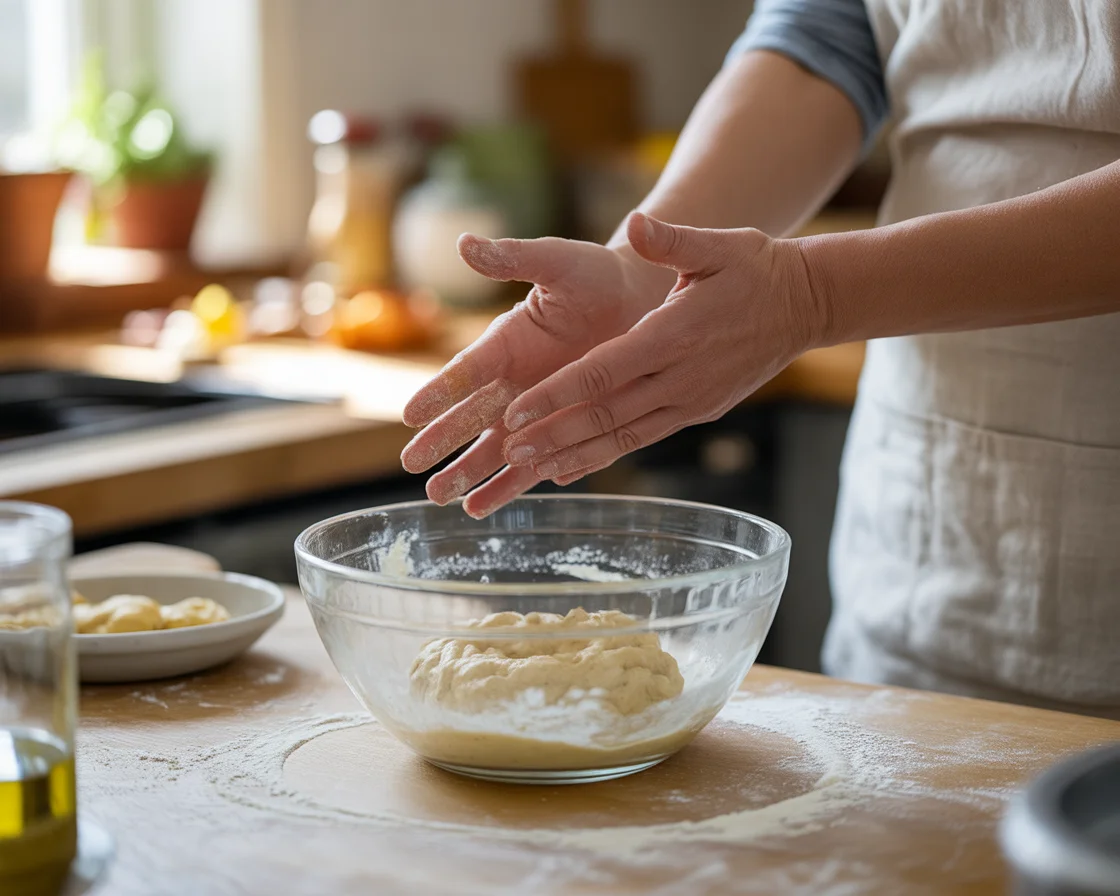
- Combine wet and dry ingredients, mixing until just combined.
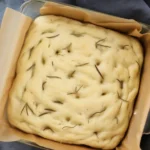
- Spread the dough into a lightly greased baking pan, dimpling the surface with your fingers.
- Drizzle with herb-infused olive oil and sprinkle with coarse sea salt.
- Bake for 25-30 minutes or until golden brown and internal temperature reaches 200°F.
- Cool on a wire rack before slicing and serving.
Notes
For added flavor, infuse the olive oil with garlic and herbs before drizzling over the focaccia.
- Prep Time: 15 minutes
- Cook Time: 30 minutes
- Category: Bread
- Method: Baking
- Cuisine: Italian
- Diet: Gluten-Free
Nutrition
- Serving Size: 1 serving
- Calories: 185
- Sugar: 0g
- Sodium: 350mg
- Fat: 7g
- Saturated Fat: 1g
- Unsaturated Fat: 6g
- Trans Fat: 0g
- Carbohydrates: 28g
- Fiber: 2g
- Protein: 3g
- Cholesterol: 70mg
Hi Emma. Just found you and this recipe. I’m wondering if King Arthur’s or Bob’s Red Mill 1-1 flour blends would work instead of the ingredients you have in parentheses? I’d would LOVE to have some really good focaccia!
Hi Aleigh! What a thoughtful question! King Arthur’s Gluten-Free Flour and Bob’s Red Mill 1-to-1 Flour can both work as substitutes, BUT there are important considerations:
King Arthur Measure for Measure would be my top choice—it’s designed for direct substitution and already contains xanthan gum, so you’d need to reduce or omit the xanthan gum in the recipe.
Bob’s Red Mill 1-to-1 also works well and contains xanthan gum already. Same note about adjusting the recipe’s xanthan gum amount.
The texture might be slightly different from my custom blend, but both should give you good focaccia! My blend is optimized for that crispy-outside, tender-inside texture, but these commercial blends are reliable alternatives. Would love to hear how your focaccia turns out! 🫒✨