Every Thanksgiving for three years after my celiac diagnosis, I watched my family pass around golden, pillowy dinner rolls while I sat there with my sad gluten-free crackers. The store-bought gluten-free rolls? Dense as hockey pucks and about as flavorful. I was convinced I’d never have a proper dinner roll again.
Then last fall, I had a breakthrough. While roasting sweet potatoes for another dish, I wondered: what if I used some of this creamy, naturally sweet puree in dinner rolls? Three dozen test batches later, I finally cracked the code.
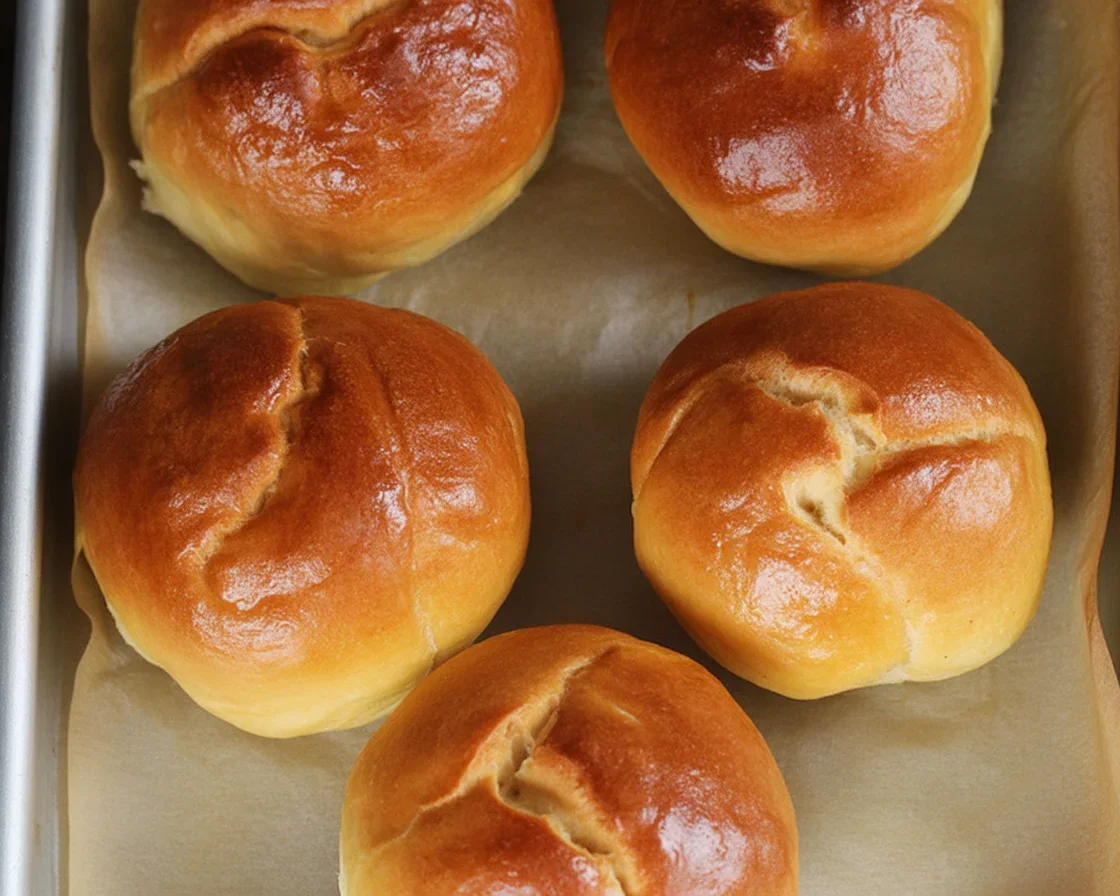
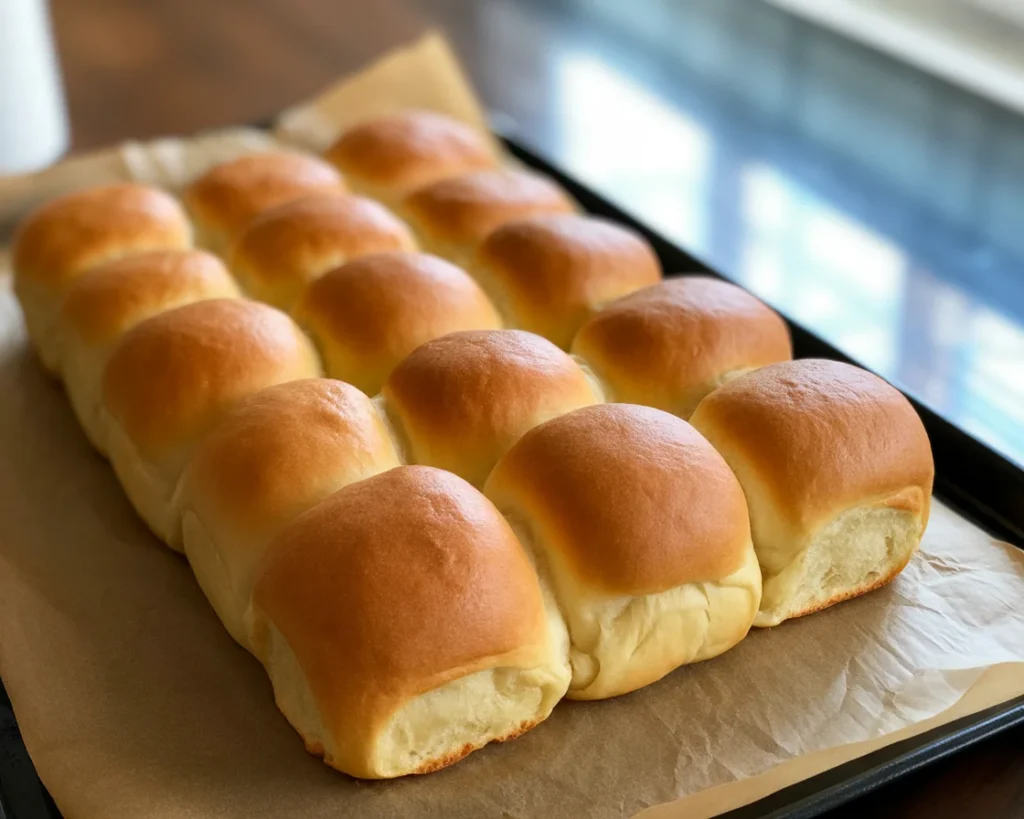
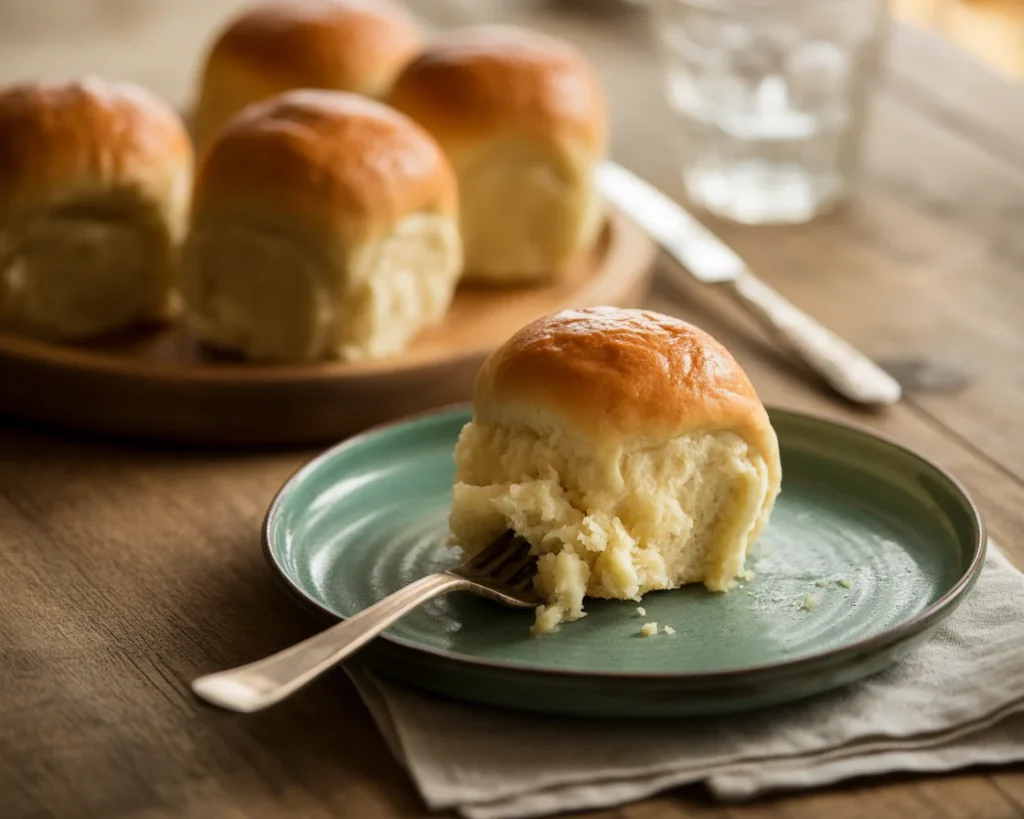
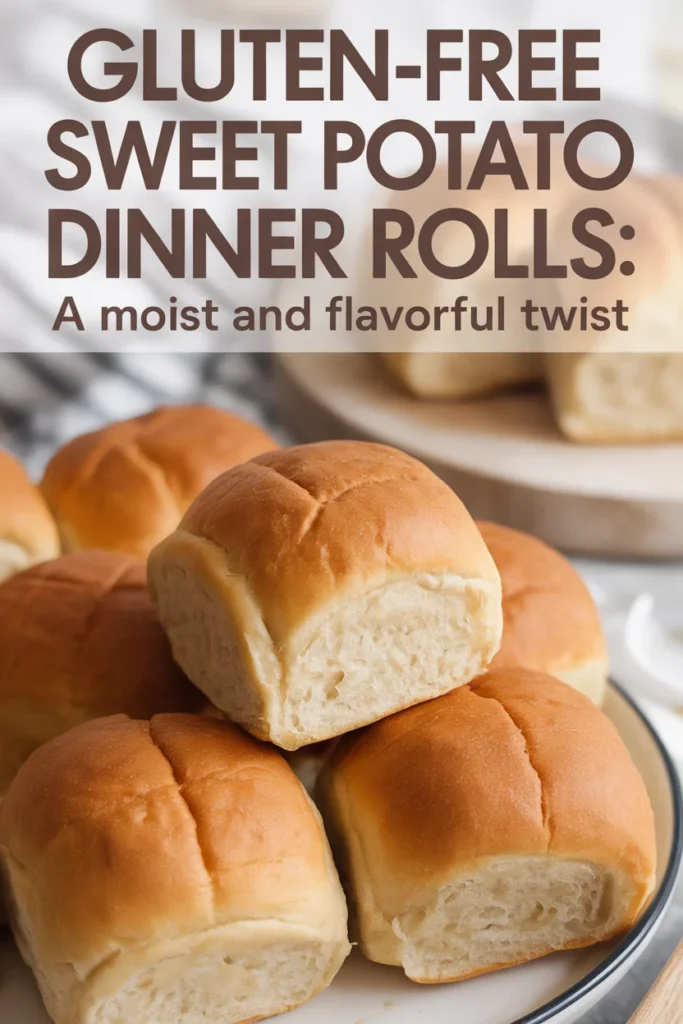
These sweet potato dinner rolls are so good that my gluten-eating family now requests them over traditional rolls. They’re naturally moist, have the perfect hint of sweetness, and stay soft for days. Best of all, they look absolutely beautiful on your holiday table with their gorgeous golden color.
The secret isn’t just the sweet potato—it’s understanding how this amazing vegetable replaces what gluten normally does while adding its own special magic to the mix.
Why Sweet Potato Makes Perfect Dinner Rolls
I’ll be honest: I stumbled onto sweet potato by accident, but now I understand why it works so brilliantly for gluten-free rolls.
The Sweet Potato Advantage
Natural moisture that lasts: Sweet potatoes are about 77% water, but it’s bound water that releases slowly during baking. This means your rolls stay tender for days instead of turning into cardboard by day two like so many gluten-free breads.
Built-in binding power: The natural starches in sweet potato help create the structure that gluten usually provides. When heated, these starches swell and create a network that holds your rolls together without any weird gums or additives.
Perfect subtle sweetness: Sweet potatoes add just enough sweetness to balance the yeast and salt without making your rolls taste like dessert. It’s that perfect savory-sweet spot that makes people keep reaching for another one.
Gorgeous color: That beautiful golden-orange hue makes these rolls look like they came from a fancy bakery. No more pale, sad-looking gluten-free bread!

Why This Recipe Works Better Than Others
After years of disappointing gluten-free dinner rolls, I’ve learned what actually matters. Most recipes try to replicate wheat exactly, but sweet potato lets us create something different—and better.
The natural sugars in sweet potato create the perfect environment for yeast to thrive, so you get a reliable rise every time. Unlike other gluten-free rolls that can be unpredictable, these work consistently because the sweet potato provides both food for the yeast and structure for the dough.
Plus, they’re incredibly forgiving. Overwork regular gluten-free dough and it becomes a gummy mess. Sweet potato dough? Much more resilient and easier to handle.
Want to understand more about how yeast works in gluten-free baking? I dive deep into the chemistry in my complete guide to gluten-free yeast-free bread science.
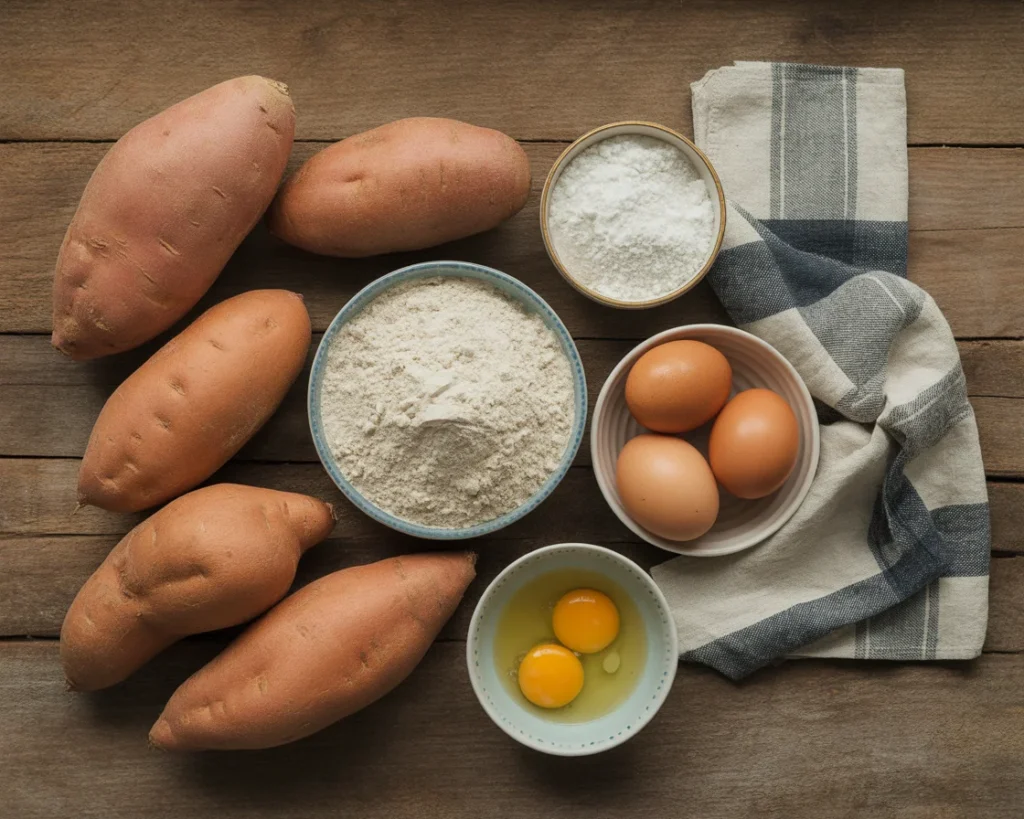
Essential Ingredients & Why Each Matters
Getting gluten-free rolls right is all about understanding what each ingredient brings to the party. Here’s what goes into my tested-to-perfection recipe:
Sweet Potato (The Star Ingredient)
You’ll need 1 cup of roasted sweet potato puree, which is about one large sweet potato (roughly 10-12 ounces before roasting).
Why roasted instead of boiled? Roasting concentrates the flavors and removes excess moisture that can make your rolls soggy. When you boil sweet potatoes, they absorb water. When you roast them, the natural sugars caramelize slightly, and moisture evaporates, giving you a more concentrated, flavorful puree.
How to roast perfectly: Pierce your sweet potato with a fork, wrap in foil, and roast at 400°F for 45-60 minutes until very soft. Let it cool, then scoop out the flesh and mash until smooth. No food processor needed—a regular fork or potato masher works perfectly.
Make-ahead tip: You can roast and puree sweet potatoes up to 3 days ahead. Store covered in the refrigerator and bring to room temperature before using.
Flour Blend That Actually Works
After testing 15 different combinations, this blend gives me the closest texture to traditional dinner rolls:
Brown rice flour (1½ cups): This is your main structure builder. Brown rice flour has a slightly nutty flavor that complements sweet potato beautifully and provides the “backbone” of your rolls.
Potato starch (½ cup): Creates incredible moisture retention and that soft, pillowy texture we all crave in dinner rolls. Don’t substitute corn starch here—potato starch has unique properties that make rolls tender.
Tapioca starch (¼ cup): Adds the chewiness and elasticity that makes these rolls feel substantial rather than crumbly. It also helps create that satisfying “pull” when you tear a roll apart.
Need store-bought alternatives? Check out my complete guide to gluten-free flour blends for substitution options that work well in this recipe.
Yeast & Leavening
Active dry yeast (1 packet/2¼ teaspoons): I prefer active dry over instant yeast because you can test it first to make sure it’s alive. Nothing’s more disappointing than flat rolls because your yeast was dead.
Baking powder (1 teaspoon): This is my insurance policy. It provides extra lift and helps ensure your rolls rise properly even if your yeast isn’t at peak performance.
Sugar (2 tablespoons): Feeds the yeast and provides just a touch of sweetness that balances the earthiness of the sweet potato.
Binding & Moisture
Eggs (2 large, room temperature): Essential for structure in gluten-free baking. Eggs provide protein that helps set the structure and lecithin that improves texture – critical components when you don’t have gluten to rely on.
Butter (4 tablespoons, melted): Adds richness and helps create tender crumb. The fat coats flour proteins and creates a more delicate texture.
Warm milk (¼ cup): Activates the yeast and adds moisture. The temperature should be around 110°F—warm to the touch but not hot.
Salt (1 teaspoon): Don’t skip this! Salt enhances all the other flavors and actually helps control yeast fermentation for better texture.
| Ingredient | Purpose | Nutritional Benefit |
|---|---|---|
| Sweet Potatoes | Adds moisture and sweetness | Rich in Vitamin A and dietary fiber |
| Gluten-Free Flour Blend | Creates the structure for the rolls | Provides various minerals depending on the blend |
| Psyllium Husk | Gives elasticity to the dough | High in fiber, supports digestive health |
| Active Dry Yeast | Leavens the dough for fluffy rolls | Source of protein and B vitamins |
| Plant Milk | Adds moisture and flavor | Low in calories, varies by type |
Optional Flavor Boosters
Fresh herbs: 1 tablespoon chopped rosemary, thyme, or sage adds an elegant, savory note that’s perfect for holiday meals.
Garlic powder (½ teaspoon): Adds subtle depth without overwhelming the sweet potato.
Honey (1 tablespoon): If you want slightly sweeter rolls, honey works beautifully with sweet potato.
Step-by-Step Instructions
Prep Work (15 minutes)
Start by getting your sweet potato ready if you haven’t already. Pierce a large sweet potato with a fork, wrap in foil, and roast at 400°F for 45-60 minutes until very soft when squeezed. Let cool completely, then scoop out 1 cup of flesh and mash until smooth.
While that’s cooling, activate your yeast. In a small bowl, combine ¼ cup warm milk (110°F), 2 tablespoons sugar, and your packet of yeast. Stir gently and let sit for 5-10 minutes until foamy and bubbly. If it doesn’t foam, your yeast is dead—get fresh yeast and start over.
Get all your other ingredients measured and ready. Room temperature ingredients mix more easily and create better texture in gluten-free baking.
Mixing Method That Prevents Dense Rolls
Step 1: Create the Base (5 minutes)
In a large mixing bowl, combine your cooled sweet potato puree, melted butter, and beaten eggs. Mix until smooth and well combined. The mixture should be warm but not hot—if it’s too hot, it will kill your yeast when you add it.
Add your foamy yeast mixture and stir until evenly distributed. The color should be a beautiful golden orange at this point.
Step 2: Flour Integration (3 minutes)
In a separate bowl, whisk together brown rice flour, potato starch, tapioca starch, baking powder, and salt. Make sure there are no lumps—they’ll create dense spots in your finished rolls.
Add the flour mixture to the sweet potato mixture and stir with a wooden spoon until just combined. The dough will be stickier than regular bread dough—this is normal! Gluten-free dough always looks different, and trying to make it look like wheat dough will lead to overworking and dense results.
Mix just until you don’t see any dry flour. The dough should be soft, slightly sticky, and cohesive but not smooth like wheat dough.
Step 3: First Rise Strategy (45 minutes)
Transfer the dough to a greased bowl, cover with a damp towel or plastic wrap, and place in a warm, draft-free spot. I like to turn my oven to 200°F for just 2 minutes, then turn it off and put the bowl inside with the door cracked open.
Let rise for 45 minutes to 1 hour, until roughly doubled in size. Gluten-free dough rises differently than wheat dough—it might not double as dramatically, but you should see noticeable growth and the surface might look slightly puffy.
Shaping and Second Rise (30 minutes)
Here’s where sweet potato dough shines—it’s much easier to handle than most gluten-free doughs because the sweet potato adds natural binding.
Grease a 9×13 inch baking dish or large round pan. With wet hands (this prevents sticking), gently deflate the dough and divide into 12-15 pieces, depending on how large you want your rolls.
Roll each piece gently between your palms to form rough balls. Don’t worry about perfection—rustic looks beautiful! Place the shaped rolls in your prepared pan, leaving about an inch between each one.
Cover again and let rise for 30-45 minutes until the rolls look puffy and have grown noticeably. They should spring back slowly when lightly poked.
Baking for Perfect Results (20 minutes)
Preheat your oven to 375°F during the last 15 minutes of the second rise.
For gorgeously golden tops, brush the rolls gently with beaten egg mixed with a tablespoon of milk. This creates that bakery-beautiful shine.
Bake for 18-22 minutes, until the tops are golden brown and the internal temperature reaches 190°F. The rolls should sound slightly hollow when tapped on the bottom.
Immediately brush the hot rolls with melted butter for soft, flavorful tops. This also helps prevent the crust from getting too hard as they cool.
Let cool in the pan for 5 minutes before serving warm.
Want to keep these rolls fresh longer? Check out my complete guide to storing gluten-free bread for the best techniques.
“I never thought gluten-free rolls could taste this good. My husband thought I bought them at a five-star restaurant!” – Jess, actual dinner guest
Troubleshooting Common Issues
Even with a tested recipe, things can sometimes go sideways. Here’s how to fix the most common problems:
Dense or Heavy Rolls
Most likely cause: Overworked dough or inactive yeast.
The fix: Always test your yeast first—it should foam vigorously within 10 minutes. When mixing, stop as soon as the flour disappears. Gluten-free dough doesn’t need the extended kneading that wheat dough requires.
Prevention tip: Measure flour by weight if possible (brown rice flour should be 240g for 1½ cups). Too much flour is the #1 cause of dense gluten-free baked goods.
Understanding proper hydration is crucial for any gluten-free bread success. For comprehensive troubleshooting of moisture-related issues and the complete science behind gluten-free dough consistency, see our detailed hydration mastery guide for gluten-free dinner rolls.
Rolls That Don’t Rise
Yeast problems: Check expiration dates and water temperature. Water that’s too hot kills yeast; too cool won’t activate it.
Cold kitchen solution: If your kitchen is cold (below 70°F), create a warm environment for rising. A barely warm oven, top of the refrigerator, or even a heating pad on low can help.
Sweet potato moisture: If your sweet potato puree was very wet, it might have thrown off the dough consistency. Next time, let roasted sweet potato cool completely and drain off any excess moisture.
Gummy Texture
Underbaking is usually the culprit: Use an instant-read thermometer to check internal temperature (should reach 190°F). Visual cues can be deceiving with gluten-free baking.
Flour ratio issues: Too much starch relative to rice flour can create gumminess. Stick to the tested ratios.
Cooling problems: Let rolls cool on a wire rack to prevent steam from making the bottoms soggy.
Flavor Problems
Too sweet: Reduce sugar to 1 tablespoon or balance with extra salt or herbs.
Bland results: Make sure you’re using enough salt (1 full teaspoon), and consider adding garlic powder or fresh herbs.
Yeasty taste: This means over-fermentation. Reduce rising time, especially in very warm environments.
For more comprehensive troubleshooting help with all types of gluten-free bread issues, see my complete gluten-free bread troubleshooting guide.
Variations & Customizations
Once you master the basic recipe, these variations will keep things interesting:
Savory Options
Herb and Garlic Rolls: Add 1 tablespoon fresh chopped rosemary, 1 teaspoon garlic powder, and a pinch of black pepper to the dough. Brush tops with garlic butter after baking.
Cheese Variations: Fold in ½ cup shredded sharp cheddar or grated Parmesan during the final mixing. The cheese adds flavor and helps with binding.
Everything Seasoning: Skip herbs in the dough and brush tops with egg wash, then sprinkle with everything bagel seasoning before baking.
Holiday Adaptations
Thanksgiving Version: Add 1 tablespoon fresh chopped sage and ½ teaspoon dried thyme. These earthy herbs complement turkey beautifully.
Christmas Spice: A tiny pinch of nutmeg and 1 tablespoon fresh rosemary creates sophisticated holiday flavor.
Easter Fresh: Fold in 2 tablespoons chopped fresh chives and 1 teaspoon dried dill for a spring celebration.
Dietary Modifications
Vegan Adaptation: Replace eggs with 2 flax eggs (2 tablespoons ground flaxseed mixed with 6 tablespoons warm water, let sit 5 minutes). Use plant milk and vegan butter. The texture will be slightly different but still delicious.
Dairy-Free: Substitute coconut oil for butter and use any non-dairy milk. Coconut oil actually creates very tender rolls.
Lower Sugar: Reduce sugar to 1 tablespoon. The sweet potato provides plenty of natural sweetness for most palates.
For busy schedules, try adapting this recipe for effortless bread machine gluten-free dinner rolls – just adjust the sweet potato amount and follow the machine timing guide.
Make-Ahead & Storage Tips
These rolls are perfect for holiday meal prep—in fact, I think they’re better when you can plan ahead.
Advance Preparation Options
Sweet Potato Prep: Roast and puree sweet potatoes up to 3 days ahead. Store covered in refrigerator and bring to room temperature before using.
Shaped Rolls Method: After shaping, cover tightly and refrigerate overnight. Let come to room temperature and rise (about 1 hour) before baking. This actually improves flavor as the dough develops overnight.
Freezing Unbaked: Shape rolls, place on a baking sheet, and freeze until solid. Transfer to freezer bags for up to 1 month. Thaw overnight in refrigerator, then let rise and bake as normal.
Storage for Freshness
Room Temperature: Wrap cooled rolls in plastic wrap or store in an airtight container for 2-3 days. The sweet potato keeps them moist much longer than regular gluten-free bread.
Refrigeration: For longer storage, refrigerate for up to 1 week. Reheat in 300°F oven for 5-7 minutes to refresh.
Freezing Baked Rolls: Wrap individually in plastic wrap, then place in freezer bags. Good for up to 3 months. Thaw at room temperature and warm in oven before serving.
Serving Suggestions
Reheating Methods: Oven reheating (300°F for 5-7 minutes) is best for maintaining texture. Microwave works in a pinch—wrap in damp paper towel and heat 15-20 seconds.
Perfect Pairings: These rolls are amazing with honey butter, herb butter, or just good quality salted butter. The slight sweetness also pairs beautifully with savory soups and stews.
Holiday Menu Integration: Serve alongside turkey, ham, or roast beef. The sweetness complements rich, savory main dishes perfectly.
Why This Recipe Succeeds
After three years of holiday disappointment and countless failed attempts, I can confidently say this recipe works because it embraces what makes gluten-free baking different rather than fighting against it.
Real-world tested: I’ve made these rolls for Thanksgiving, Christmas, Easter, and regular family dinners. My 85-year-old grandmother (who’s been making dinner rolls for 60 years) declared them “better than mine ever were.”
Beginner-friendly: If you’re new to gluten-free baking, this is a perfect starter recipe. Sweet potato dough is forgiving, the ingredients are straightforward, and the results are consistently good.
Reliable results: Unlike many gluten-free bread recipes that work sometimes, this one works every time when you follow the steps. The sweet potato provides consistency that other recipes lack.
Versatile enough for any season: While perfect for holidays, these rolls work year-round and adapt to whatever herbs or seasonings you have on hand.
If you’re just starting your gluten-free baking journey, these rolls are a perfect confidence-builder. For more beginner-friendly options and essential tips, check out my gluten-free bread recipes for beginners guide.
Common Questions
Yep! They’re actually awesome the next day. Store in a bag on the counter, then just re-warm in the oven for a few minutes.
Totally. Cool them completely, pop in a freezer-safe bag, and freeze. Warm up from frozen at 350°F for about 10 minutes.
Honestly, it’s key, but you could try ground flaxseed as a last resort. Results might be a bit less fluffy.
Yup, if you pick a nut-free plant milk and double-check your flour blend.
I have! Just drain off extra liquid and mash smooth. Fresh tastes better, though.
Ready to Impress Everyone at Your Table?
These sweet potato dinner rolls prove that gluten-free doesn’t mean compromising on flavor or texture. They’re beautiful, delicious, and so satisfying that even your gluten-eating guests will be asking for the recipe.
The best part? Once you master this basic technique, you can customize these rolls for any season or occasion. Whether it’s a holiday feast or a casual family dinner, these rolls will make your table feel special.
Start with roasting that sweet potato today, and by tomorrow, you’ll have the most gorgeous, delicious dinner rolls anyone’s ever brought to a gathering. Trust me—these will become your new signature recipe.
Have you tried these rolls? I’d love to hear how they turned out for you! Drop a comment below and let me know if you tried any of the flavor variations—I’m always looking for new ideas to share.

Gluten-Free Sweet Potato Dinner Rolls
These soft, fluffy gluten-free sweet potato dinner rolls are so good that even gluten-eaters prefer them over traditional rolls! Made with roasted sweet potato puree, this tested recipe creates naturally moist, golden-colored rolls that stay fresh for days.
Tested & Perfected: After 36 test batches and 3 years of disappointing store-bought alternatives, I finally cracked the code. These rolls use the natural binding power of sweet potato to replace gluten while adding subtle sweetness and gorgeous color.
- Total Time: 75 minutes
- Yield: 12 servings
Ingredients
- 1 cup roasted sweet potato puree (about 1 large sweet potato)
- 1½ cups brown rice flour
- ½ cup potato starch
- ¼ cup tapioca starch
- 1 packet (2¼ teaspoons) active dry yeast
- 1 teaspoon baking powder
- 2 tablespoons sugar
- 2 large eggs (room temperature)
- 4 tablespoons butter (melted)
- ¼ cup warm milk (110°F)
- 1 teaspoon salt
- Optional: 1 tablespoon fresh herbs (rosemary, thyme, or sage)
- Optional: ½ teaspoon garlic powder
- Optional: 1 tablespoon honey
Instructions
- Roast the sweet potato: Pierce a large sweet potato, wrap in foil, and bake at 400°F for 45-60 minutes until soft. Cool, then mash into 1 cup puree.
- Activate yeast: In a small bowl, combine warm milk, sugar, and yeast. Let sit until foamy, about 5-10 minutes.
- Combine ingredients: In a large bowl, mix sweet potato puree, melted butter, and eggs until smooth. Add foamy yeast mixture.
- Mix dry ingredients: In another bowl, whisk together brown rice flour, potato starch, tapioca starch, baking powder, and salt. Gradually stir dry ingredients into the wet mixture until just combined.
- First rise: Transfer dough to a greased bowl, cover, and let rise in a warm place for 45-60 minutes.
- Shape rolls: With wet hands, divide dough into 12-15 pieces, shape into balls, and place in a greased baking dish. Cover and let rise for 30-45 minutes.
- Bake: Preheat oven to 375°F. Brush rolls with egg wash. Bake for 18-22 minutes until golden and internal temp reaches 190°F.
- Cool and serve: Brush with melted butter after baking, let cool for 5 minutes, then serve warm.
Notes
Make-ahead options include roasting sweet potatoes up to 3 days ahead or shaping rolls and refrigerating overnight.
- Prep Time: 15 minutes
- Cook Time: 60 minutes
- Category: Bread
- Method: Baking
- Cuisine: American
- Diet: Gluten Free
I don’t see psyllium husk in the ingredient list.
Great question! There’s actually no psyllium husk in this gluten-free sweet potato roll recipe—the binding and structure come from a combination of sweet potato, eggs, and the custom flour blend (brown rice flour, potato starch, and tapioca starch). Sweet potato’s natural starches help create a soft, cohesive dough, so you don’t need psyllium husk for these rolls to turn out fluffy and tender. If you’re looking for recipes that do use psyllium for extra chew, check out the gluten-free bread guides, but for this specific recipe, it’s not needed!
Can you recommend a substitute for brown rice flour? My daughter is sensitive to rice, also on gluten, dairy, and soy free diet for now. We did food sensitivity testing and haven’t been on the program since May. We have struggled to find bread recipes that taste good and this one I was super excited to find! Hoping I can make it work!
I’m so glad you found this recipe! I completely understand the struggle of navigating multiple food sensitivities—it can be so challenging. For the brown rice flour, you have a few options: sorghum flour works beautifully and has a mild, slightly sweet flavor that complements the sweet potato. Oat flour (certified gluten-free) is another great option if oats are safe for your daughter. You could also try a blend of millet flour and tapioca starch (use half millet, half tapioca to replace the brown rice flour). Each flour behaves a bit differently, so the texture might vary slightly, but these should all work! Please let me know which one you try and how it turns out—I’d love to help troubleshoot if needed. Wishing your daughter healing and hope you both love these rolls!
Okay, going to try making them tomorrow. I appreciate all the options you’ve given. Ive tried it all so I actually have everything and will start with the sorghum flour since this sounds like the best substitute. Thank you so much and I’ll keep you posted!
Also, can you give the metric conversions for all the flours/starches? Thank you!
So I made them, but they look nothing like yours! They did rise, but then while baking they spread out snd ran together and were not smooth on top and very crumbly. The flavor is good, but not sure what happened? I used sorghum flour and weighed it (it says 240 grams in the brown rice weight portion so I did that with the sorghum? Is that too much though?). I spoon scooped the starches since there wasn’t conversions for this…I also used earth balance vegan butter sticks vs coconut oil…should I have used the oil instead?
We ate them, but I was really hoping them to be the fluffy ones you described and in the pictures. Can you help?!
Okay, tried again and this batch is WAY runnier and very sticky/not forming balls at all. This time did about half cup of sorghum and 1 cup oat flour and coconut oil instead of butter…maybe I need metric measurements bs spoon method for scooping flour? I don’t know. Hoping my daughter isn’t too disappointed of not having rolls for Thanksgiving dinner.