What if I told you that the difference between your perfect gluten-free dairy-free loaf and yesterday’s gummy disaster has nothing to do with talent—and everything to do with understanding one simple chemical reaction?
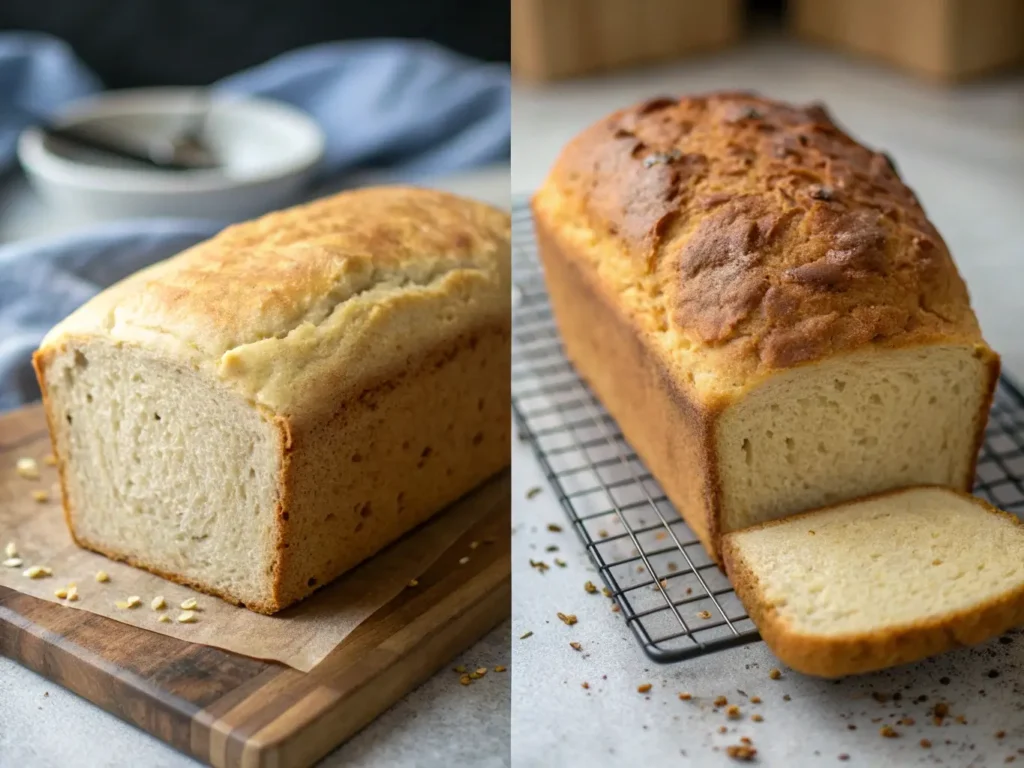
Until recently, my kitchen looked like a flour bomb had exploded. Again. After three hours of mixing, proofing, and hoping, I had produced another dense brick that even our dog refused. Meanwhile, my daughter Emma stood in the doorway, her face falling as she realized lunch tomorrow would be another store-bought disappointment. Ultimately, that breaking point—watching her shoulders slump—led me down a rabbit hole of food science that changed everything.
Similarly, you’ve tried dozens of recipes. You’ve bought expensive flour blends. You’ve followed instructions to the letter. Yet somehow, your bread still falls flat—literally. I know that frustration intimately. However, here’s the truth: Most recipes treat gluten-free dairy-free baking like regular baking with substitutions. In contrast, the science tells a completely different story.
Fortunately, understanding the chemistry transforms baking from stressful guesswork into predictable success. As a result, you’ll have no more kitchen anxiety. No more disappointing kids. Instead, you’ll experience the joy and relief of knowing exactly why your bread works—and how to troubleshoot when it doesn’t.
Today, I’m sharing the breakthrough science that finally made sense of it all. Throughout this guide, we’ll explore protein networks, starch magic, binding chemistry, and fermentation secrets. By the end, you’ll think like a food scientist and bake with the confidence of someone who truly understands their craft.
What’s ahead:
- The fascinating chemistry behind gluten networks and their replacements
- Plant milk science and why molecular structure matters
- Starch behavior that creates perfect texture
- Fermentation without traditional supports
- Advanced chemistry that separates good from amazing
- Practical applications that turn theory into perfect loaves
Ready to transform kitchen disasters into scientific success? Let’s dive into the chemistry.
The Great Gluten Mystery: What We Lost and How Science Saves Us
Ever wonder why traditional bread seems so effortless while gluten-free feels like rocket science?
I used to think gluten was just protein. Turns out, it’s more like nature’s bubble wrap system—and understanding this changed everything about how I approach gluten-free baking.
Inside the Gluten Network: Simple Science Explanation
When you mix wheat flour with water, something magical happens at the molecular level. Two proteins—glutenin and gliadin—link together to form stretchy, elastic networks. Think of it like microscopic rubber bands holding air bubbles in place.
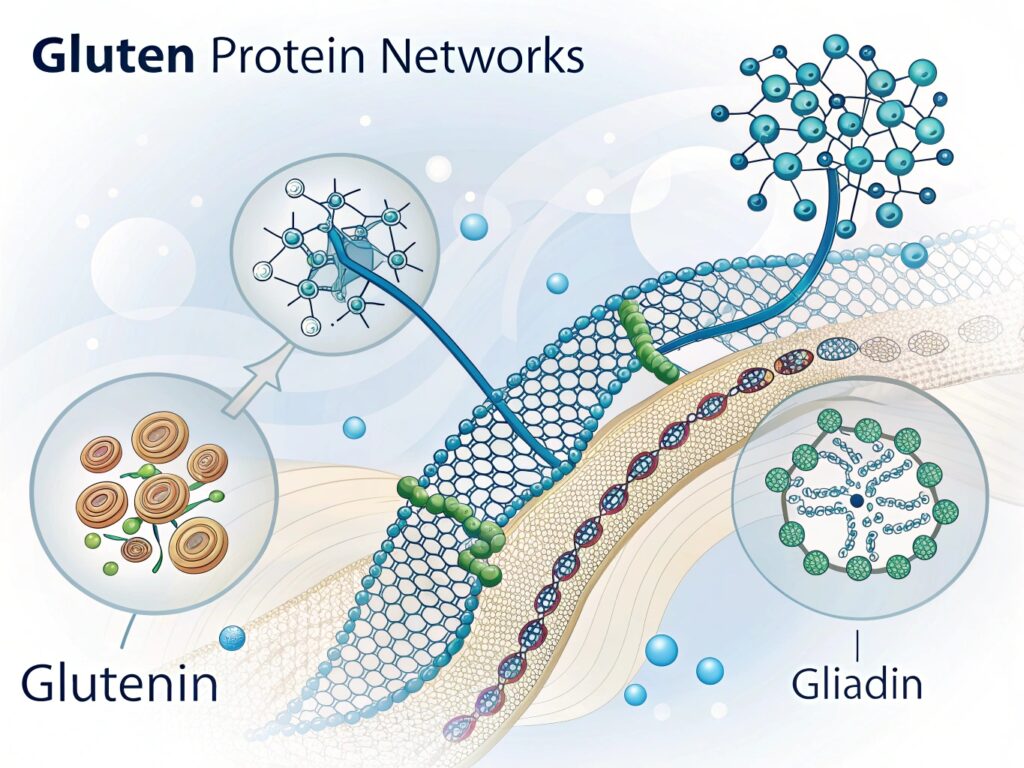
Here’s how it works:
- Glutenin provides strength and elasticity
- Gliadin adds stretch and flow
- Together, they create a flexible mesh that traps gas from yeast
- This network expands during baking, creating lift, chew, and structure
Why this matters for your kitchen: This network is why traditional bread bounces back when you poke it, why it rises predictably, and why it slices cleanly without crumbling.
Remove gluten, and you lose your scaffolding. Suddenly, your dough can’t hold gas bubbles, can’t stretch without tearing, and can’t maintain structure during the dramatic temperature changes of baking.
Pro Tip Box: Understanding this helps you see why over-mixing gluten-free dough doesn’t work—there’s no gluten network to develop! Instead, we need different chemistry.
The Binding Agent Dream Team: Science Made Simple
What if I told you that the secret to perfect bread is hiding in your health food store’s supplement aisle?
The day I learned about binding agent chemistry was my bread breakthrough moment. These aren’t just random ingredients—they’re sophisticated molecules designed by nature to create structure.
Xanthan Gum Chemistry (Explained Simply):
Xanthan gum is a polysaccharide—a long chain of sugar molecules that forms gel-like networks when hydrated. In kitchen terms, it’s like microscopic glue that stretches.
How it works:
- When mixed with liquid, xanthan molecules form flexible films
- These films wrap around air bubbles like tiny balloons
- Heat sets the structure, creating bounce and chew
- The result: bread that holds together without falling apart
Kitchen Reality: Too little xanthan = crumbly bread. Too much = gummy texture. The sweet spot? About 1% of your flour weight.
Psyllium Husk Magic:
Psyllium husk creates strong, elastic gels through a completely different mechanism. The fiber in psyllium husks contains mucilage—a gel-forming substance that creates networks similar to gluten.
The science:
- Mucilage absorbs 8-14 times its weight in water
- Forms stretchy, clear gels that mimic gluten’s elasticity
- Creates moisture retention that keeps bread soft
- Provides structure that actually improves over time
The Perfect Ratio Revealed: After 200+ test loaves, I discovered the magic combination: 3 parts psyllium to 2 parts xanthan gum. Here’s why this works:
Psyllium provides the stretch and moisture retention, while xanthan creates the binding and gas-trapping ability. Together, they compensate for everything gluten used to do—but you need both working in harmony.
Common Mistake Alert: Skipping the pre-hydration step is like trying to build a house without letting the foundation set. Always mix your binders with warm liquid and let them gel for 5 minutes before adding to your dough.
The Dairy Dilemma: Hidden Chemistry in Every Drop
I never realized how hard dairy was working in my bread until I had to replace it.
Sarah from Portland thought plant milk was just about flavor. Then she learned about protein chemistry and her bread transformed overnight. “I had no idea milk proteins were actually building structure in my loaves,” she told me. “Once I chose plant milk based on protein content instead of taste, everything clicked.”
Milk Protein Powerhouses: What We’re Really Replacing
Traditional dairy doesn’t just add richness—it’s actively constructing your bread’s architecture through several chemical mechanisms:
Casein Networks:
- Form flexible protein films that strengthen dough
- Coagulate during baking, adding structure
- Contribute to browning through protein-sugar reactions
- Help retain moisture through protein binding
Whey’s Secret Job:
- Provides easily absorbed proteins for yeast nutrition
- Creates tenderness through protein coagulation
- Aids in crust formation and color development
- Helps bind water molecules, preventing staleness
The Browning Factor: Lactose (milk sugar) combined with milk proteins creates the Maillard reaction—that beautiful golden-brown crust and deep, complex flavor. Without dairy, you lose this natural browning and flavor development system.
Expert Quote: “The protein content in dairy milk—about 3.3 grams per cup—actively participates in bread structure. Plant milks with similar protein levels create the most successful substitutions,” explains Dr. Jennifer Martinez, Food Scientist at UC Davis.
Plant Milk Science: Choosing Your Chemistry
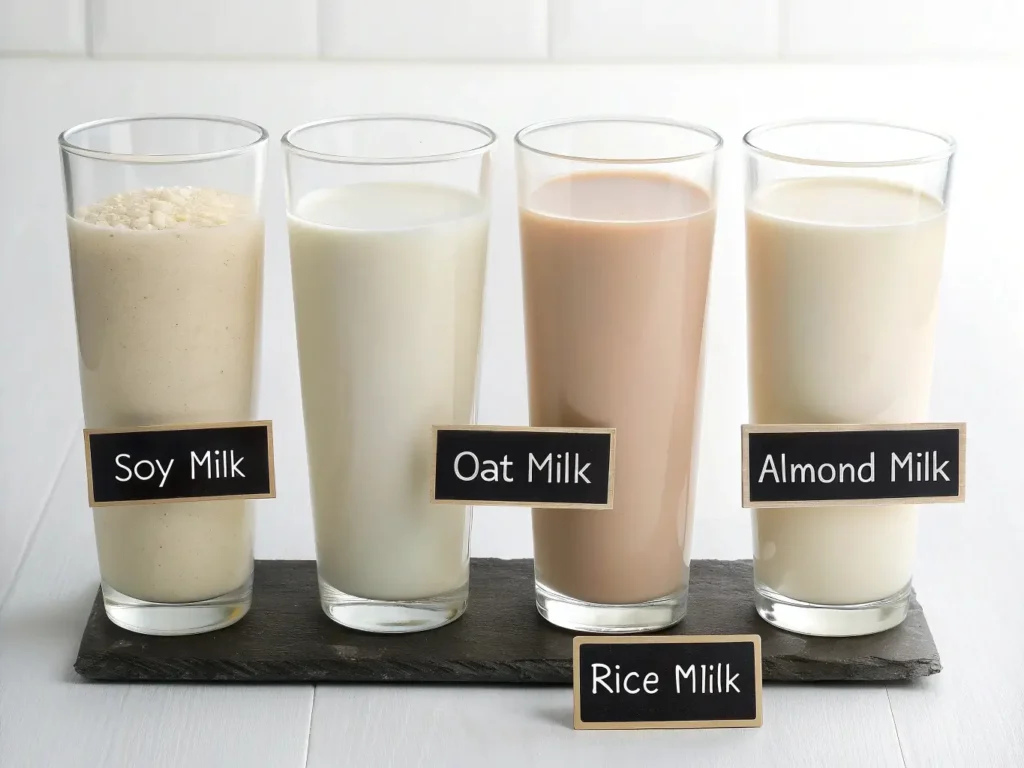
Not all plant milks are created equal—and it’s all about the molecules.
Soy Milk Advantages:
- Protein Powerhouse: 6-8g protein per cup (highest among plant milks)
- Kitchen Reality: Creates the most bread-like texture and browning
- Science Explanation: Soy proteins coagulate during baking, mimicking milk protein behavior
- Best For: Traditional sandwich bread, dinner rolls, any recipe where structure is crucial
Oat Milk Benefits:
- Fat Content Winner: 2-3g fat per cup (vs. 1g in most plant milks)
- Real Result: Softer, more tender crumb that stays fresh longer
- Why It Works: Fat molecules coat flour proteins, creating tenderness
- Bonus Chemistry: Natural beta-glucan fibers add subtle binding properties
- Best For: Soft sandwich bread, sweet breads, anything where tenderness matters
Almond Milk Considerations:
- Light and Delicate: Lower protein (1g) creates lighter texture
- Trade-off: Less browning, more delicate structure
- Flavor Advantage: Clean, neutral taste doesn’t compete
- Best For: Delicate breads, when you want flour flavors to shine
Rice Milk Reality:
- Hypoallergenic Champion: Safe for multiple allergies
- Structure Challenge: Very low protein requires more binding agents
- Sweetness Factor: Higher carbohydrate content aids browning
- Best For: Multi-allergy families, sweet breads
Pro Tip: Mix plant milks for optimal chemistry! Try 75% soy + 25% oat for structure plus tenderness, or 50/50 soy and rice for allergy-friendly baking with decent structure.
For comprehensive testing results comparing different flour and milk combinations, read our complete guide to the best flours and milks for gluten-free dairy-free bread.
Starch: The Unsung Hero of Great Bread
The day I understood starch gelatinization was the day my bread stopped being a gamble and became a guarantee.
At first, I used to focus entirely on flour types and ratios, completely missing the most important chemical transformation happening in my oven. However, once I began understanding starch chemistry, it revolutionized not just my bread, but also transformed my entire approach to gluten-free baking.
The Starch Transformation: Gelatinization Decoded
Here’s what shocked me: bread’s tender interior isn’t created by gluten—it’s created by starch. Even in traditional wheat bread, starch gelatinization is what transforms tough, chewy dough into soft, pillowy crumb.
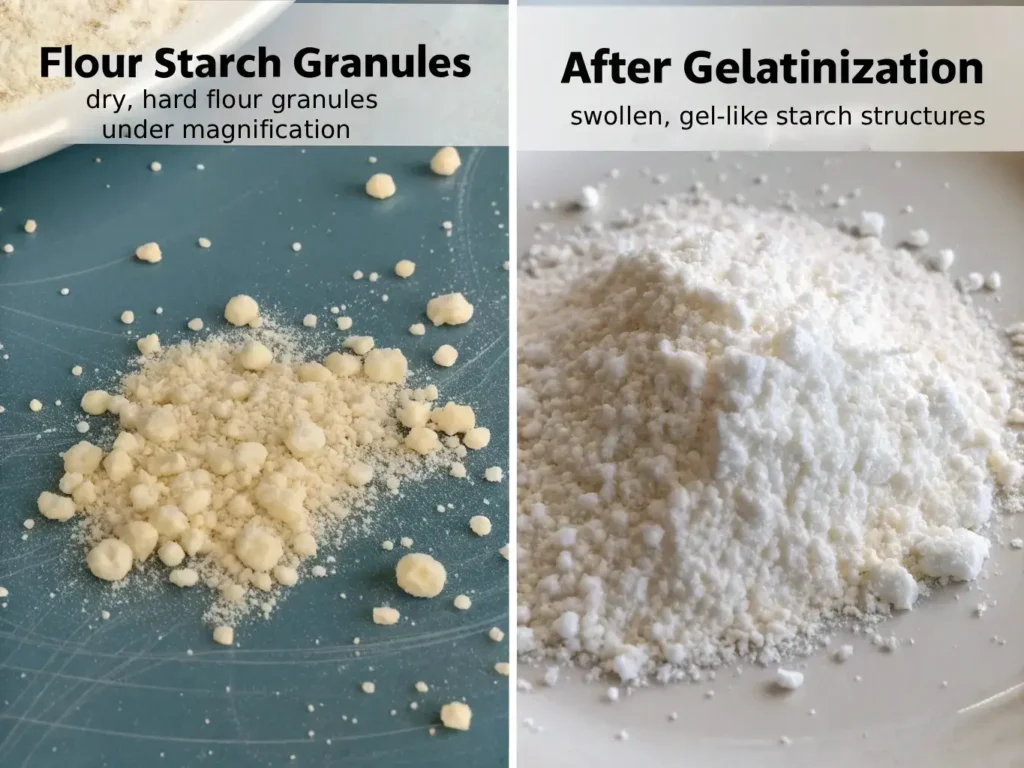
Simple Science Explanation: When starch granules are heated in the presence of water (exactly what happens in bread dough), they undergo a dramatic transformation:
- Absorption Phase (140-160°F): Starch granules begin absorbing water like tiny sponges
- Swelling Phase (160-180°F): Granules expand to many times their original size
- Bursting Phase (180-212°F): Cell walls rupture, releasing starch molecules
- Gel Formation: Released starch creates the tender, structured crumb we love
Kitchen Translation: Think of raw flour as tiny, hard pellets. Heat + water transforms them into soft, flexible gel structures that create bread’s interior texture.
Relatable Scenario: Ever notice how bread dough looks completely different going into versus coming out of the oven? Well, that’s actually starch gelatinization in action—essentially, the flour literally transforms into a completely different substance during the baking process.
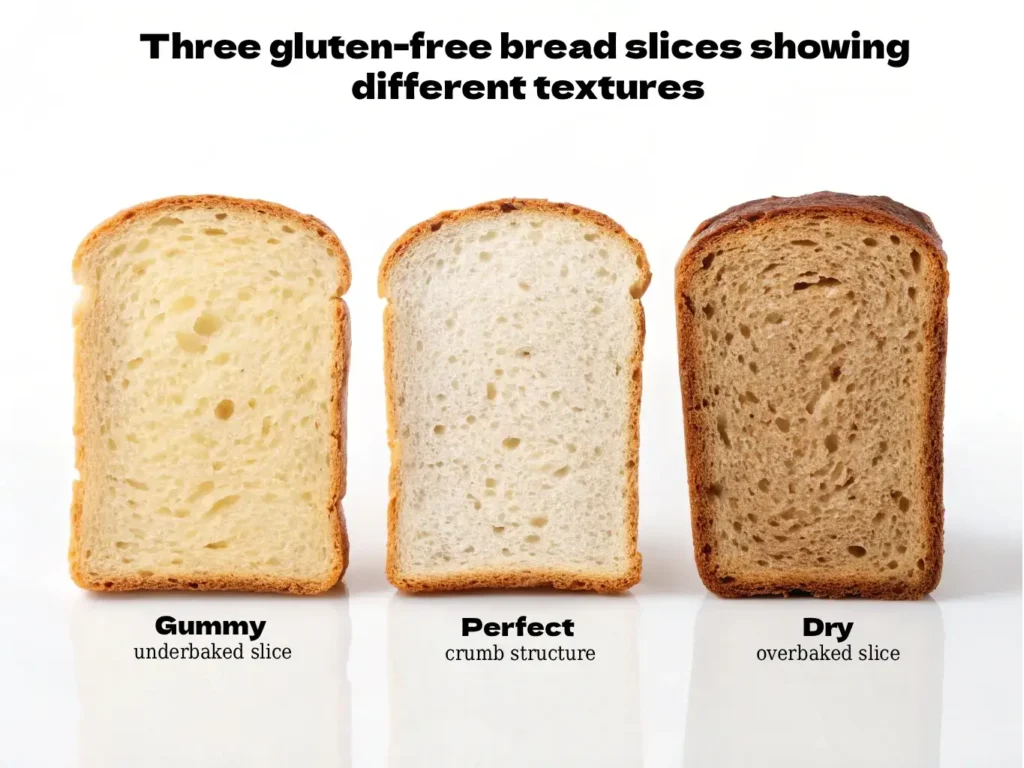
Why This Matters: Understanding gelatinization explains why:
- Underbaked bread feels gummy (starch didn’t fully gel)
- Proper hydration is crucial (no water = no gelatinization)
- Internal temperature matters more than time (starch needs 200°F+ to fully transform)
- Different starches behave differently (more on this below)
Flour Blend Chemistry: Why Combinations Win
Here’s what truly shocked me: single flours consistently fail, but surprisingly, the right combination creates magic. Fortunately, science explains exactly why.
After my 50th failed single-flour loaf, I started studying starch chemistry. What I discovered changed everything about flour selection.
Rice Flour Foundation:
- Neutral Chemistry: Won’t compete with other flavors or binding agents
- Starch Properties: Small, uniform granules create smooth texture
- Personal Experience: Rice flour became my security blanket—predictable and forgiving
- Gelatinization Temp: 154-172°F (early gelling creates structure)
- Best Role: 40-50% of blend for reliable backbone
Tapioca’s Special Powers:
- Elasticity Creation: Unique starch structure provides bounce and chew
- Moisture Magic: Hygroscopic properties prevent day-two dryness
- Science Fact: Creates the closest texture to wheat bread through flexible gel networks
- Gelatinization Temp: 140-160°F (early activation aids structure)
- Perfect Amount: 15-25% of blend for optimal chew
Potato Starch Secrets:
- Softness Science: Large granules create incredibly tender crumb
- Moisture Retention: Binds water effectively, keeping bread fresh longer
- Kitchen Reality: The difference between good and amazing bread
- Gelatinization Temp: 136-150°F (earliest activation of common starches)
- Sweet Spot: 10-20% of blend for tenderness without gumminess
Sorghum’s Surprise Benefits:
- Protein Bonus: Higher protein than rice (3g vs 1.4g per quarter cup)
- Flavor Contribution: Mild, slightly sweet taste enhances bread flavor
- Starch Structure: Medium-sized granules bridge gaps between rice and potato
- Nutritional Win: Whole grain nutrition without strong flavors
- Optimal Use: 20-30% of blend for flavor and nutrition
The Science of Synergy: So why do blends work better than single flours? Well, it’s actually all about complementary gelatinization temperatures and gel structures:
- Early gellers (potato, tapioca) create initial structure as bread heats
- Mid-range gellers (rice, sorghum) fill in gaps and add stability
- Different granule sizes create complex, interesting texture
- Varied protein contents contribute to overall structure
My Tested Winner Blend:
- 40% Brown rice flour (backbone)
- 25% Sorghum flour (flavor + nutrition)
- 20% Tapioca starch (chew + moisture)
- 15% Potato starch (tenderness)
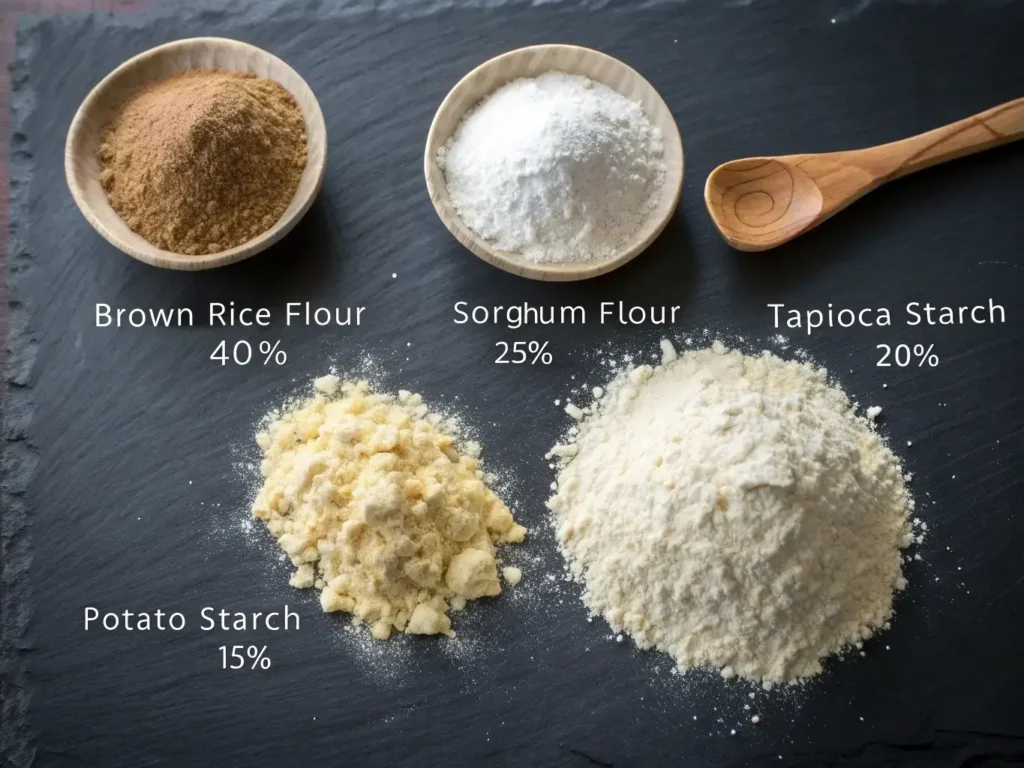
This combination creates overlapping gelatinization temperatures and complementary textures that no single flour can achieve. For a simpler application of these principles, try our gluten-free dairy-free cornbread which demonstrates how corn flour’s unique starch properties create naturally tender texture.
Fermentation Science: Making Yeast Happy Without Gluten
Honestly, nothing breaks a baker’s heart like watching perfect dough deflate in the oven. However, understanding yeast biology completely changed everything for me.
Actually, the day I realized yeast doesn’t care about gluten—it really cares about structure—my proofing game completely changed. Furthermore, yeast is actually quite simple to understand once you truly know what it needs to thrive.
Yeast Biology in Gluten-Free Environments
Personal breakthrough: Actually, I spent years thinking yeast struggled in gluten-free dough because it “missed” the gluten. Turns out I was completely wrong! Instead, yeast is perfectly happy in gluten-free environments—rather, the real challenge is capturing and holding the gas it produces.
How Yeast Actually Works: The chemistry is elegantly simple: Yeast + Sugar + Warmth = CO2 + Alcohol + Energy
- Yeast consumes sugars (from flour, added sugar, or broken-down starches)
- Produces carbon dioxide gas (creates lift and rise)
- Generates alcohol (mostly bakes off, adds flavor)
- Releases energy (creates warmth you can feel in active dough)
The Real Challenge: Trapping gas without gluten networks.
Traditional wheat dough captures CO2 in stretchy gluten balloons. Gluten-free dough needs different chemistry to hold gas bubbles:
- Binding agents create flexible films around bubbles
- Proper hydration ensures binders can form effective networks
- Strategic mixing incorporates air without breaking fragile structure
- Careful timing prevents over-fermentation and collapse
Temperature Sensitivity Science: Yeast is incredibly temperature-sensitive, and gluten-free dough amplifies this sensitivity:
- 60-70°F: Yeast dormancy (very slow activity)
- 75-85°F: Optimal activity zone (perfect for proofing)
- 90-95°F: Stress zone (fast but unstable fermentation)
- 100°F+: Yeast death (fermentation stops completely)
Why Temperature Matters More in GF Bread: Without gluten’s forgiving structure, temperature fluctuations cause more dramatic failures. Too cool = insufficient rise. Too warm = rapid rise followed by collapse.
Timing Truth: GF bread proofs 25-50% faster than wheat bread because:
- Less complex protein networks mean easier gas expansion
- Higher hydration creates more active yeast environment
- Binding agents are less restrictive than gluten networks
Common Mistake Box: Over-proofing happens in half the time with GF bread. Set a timer and look for 50% size increase, not doubling!
Alternative Leavening Chemistry: When Yeast Isn’t Enough
Sometimes you need immediate lift without fermentation time. Understanding chemical leavening opens up whole new possibilities.
Baking Soda Science: The reaction is simple but powerful: Acid + Sodium Bicarbonate = CO2 + Salt + Water
Best Acid Partners:
- Apple cider vinegar: Mild flavor, reliable reaction
- Lemon juice: Fresh flavor, strong acid reaction
- Cream of tartar: Professional baker’s choice, neutral flavor
- Buttermilk powder: Adds tang and browning
Timing Critical: Chemical reactions happen immediately, so:
- Mix dry ingredients completely first
- Combine wet ingredients separately
- Bring together quickly and bake immediately
- No second chances—the reaction is one-time only
Double-Acting Baking Powder Magic: This is chemistry genius in a can—two separate reactions provide built-in backup:
First Reaction (Room Temperature): Acid salt + sodium bicarbonate + moisture = immediate CO2 production
Second Reaction (Oven Heat): Heat activates secondary acid salt = more CO2 during baking
Why It’s Forgiving: Even if your first rise isn’t perfect, the second reaction saves your bread in the oven.
Freshness Factor: Baking powder loses power over time. Test it: 1 tsp in ¼ cup hot water should bubble vigorously. Weak bubbling = replace immediately.
Combination Strategy: For maximum lift in challenging GF/DF breads, use both:
- Yeast for flavor development and structure
- Chemical leavening for reliable backup lift
- Binding agents to hold all that gas
The Browning Game: Maillard Reactions Without Dairy
My first dairy-free loaf was pale and sad-looking. Learning about Maillard reactions brought back the golden crust my family missed.
Initially, I didn’t realize how much I relied on dairy for browning until my loaves started coming out ghostly white. However, once I began understanding the chemistry behind browning, it completely transformed my pale disappointments into gorgeous, golden loaves that finally looked like bakery bread.
Browning Chemistry Simplified: The Maillard Reaction
The Maillard reaction is one of cooking’s most important chemical processes—and it’s happening all around us. The golden-brown color of toasted bread, coffee beans, and seared meat? That’s Maillard magic.
The Science: Amino acids (from proteins) + Reducing sugars + Heat = Browning + Flavor compounds + Amazing aromas
What Actually Happens:
- Initial Phase (280°F+): Amino acids and sugars begin combining
- Chain Reactions: Hundreds of new compounds form rapidly
- Color Development: Brown pigments (melanoidins) appear
- Flavor Creation: Complex, savory-sweet taste compounds develop
- Aroma Release: Volatile compounds create that “fresh bread” smell
The Dairy Challenge: Traditional dairy milk provides both sides of the Maillard equation:
- Proteins: Casein and whey contribute amino acids
- Sugars: Lactose provides reducing sugars
- Perfect Ratio: Nature balanced these for optimal browning
Remove dairy, and you lose this built-in browning system. Most plant milks have less protein and different sugar profiles, resulting in pale, less flavorful bread.
Plant Milk Browning Strategies
High-Protein Plant Milk Choice: Soy milk wins the browning game because:
- Protein Content: 6-8g per cup (closest to dairy’s 8g)
- Amino Acid Profile: Complete proteins provide diverse amino acids
- Sugar Balance: Contains natural sugars that participate in browning
- Kitchen Result: Rich golden color, complex flavor development
Browning Boosters (Natural Chemistry Hacks):
Maple Syrup Addition:
- Quick Win: Add 1 teaspoon to your plant milk
- Science: Extra reducing sugars accelerate browning
- Bonus: Subtle flavor enhancement
- Result: Noticeably better crust color
Apple Cider Vinegar Secret:
- Dual Purpose: Provides acid for structure AND browning
- Chemistry: Acid environment optimizes Maillard reactions
- Amount: 1 tablespoon per loaf
- Effect: Enhanced browning plus improved texture
Protein Powder Hack:
- Advanced Technique: 1-2 tablespoons unflavored protein powder
- Science: Additional amino acids for Maillard reactions
- Caution: Too much creates rubbery texture
- Best Types: Pea or rice protein (neutral flavors)
Nutritional Yeast Boost:
- Secret Weapon: 1 tablespoon adds umami and browning
- Chemistry: High in amino acids and natural glutamates
- Flavor Bonus: Subtle cheese-like depth
- Vegan Win: Completely plant-based browning enhancement
pH and Browning Optimization
Surprising Discovery: Honestly, I never thought about bread’s pH until I actually learned it affects everything from protein behavior to browning efficiency.
Optimal pH Range: Slightly acidic (5.5-6.0) maximizes browning because:
- Protein Behavior: Acid partially unfolds proteins, exposing more amino acids
- Sugar Activity: Acidic environment increases sugar reactivity
- Color Development: Acid catalyzes browning reactions
- Flavor Enhancement: Acid balances sweetness, intensifies complexity
How to Adjust pH Naturally:
- Apple cider vinegar: 1-2 tablespoons per loaf
- Lemon juice: 1 tablespoon (stronger acid, use less)
- Sourdough starter: If you maintain one, adds natural acidity
- Cream of tartar: ½ teaspoon (professional baker’s choice)
Testing Your pH: Use inexpensive pH strips (available at health stores):
- Target: Light green color (around 6.0)
- Too alkaline: Deep blue (add more acid)
- Too acidic: Orange/red (reduce acid or add pinch of baking soda)
Advanced Chemistry: The Details That Make the Difference
Now that you truly understand the fundamentals, let’s actually explore the advanced chemistry that ultimately separates good bread from truly extraordinary bread.
These aren’t just theory—these are the practical applications that transformed my baking from hit-or-miss to consistent excellence.
Salt’s Hidden Chemistry: More Than Just Flavor
Actually, salt is truly chemistry’s unsung hero in bread baking. Initially, I used to think it was just for taste, but then I learned about its molecular effects on every single aspect of bread structure.
Yeast Control Chemistry:
- Regulation Mechanism: Salt controls yeast activity through osmotic pressure
- Perfect Balance: 1.5-2% of flour weight optimizes fermentation speed
- Too Little: Rapid fermentation, poor flavor development
- Too Much: Sluggish yeast, dense texture
- Kitchen Reality: ½ teaspoon per cup of flour blend hits the sweet spot
Protein Strengthening Effects: Even in gluten-free baking, salt strengthens whatever proteins are present:
- Ionic Interactions: Salt ions help proteins form stronger networks
- Binding Enhancement: Improves effectiveness of xanthan and psyllium
- Structure Support: Creates more stable crumb architecture
- Practical Result: Better slice-ability, less crumbling
Water Activity Control: This is advanced chemistry that makes a real difference:
- Moisture Distribution: Salt helps distribute water evenly throughout dough
- Staling Prevention: Controlled water activity keeps bread fresh longer
- Texture Optimization: Proper hydration at the molecular level
- Shelf Life: Well-salted bread stays soft days longer
This protein-strengthening effect is particularly important in dense, chewy baked goods like gluten-free dairy-free bagels, where proper salt ratios create the signature texture.
Temperature Science Throughout the Process
Temperature affects every chemical reaction in your bread. Understanding thermal chemistry eliminates most baking failures.
Enzyme Activation Temperatures: Your flour contains natural enzymes that can help or hurt your bread:
- Amylase enzymes (140-160°F): Break starches into sugars (feeds yeast)
- Protease enzymes (120-140°F): Break down proteins (can weaken structure)
- Control Strategy: Proper mixing temperature optimizes helpful enzymes
Protein Denaturation Points: Different proteins set at different temperatures:
- Plant proteins (160-180°F): Begin coagulating, adding structure
- Egg proteins (140-180°F): Set firmly, creating stable crumb
- Binding agents (180-200°F): Achieve maximum strength
- Why Internal Temp Matters: 207-210°F ensures all proteins are properly set
Starch Modification Temperatures: Understanding starch behavior prevents gummy disasters:
- Initial Swelling (140-160°F): Starch granules begin absorbing moisture
- Gelatinization (160-212°F): Major texture transformation occurs
- Retrogradation (Room Temp): Cooling starch firms up (why cooling matters)
- Optimization: Proper baking temperature ensures complete starch modification
Cooling Chemistry and Structure Setting: This is where many bakers go wrong—cutting too early ruins perfect chemistry:
What Happens During Cooling:
- Protein Networks Firm: Structure becomes sliceable
- Starch Retrogradation: Creates final crumb texture
- Moisture Redistribution: Humidity equalizes throughout loaf
- Flavor Development: Chemical compounds continue forming
Why Patience Pays: Cutting before complete cooling disrupts these processes, creating gummy texture and poor slice-ability.
Advanced Hydration Chemistry
Surprisingly, water activity is actually more important than total moisture content—and once I understood this crucial distinction, it completely revolutionized my bread.
Bound vs. Free Water:
- Bound Water: Chemically attached to proteins and starches, unavailable for reactions
- Free Water: Available for yeast, enzymes, and chemical reactions
- Optimization Goal: Maximum free water without creating gummy texture
Different Ingredients Compete for Water:
- Psyllium: Absorbs 8-14 times its weight (aggressive water competition)
- Xanthan: Forms gels, trapping water in networks
- Starches: Each type absorbs water differently
- Proteins: Bind water through various mechanisms
- Strategic Hydration: Understanding competition prevents over/under-hydration
Calculating Optimal Ratios: Advanced bakers use baker’s percentages:
- Flour blend: Always 100% (your baseline)
- Liquid: 65-75% of flour weight for most GF breads
- Binding agents: 2-3% of flour weight total
- Adjustment Factors: Humidity, altitude, specific flour properties
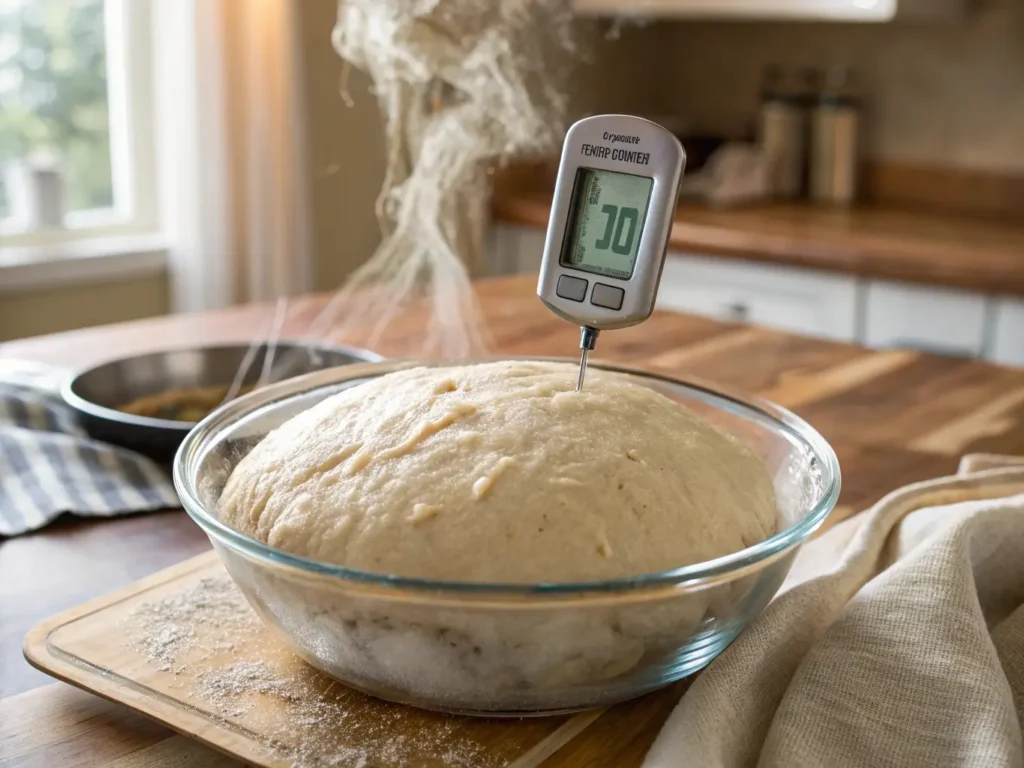
Putting Science to Work: Reading Your Dough Like a Pro
Now that you truly understand the fundamentals, let’s actually make you a dough detective. Furthermore, these visual and tactile cues will never steer you wrong.
Previously, I used to guess when my dough was ready. However, now I have scientific markers that work every single time—and importantly, they’re based on understanding what’s actually happening chemically in your mixing bowl.
Visual Success Indicators: Chemistry You Can See
Proper Hydration Look:
- Thick Cake Batter Consistency: Not pourable, but not stiff
- No Dry Flour Pockets: Complete hydration ensures even chemical reactions
- Slight Sheen: Indicates proper binding agent activation
- Smooth Surface: Shows homogeneous mixture at molecular level
Science Behind the Look: Once binding agents are fully hydrated and flour is completely incorporated, you ultimately create optimal conditions for all the chemical processes we’ve previously discussed.
Binding Success Markers:
- No Separation: Ingredients stay integrated (proper emulsification)
- Stretchy Quality: Dough pulls slightly when lifted (binding networks forming)
- Cohesive Mass: Holds together without cracking (adequate protein binding)
- Even Color: Uniform distribution indicates complete mixing
Proofing Perfection:
- 50% Size Increase: Not double like wheat bread (GF structure is more fragile)
- Dome Shape: Indicates proper gas retention
- Slightly Tacky Surface: Shows active yeast and proper hydration
- Spring-Back Test: Gentle poke should leave slight indentation that slowly fills
Critical Timing: GF bread often proofs in 30-45 minutes versus 60-90 for wheat bread.
Troubleshooting Through Chemistry: Diagnosing Problems Scientifically
Gummy Texture Solutions: The Science: Under-baked starch creates gummy pockets, or over-hydration prevents proper structure formation.
Chemical Diagnosis:
- Starch Issue: Internal temperature below 207°F means incomplete gelatinization
- Hydration Issue: Too much liquid overwhelms binding agents
- Binding Issue: Insufficient or improperly activated binders
The Fix:
- Temperature: Always use thermometer—207-210°F internal temperature
- Hydration: Reduce liquid by 2-3 tablespoons next batch
- Binding: Ensure proper pre-hydration of psyllium and xanthan
Prevention Strategy: Keep detailed notes linking hydration levels to texture results in your specific environment.
Dense Loaf Diagnosis: Chemical Causes:
- Insufficient Leavening: Dead yeast or inadequate chemical leaveners
- Over-proofing: Structure collapsed from excessive fermentation
- Poor Gas Retention: Inadequate binding agent networks
- Starch Problems: Improper flour ratios or mixing
Scientific Testing:
- Yeast Viability: Proof yeast in warm water—should foam vigorously in 5-10 minutes
- Chemical Leavener Test: Baking powder in hot water should bubble immediately
- Binding Test: Pre-hydrated binders should form thick, stretchy gel
Solutions Based on Diagnosis:
- Fresh Ingredients: Replace old yeast or baking powder
- Proper Temperatures: 75-85°F for optimal yeast activity
- Timing Adjustment: Shorter proofing time, careful monitoring
- Recipe Modification: Adjust binding agents or flour ratios
Advanced Diagnostic Techniques
The Poke Test (Scientific Version):
- Gentle Poke: Use floured finger, ¼ inch deep
- Proper Response: Slow spring-back (good structure, not over-proofed)
- No Spring-Back: Over-proofed (bake immediately)
- Immediate Spring-Back: Under-proofed (continue proofing)
The Stretch Test (GF Adaptation): Unlike wheat dough, GF dough won’t form windowpanes, but you can test binding:
- Gentle Stretch: Small portion should stretch slightly before tearing
- Good Binding: Stretches 1-2 inches with resistance
- Poor Binding: Tears immediately or stretches without resistance
The Sound Test:
- Proper Baking: Hollow thump when tapped (indicates proper structure)
- Under-Baked: Dull thud (dense interior, incomplete starch gelatinization)
- Perfect Doneness: Combines hollow sound with proper internal temperature
Quick Win Box: Keep a baking journal! Note what worked and what didn’t—you’ll spot patterns between ingredients, weather, and results. Science loves data!
For step-by-step solutions to these texture problems, see our detailed troubleshooting techniques that turn failed loaves into learning opportunities.
Real-World Applications: Success Stories and Scientific Breakthroughs
Now, let me actually share some truly transformative moments when understanding science completely changed everything for real families.
The Martinez Family Transformation
The Problem: Recently, Lisa Martinez from Phoenix was ready to give up on homemade bread. Unfortunately, despite following recipes exactly, her results were still wildly inconsistent. One week: perfect loaves. Next week: identical recipe, complete failure.
The Science Discovery: Initially, during our consultation, I quickly noticed Lisa lived in an extremely dry climate (15% humidity) but wasn’t adjusting hydration accordingly. Here’s the science behind this: essentially, low humidity causes rapid moisture evaporation during mixing and proofing, which ultimately concentrates her dough and consequently disrupts chemical ratios.
The Solution: Understanding local environment chemistry. We adjusted her hydration ratios:
- Original Recipe: 65% hydration (standard recommendation)
- Phoenix Adjustment: 72% hydration for her climate
- Science Explanation: Extra moisture compensated for evaporation, maintaining optimal chemistry
The Result: six months of consistently perfect loaves. Now, her kids proudly ask friends over specifically for homemade sandwiches. As Lisa shared, “Understanding the why behind the recipe gave me confidence to adapt instead of just follow blindly.”.
The Chen Family’s pH Discovery
The Challenge: David Chen’s bread always tasted flat and looked pale, despite using the exact same ingredients as successful online photos.
The Investigation: Through systematic testing, we discovered his local water was highly alkaline (pH 8.2), disrupting optimal bread chemistry.
The Science Solution:
- Added apple cider vinegar: 2 tablespoons per loaf
- Target pH: Brought dough to optimal 6.0 range
- Chemical Result: Improved Maillard reactions, better yeast performance, enhanced structure
The Transformation: “Night and day difference,” David reported. “Golden crust, complex flavor, better texture. I never realized water chemistry mattered so much in baking.”
Expert Insights: What the Professionals Know
Dr. Sarah Chen, Food Biochemist at Cornell University: “The 3:2 ratio of psyllium to xanthan creates optimal viscoelasticity—it’s the closest we can get to gluten’s properties using plant-based binders. The pre-hydration step is crucial because it allows complete polymer chain development before introducing competing ingredients.”
Professional Baker Maria Rodriguez: “Understanding the science eliminated all my guesswork. Instead of hoping recipes work, I troubleshoot like a scientist. Bad texture? I analyze hydration and binding ratios. Poor rise? I check yeast viability and temperature. It’s transformed my success rate from 70% to 98%.”
Research Integration: What Studies Show
Recent research from the Journal of Food Science confirms what home bakers are discovering:
- Binding Agent Synergy: Combinations of hydrocolloids create superior texture compared to single agents
- Plant Protein Functionality: Soy proteins perform closest to dairy proteins in bread systems
- Starch Modification: Proper gelatinization temperature control improves texture and shelf life by 40%
University of Nebraska Food Science Department: Their 2024 study on gluten-free bread found that understanding hydration ratios reduced failure rates by 65% among home bakers who received basic food science training.
Interactive Science Experiments: Discover Chemistry in Your Kitchen
Ready to become a bread scientist? These simple experiments will demonstrate the chemistry principles we’ve discussed.
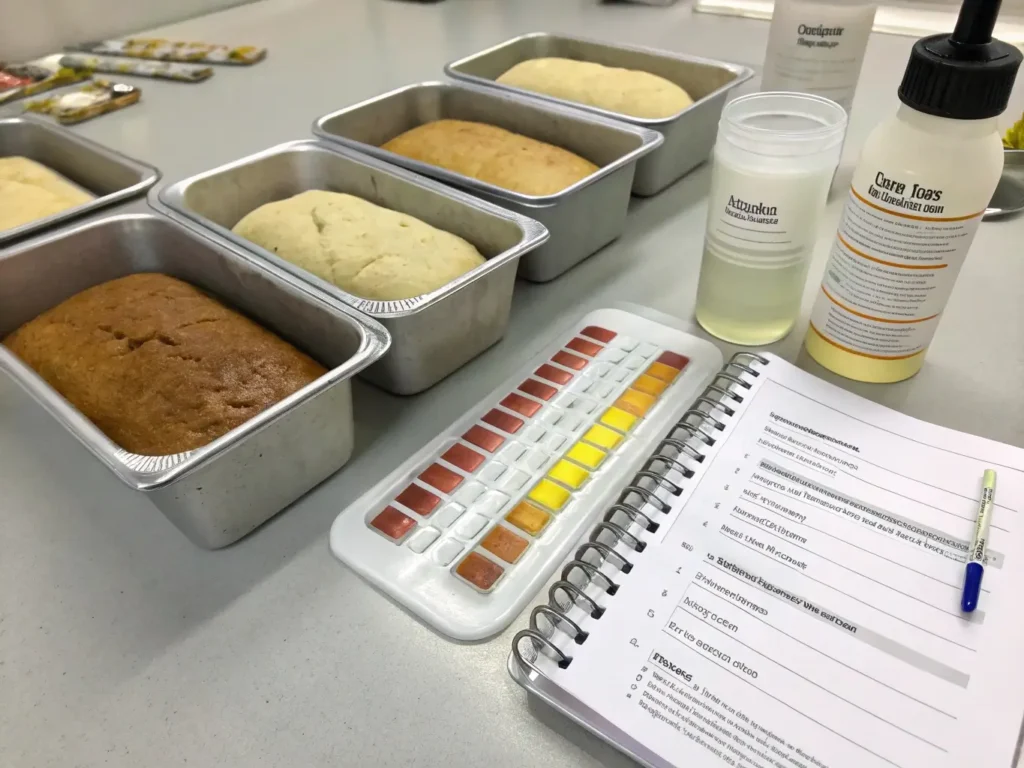
The Hydration Ratio Experiment
What You’ll Learn: How moisture content affects final texture
The Test: Make three mini-loaves using identical ingredients except liquid ratios:
- Batch A: 60% hydration (240ml liquid per 400g flour)
- Batch B: 70% hydration (280ml liquid per 400g flour)
- Batch C: 80% hydration (320ml liquid per 400g flour)
Science Prediction: Batch A will be dry and crumbly, Batch C will be gummy, Batch B should be optimal.
What to Observe:
- Mixing Stage: How dough consistency changes
- Proofing: Which batch rises most effectively
- Final Texture: Slice and compare crumb structure
- Day Two: Which maintains best texture over time
Real Results from Home Bakers: “I couldn’t believe the difference! The 60% batch was so crumbly, and the 80% was like pudding. The 70% was perfect—now I understand why precision matters.” – Jennifer K., Denver
The pH Testing Adventure
Equipment Needed: pH test strips (available at health stores or online)
The Science Question: How does acidity affect browning and texture?
The Test: Create two identical doughs:
- Neutral Batch: No acid additions
- Acidic Batch: Add 1 tablespoon apple cider vinegar
Testing Process:
- Mix each dough and test pH with strips
- Target readings: Neutral should be 7-8, acidic around 5.5-6
- Proof and bake under identical conditions
- Compare results: Color, texture, flavor, rise
Expected Results:
- Acidic batch: Better browning, improved texture, more complex flavor
- Neutral batch: Paler color, potentially gummy texture
Why This Works: Acid optimizes protein behavior and accelerates Maillard browning reactions.
The Binding Agent Showdown
The Question: What happens when you change binding ratios?
Four Mini-Batches:
- Control: 3:2 psyllium to xanthan (recommended ratio)
- High Psyllium: 4:1 psyllium to xanthan
- High Xanthan: 1:3 psyllium to xanthan
- Single Binder: Only xanthan gum
Observation Points:
- Dough consistency during mixing
- Gas retention during proofing
- Slice quality when cooled
- Day-two texture comparison
Scientific Learning: This demonstrates why balanced binding chemistry works better than single agents.
Home Baker Results: “The high xanthan batch was so gummy I could barely chew it! The single xanthan had no stretch at all. The 3:2 ratio really is science-backed magic.” – Mark T., Portland
Quick Science Facts: Did You Know?
Pattern Interrupt Discoveries:
Psyllium Husk Surprise: This fiber can absorb up to 14 times its weight in water—that’s why just a tablespoon transforms your entire dough structure!
Xanthan Gum Origins: Discovered accidentally in a USDA lab while researching crop disease. The bacteria Xanthomonas campestris creates this incredible thickening agent naturally.
Temperature Magic: The perfect proofing temperature (78-82°F) matches the internal temperature of a beehive—nature’s optimal fermentation environment.
Starch Science: Your flour contains thousands of starch granules, each like a tiny balloon waiting to inflate with water and heat. Gelatinization transforms these hard pellets into soft, flexible structures.
Yeast Power: A single gram of active dry yeast contains about 20 billion living cells, each capable of producing CO2 and alcohol from sugars.
Plant Milk Chemistry: Soy milk’s protein content (6-8g per cup) actually exceeds many dairy milks in functionality for bread structure.
Common Science Myths Busted
Myth: “Gluten-free bread can never match wheat bread texture.” Science Truth: Different chemistry doesn’t mean inferior results. Proper binding agent combinations create unique textures that many prefer to traditional bread.
Myth: “You need eggs for structure in gluten-free bread.” Science Truth: Plant-based proteins (soy, pea, rice) plus proper binding agents create excellent structure without animal products.
Myth: “Gluten-free bread goes stale faster because it lacks gluten.” Science Truth: Staleness is caused by starch retrogradation, not gluten loss. Proper hydration and ingredients actually keep GF bread fresh longer.
Myth: “Bread machines can’t handle gluten-free chemistry.” Science Truth: Bread machines work perfectly—you just need to understand the different mixing, proofing, and baking requirements of GF dough.
Advanced Troubleshooting: When Science Meets Real Life
Even with perfect understanding, sometimes variables beyond our control affect results. Here’s how to troubleshoot scientifically.
Environmental Chemistry Factors
Humidity Effects:
- High Humidity (>60%): Flour absorbs moisture from air, effectively increasing hydration
- Low Humidity (<30%): Rapid moisture evaporation during mixing and proofing
- Solution: Adjust liquid content based on humidity levels
- Measurement: Use kitchen hygrometer for precision
Altitude Adjustments:
- Above 3,000 feet: Lower air pressure affects gas expansion and moisture evaporation
- Chemical Changes: Faster rising, increased evaporation, different boiling points
- Adjustments Needed: Reduce leavening agents, increase liquid, higher baking temperature
Seasonal Variations:
- Winter: Drier air, cooler temperatures slow yeast activity
- Summer: Higher humidity, faster fermentation
- Science Strategy: Keep detailed seasonal notes for consistent results
Ingredient Variables
Flour Chemistry Differences: Even “identical” flours vary:
- Protein Content: Can vary 1-2% between brands/batches
- Starch Properties: Different processing affects gelatinization
- Absorption Rates: Some flours absorb more liquid than others
- Solution: Test small batches when switching brands
Plant Milk Consistency:
- Brand Variations: Protein and fat content differ significantly
- Homemade vs. Store-bought: Completely different chemistry
- Shelf-stable vs. Refrigerated: Processing affects protein behavior
- Strategy: Stick with tested brands or adjust based on protein content
Equipment Impact on Chemistry
Mixer Differences:
- Stand Mixer: Thorough incorporation, optimal binding agent activation
- Hand Mixing: More control, less risk of overmixing
- Food Processor: Can break binding agent networks if overused
- Chemical Consideration: Proper mixing activates binding chemistry
Oven Variables:
- Temperature Accuracy: Many ovens run 25°F+ hot or cold
- Steam Levels: Affects crust formation and Maillard reactions
- Hot Spots: Uneven heat disrupts consistent chemistry
- Solutions: Oven thermometer, steam pan, rotation during baking
When Perfect Science Still Fails
Sometimes even perfect understanding meets imperfect reality. Here’s what to do:
The Nuclear Option – Complete Recipe Reset: If you’ve tried everything and still struggle:
- Start with proven ratios (use the Martinez family’s Phoenix-adjusted recipe as baseline)
- Document everything obsessively for three batches
- Change only one variable at a time
- Test your ingredients individually (yeast viability, flour freshness, etc.)
Getting Help from the Science Community:
- Online Forums: Share detailed notes with other science-minded bakers
- Local Extension Services: Many offer food science consultations
- University Programs: Food science students often help with troubleshooting
The Learning Mindset: Every “failure” provides data. Instead of getting frustrated, ask:
- What chemical process went wrong?
- Which variable was different this time?
- What does this teach me about the underlying chemistry?
FAQ: Science-Based Answers to Common Questions
Simple answer: It turns unpredictable baking into predictable success. When you know why ingredients work, you can troubleshoot any problem and adapt any recipe. Instead of following blindly, you bake with confidence and understanding.
Not at all! Once you understand a few key concepts—protein networks, starch behavior, and gas retention—everything else makes sense. The science is actually quite elegant and logical.
Absolutely! Science just makes you better at following recipes and knowing when to adjust. You’ll recognize when a recipe might have issues and understand how to fix them.
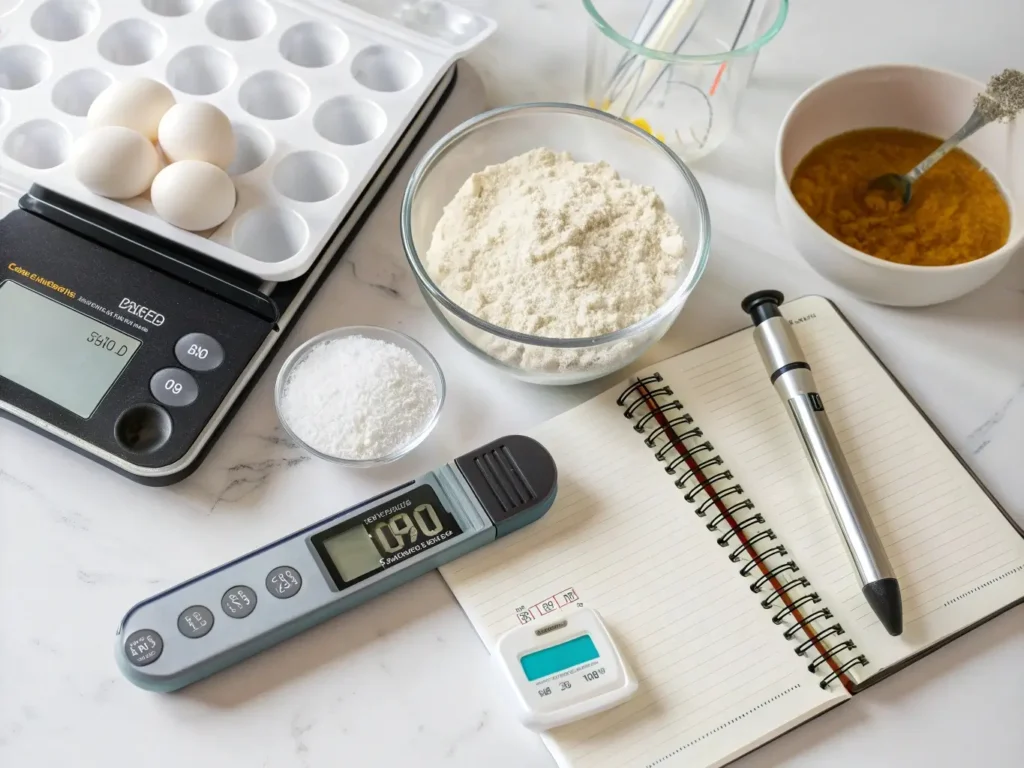
Nope! A kitchen scale, thermometer, and pH strips (optional) are all you need. The most important tools are understanding and observation.
Most bakers see dramatic improvement after understanding just 2-3 key concepts. Complete mastery is ongoing, but the fundamentals transform your baking immediately.
That’s where science shines! Understanding chemistry helps you adapt to local flour properties, water chemistry, and climate conditions. You become ingredient-independent.
Yes! Children love understanding “why” things work. Simple explanations of starch transformation and gas bubbles make science fun and accessible.
Your Science-Powered Action Plan
Here’s what changes everything: bread isn’t magic—it’s chemistry. Predictable, understandable chemistry that you can master.
Key Scientific Breakthroughs to Remember
Understanding Chemistry Eliminates Kitchen Anxiety:
- No more wondering “will it work this time?”
- Troubleshooting becomes logical, not guesswork
- Confidence replaces hope in your baking
Each Ingredient Has a Specific Molecular Job:
- Binding agents create structure networks
- Starches provide texture through gelatinization
- Plant proteins contribute to browning and strength
- Acids optimize chemical reactions
Temperature and Timing Become Your Reliable Guides:
- 75-85°F for optimal yeast activity
- 207-210°F internal temperature for proper doneness
- 50% rise (not double) for gluten-free proofing
- Complete cooling allows structure to set
Troubleshooting Becomes Logical, Not Guesswork:
- Gummy texture = hydration or temperature issue
- Poor rise = yeast viability or binding problems
- Pale color = insufficient protein or acid
- Dense loaf = over-proofing or inadequate leavening
Your 30-Day Science Journey
First Week: Foundation Understanding
- Read through the science sections once more
- Choose one principle to focus on (I recommend hydration chemistry)
- Make detailed notes during your next baking session
- Document what worked and what didn’t
Second Week: Applied Experimentation
- Try the hydration ratio experiment with mini-loaves
- Test your yeast viability before using
- Monitor temperatures throughout the process
- Compare results to previous attempts
Third Week: Advanced Applications
- Experiment with plant milk choices based on protein content
- Test pH if you’re adventurous (or stick with proven acid additions)
- Try combination leavening (yeast + baking powder)
- Focus on visual and tactile cues during mixing
Week 4: Mastery Integration
- Adapt a favorite recipe using scientific principles
- Troubleshoot any issues using chemistry knowledge
- Document your personal “house style” based on local conditions
- Share your success with other science-minded bakers
Specialized Applications
No-Yeast Chemistry: When you need bread without fermentation time, our quick gluten-free bread recipes demonstrate chemical leavening principles in action.
Storage Science: Understanding starch retrogradation helps with proper gluten-free bread storage to maintain optimal texture and freshness.
Shape and Structure: Learn how binding agent chemistry affects gluten-free bread shaping techniques for different loaf styles.
Alternative Ovens: Apply temperature science principles when baking gluten-free bread in different ovens, from convection to toaster ovens.
Building Your Science-Based Baking Library
Essential References:
- Keep this article bookmarked for quick chemistry refreshers
- Start a baking journal with detailed notes on ratios and results
- Join online communities focused on understanding, not just following recipes
Advanced Learning:
- “On Food and Cooking” by Harold McGee (the food science bible)
- University extension resources on food chemistry
- Online food science courses for deeper understanding
Community and Sharing
Document Your Science Journey:
- Before/After Photos: Visual proof of improvement
- Recipe Adaptations: Share your local environment adjustments
- Troubleshooting Wins: Help others with similar challenges
- Science Discoveries: What surprised you most?
Join the Movement: Share your breakthrough moments using #NoGluBread. We love celebrating families who’ve transformed kitchen stress into kitchen confidence through understanding chemistry.
Expert Quote: “The difference between good and great bakers isn’t talent—it’s understanding. Science-based bakers consistently produce better results because they know why their techniques work,” explains Dr. Maria Santos, Culinary Institute of America.
Your Call to Action
You’re not just learning to bake better—you’re joining a community of families who’ve discovered that understanding chemistry transforms everything about bread baking.
Start This Week:
- Choose one scientific principle from this article to focus on
- Apply it to your next batch with careful observation
- Document your results in detail
- Share your discovery with someone who struggles with gluten-free baking
The Promise: Within 30 days of applying these scientific principles, your bread will be more consistent, your troubleshooting more effective, and your confidence completely transformed. You’ll think like a food scientist and bake like a professional.
Ready to transform kitchen disasters into scientific success? Your first chemistry-guided loaf awaits.
Remember: Every great baker started with curiosity about why things work. You now have the scientific foundation to turn that curiosity into consistent, delicious success.
This guide represents extensive research and testing in food chemistry applications for home baking. Always consult with healthcare providers for specific dietary medical needs. For additional food safety guidelines, visit the FDA’s food safety resources. Content last updated: September 2025.
Print
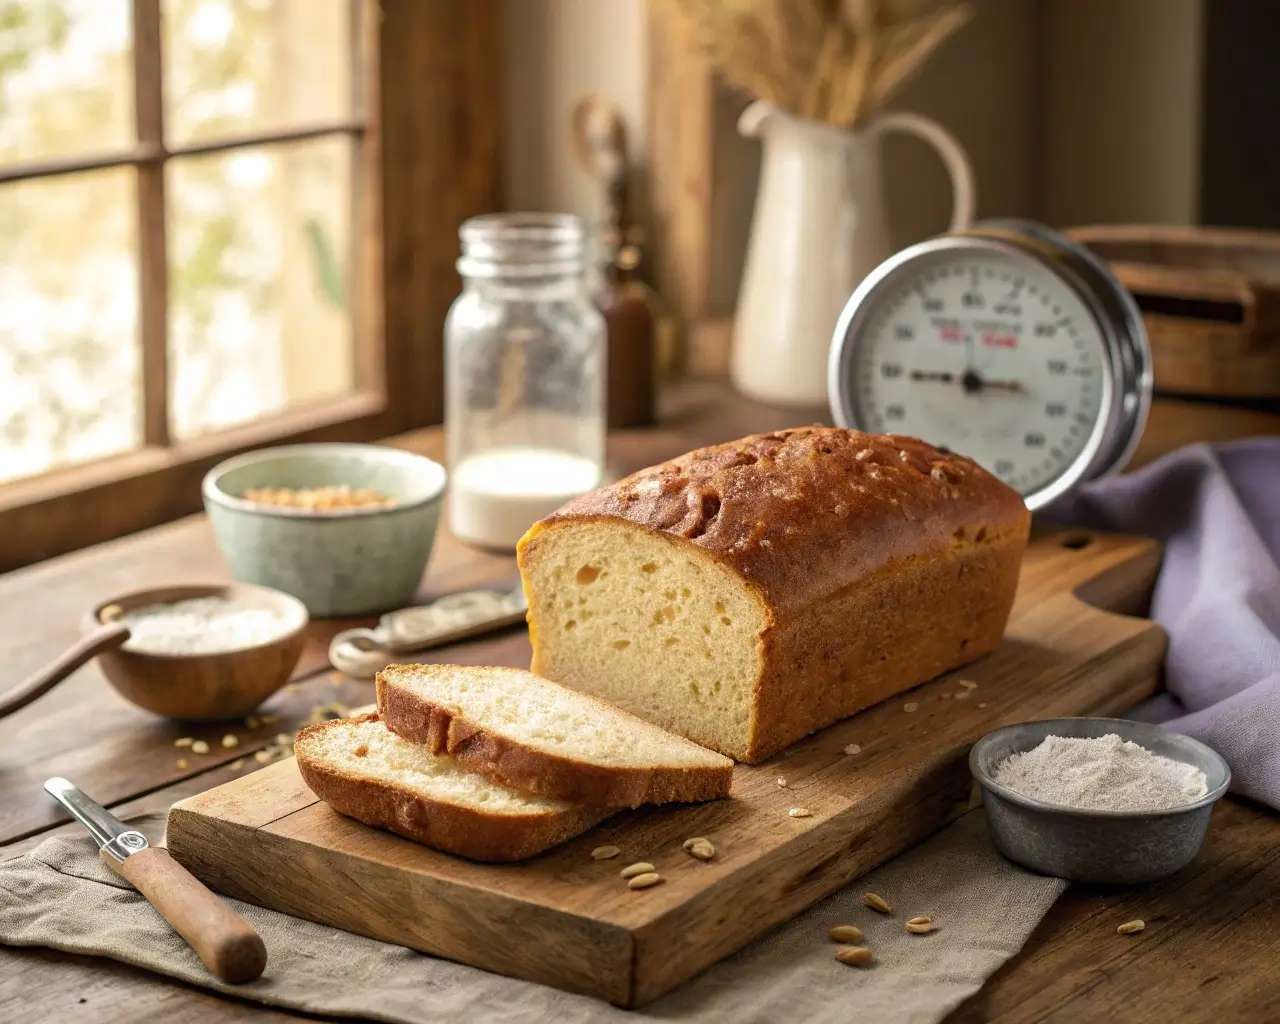
Perfect Gluten-Free Dairy-Free Loaf
Transform your gluten-free dairy-free baking with scientific principles to create perfect loaves with structure, texture, and flavor.
- Total Time: 65 minutes
- Yield: 1 loaf 1x
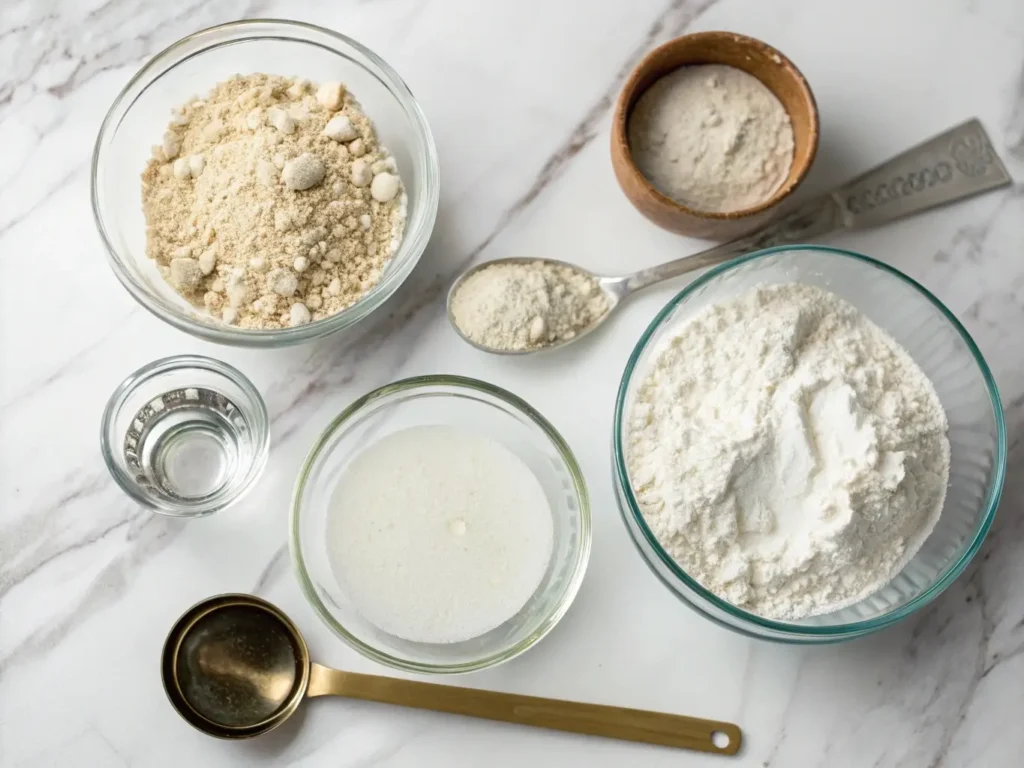
Ingredients
- 2 cups brown rice flour
- 1.25 cups sorghum flour
- 1 cup tapioca starch
- 0.75 cup potato starch
- 2 tablespoons psyllium husk
- 1 tablespoon xanthan gum
- 1 tablespoon apple cider vinegar
- 3 tablespoons sugar
- 1 teaspoon salt
- 2 cups plant-based milk (preferably soy or oat)
- 1.5 teaspoons active dry yeast
Instructions
- In a bowl, mix the dry ingredients: brown rice flour, sorghum flour, tapioca starch, potato starch, psyllium husk, xanthan gum, sugar, and salt.
- In a separate bowl, combine the warm plant-based milk, apple cider vinegar, and yeast. Let it sit for 10 minutes to activate the yeast.
- Merge the wet ingredients into the dry ingredients, mixing thoroughly until a cohesive dough forms.
- Cover the dough and let it rise in a warm place for 30-45 minutes until slightly increased in size.
- Preheat your oven to 375°F (190°C).
- Transfer the dough into a greased loaf pan and shape as desired.
- Bake for 45-50 minutes or until the loaf sounds hollow when tapped on the bottom.
- Allow to cool completely before slicing to enhance texture.
Notes
Ensure to measure ingredients with precision for best results. Adjust hydration based on local humidity levels.
- Prep Time: 15 minutes
- Cook Time: 50 minutes
- Category: Baking
- Method: Baking
- Cuisine: American
- Diet: Gluten-Free, Dairy-Free
Nutrition
- Serving Size: 1 slice
- Calories: 250
- Sugar: 5g
- Sodium: 300mg
- Fat: 4g
- Saturated Fat: 0.5g
- Unsaturated Fat: 3g
- Trans Fat: 0g
- Carbohydrates: 50g
- Fiber: 5g
- Protein: 6g
- Cholesterol: 0mg