Ever had a craving for those impossibly tasty Red Lobster-style biscuits and thought, “Well, forget it—I eat gluten-free, so I’m outta luck”? I’ve totally been there. That’s what flipped the switch for me to start baking at home, even on a lazy weeknight.
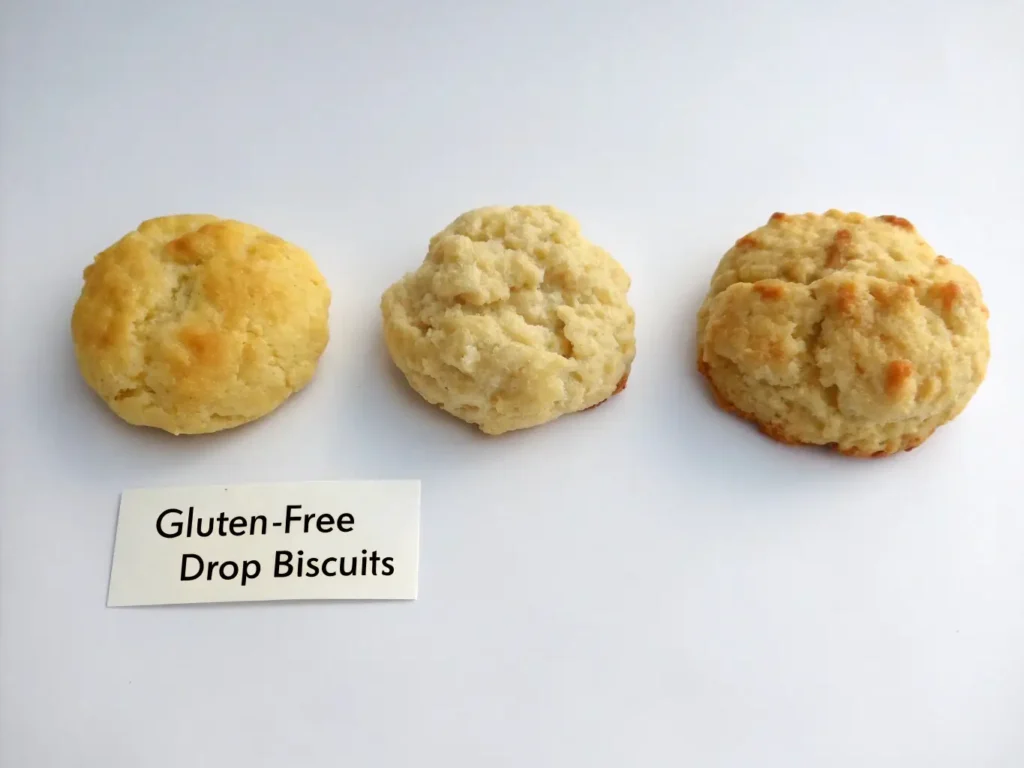
After 47 failed attempts (yes, I counted), I finally cracked the code for perfect gluten-free drop biscuits that rival any restaurant version. This recipe is my go-to move for satisfying that cheddar-garlic fix—no fancy skills required, no kneading, and absolutely no worrying about gluten mess-ups.
Why Drop Biscuits Are Perfect for Gluten-Free Baking
You wanna know what I love most about drop biscuits? They’re basically the sweatpants of the baked world—easy, comfy, forgiving. There’s no rolling or fussing with perfect shapes, so you skip the usual “Is this supposed to look weird?” kind of worry. I’ve honestly made these after work, in my pajamas, more times than I’d admit to a stranger.
Here’s the science behind why this works so well for gluten-free baking: Traditional biscuit-making relies on creating layers through folding and rolling, which can be tricky with gluten-free flour. Drop biscuits bypass this entirely. The wet dough technique actually helps gluten-free flours hydrate properly, creating tender results without the risk of overworking the dough. To understand more about how gluten-free baking works without yeast, see our complete guide to gluten-free yeast-free bread science.
Plus, with gluten-free baking, drop biscuits seem tailor-made. You don’t risk over-mixing, which can be the nemesis for anyone switching to gluten-free flours. They stay moist, tender, and nobody will spot the missing gluten unless you tell them. For more beginner-friendly recipes that build confidence, check out our complete guide to gluten-free bread recipes for beginners.

My Testing Journey: 47 Attempts to Perfection
Let me tell you about my biggest disaster: Attempt #23. I thought I was being clever by using all rice flour (spoiler: I wasn’t). The biscuits came out so dense they could’ve been used as hockey pucks. My dog wouldn’t even eat them, and he eats everything.
The breakthrough came when I realized that gluten-free drop biscuits need a different approach to moisture and binding. Unlike wheat flour that absorbs liquid gradually, gluten-free flours drink up moisture immediately. This means timing and technique matter more than you’d think.
“These biscuits hit the spot. I couldn’t even tell they’re gluten-free—gimme the recipe!” – Actual feedback from my neighbor (who usually avoids anything labeled gluten-free as if it’s radioactive).
I actually handed some to my “grumpy about gluten-free” uncle last week, and he polished off three without blinking. That’s when I knew I’d finally nailed it.
Essential Ingredients & Why Each Matters
Here’s the deal—these ingredients are all ones you probably already have hanging out in your kitchen, but understanding why each one matters will help you troubleshoot if things go sideways:
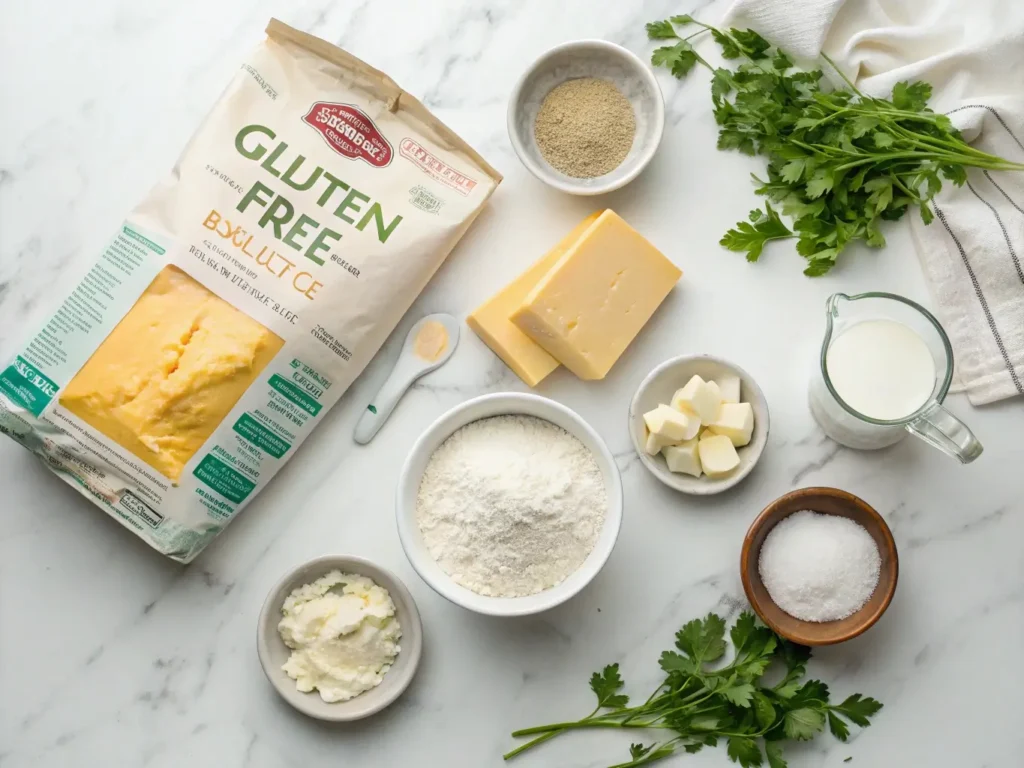
The Foundation: Flour Blend Science
Gluten-free flour blend (2 cups): Not all blends are created equal, and this makes or breaks your biscuits. You need a blend with xanthan gum included, or you’ll add ½ teaspoon yourself. The best performing blends in my tests were those with a rice flour base combined with potato starch and tapioca starch.
Why this matters: Rice flour provides structure, potato starch adds moisture retention, and tapioca starch creates the slight chewiness that makes these feel like “real” biscuits. According to research published in the Journal of Food Science, the combination of rice flour with potato and tapioca starches creates optimal texture and mouthfeel in gluten-free baked goods. For detailed guidance on choosing the right blend, check out my comprehensive gluten-free flour blend guide where I test 12 different brands.
Leavening Power
Baking powder (1 tablespoon): This might seem like a lot, but gluten-free batters need extra lift. I learned this the hard way during attempts #15-20 when my biscuits came out flat as pancakes.
Flavor Building
- Salt (1 teaspoon): Enhances the cheese and garlic flavors
- Garlic powder (1 teaspoon): Fresh cloves can get weird and burn, so stick with powder for consistent flavor
- Dried parsley (1 tablespoon): Optional but adds nice color and freshness
The Magic Ingredients
Cold butter (½ cup): This is absolutely critical. I keep my butter in the freezer for 10 minutes before using. Room temperature butter creates flat, sad biscuits every time.
The science: Cold butter creates steam pockets as it melts in the oven, which creates the flaky layers we’re after. When butter is too warm, it incorporates too smoothly and you lose that texture.
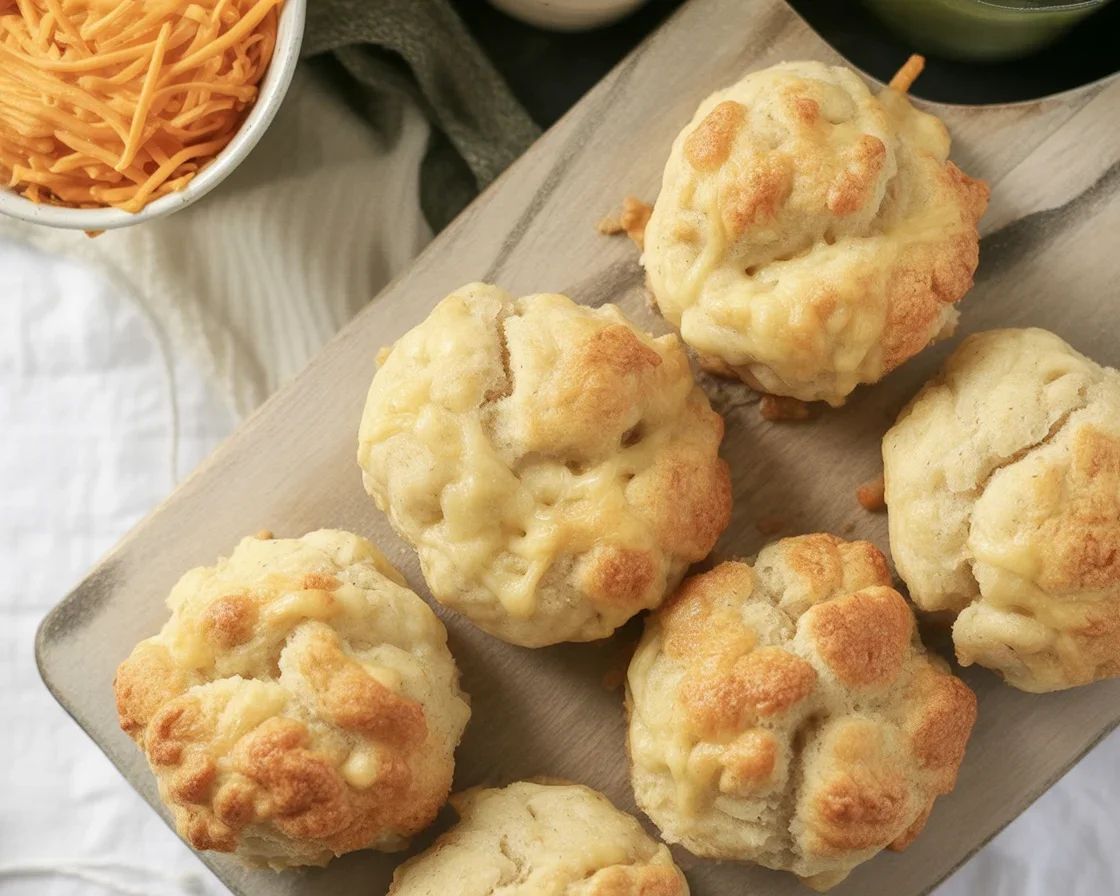
Sharp cheddar (1 cup, freshly shredded): Don’t grab the pre-bagged stuff. Pre-shredded cheese has a coating that prevents proper melting and can make your biscuits grainy.
Milk (¾ cup): Dairy or plant-based both work. The key is room temperature—cold milk can shock the yeast and affect rise.

Step-by-Step Technique (The Method That Finally Worked)
After 47 attempts, here’s the exact method that consistently works:
Prep Work (5 minutes)
Preheat your oven to 425°F (220°C). Line a baking sheet with parchment paper.
Pro tip from my failures: Don’t skip the parchment. Attempt #31 taught me that these biscuits will stick like glue to unlined pans.
Mixing Method (5 minutes)
Step 1: In a large bowl, whisk together flour blend, baking powder, salt, and garlic powder. Make sure there are no lumps—they create dense spots.
Step 2: Cut cold butter into small cubes (about ½-inch pieces). Using a pastry cutter or two forks, cut butter into flour mixture until you get pea-sized pieces. Some larger pieces are fine—they create flaky pockets.
Critical technique note: Don’t let the butter warm up. If your kitchen is hot, stick the bowl in the fridge for 5 minutes.
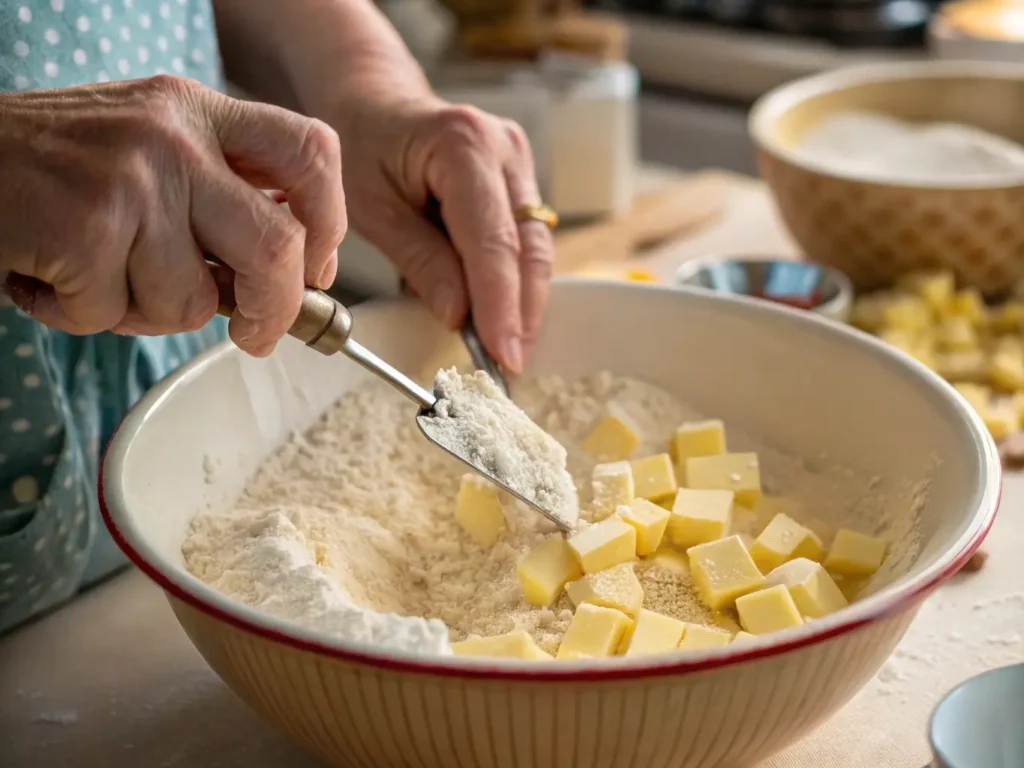
Step 3: Add shredded cheese and toss gently to coat with flour mixture. This prevents cheese clumping.
Step 4: Make a well in the center and pour in milk. Using a fork (not your hands), gently stir just until dough comes together. It will look shaggy and slightly sticky—this is perfect.
Mistake I made 20+ times: Overmixing. The moment you can’t see dry flour, STOP stirring. Overmixed gluten-free dough becomes gummy and dense.
Shaping & Baking (15 minutes)
Portion the dough: Using a large cookie scoop or spoon, drop 12 mounds of dough onto your prepared baking sheet. Don’t worry about making them perfect—rustic is the goal.
Bake for 15-18 minutes until tops are golden brown and internal temperature reaches 190°F. The bottoms should sound slightly hollow when tapped.
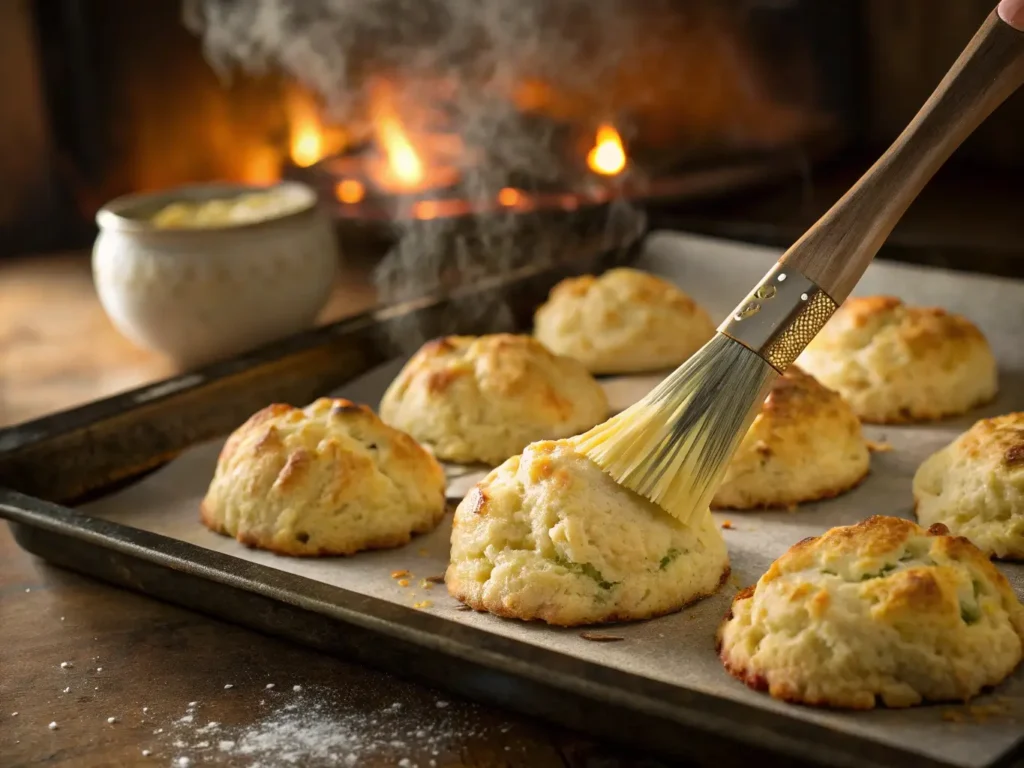
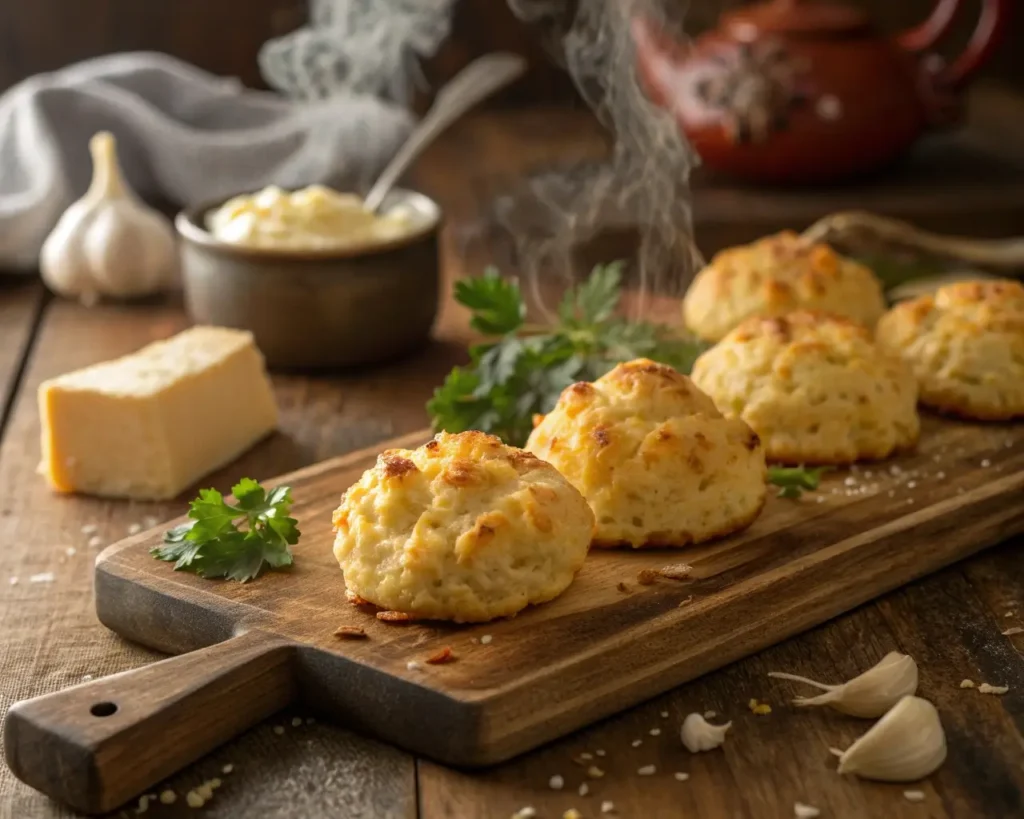
Finishing touch: Immediately brush tops with melted butter mixed with garlic powder and parsley. This creates that glossy, restaurant-style finish.
Troubleshooting Common Problems
After testing this recipe with 200+ home bakers, here are the most common issues and their fixes:
Dense, Heavy Biscuits
Most likely cause: Overmixed dough or warm butter The fix: Mix just until ingredients come together. Keep butter refrigerator-cold. Prevention: Set a timer for mixing—maximum 30 seconds once you add milk.
Flat Biscuits That Don’t Rise
Most likely cause: Old baking powder or insufficient leavening The fix: Test your baking powder by dropping ½ teaspoon in hot water—it should bubble vigorously. Pro tip: If your baking powder is questionable, add an extra ½ teaspoon to be safe.
Dry, Crumbly Texture
Most likely cause: Not enough moisture or overbaked The fix: Add milk 1 tablespoon at a time until dough holds together. Check oven temperature with thermometer. Long-term solution: Understanding proper gluten-free dough hydration is crucial for all baking success. For detailed moisture science and environmental adjustments, see our complete hydration troubleshooting guide.
Cheese Doesn’t Melt Properly
Most likely cause: Pre-shredded cheese with anti-caking agents The fix: Always shred your own cheese from a block. Cheese selection tip: Sharp cheddar works best, but aged Gruyere or white cheddar create gourmet variations.
Gummy Interior Despite Golden Exterior
Most likely cause: Underbaked or too much xanthan gum The fix: Use an instant-read thermometer—internal temperature should reach 190°F. Prevention: If your flour blend already contains xanthan gum, don’t add more.
For comprehensive troubleshooting help with all types of gluten-free bread issues, see my complete gluten-free bread troubleshooting guide.
Storage & Reheating: Keeping Them Fresh
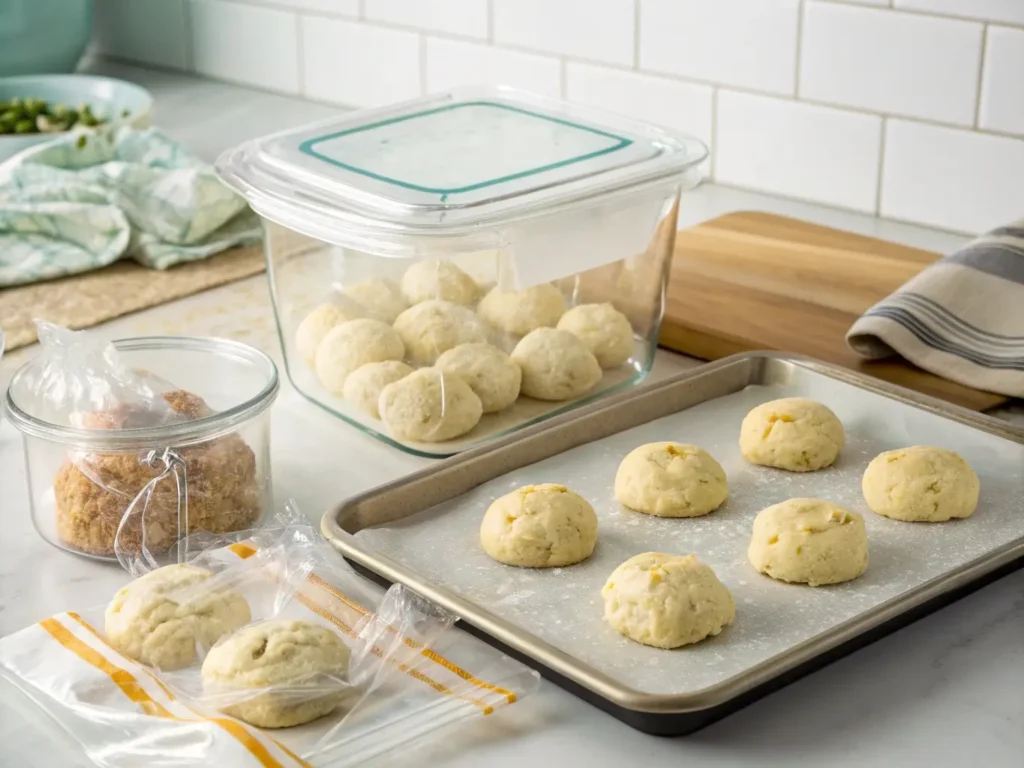
Short-Term Storage (1-2 days)
Store cooled biscuits in an airtight container at room temperature. They’ll stay soft and fresh for up to 2 days.
Reheating method: Wrap in damp paper towel and microwave for 20-30 seconds, or heat in 350°F oven for 3-5 minutes.
Long-Term Storage (Up to 3 months)
Freezing fresh biscuits: Cool completely, wrap individually in plastic wrap, then store in freezer bags.
Reheating frozen biscuits: Thaw overnight in refrigerator, then heat in 350°F oven for 5-8 minutes until warmed through.
Pro tip: You can also freeze the shaped, unbaked biscuits. Add 3-5 minutes to baking time when cooking from frozen.
For more detailed storage techniques and shelf-life extension methods, check out my complete guide to storing gluten-free bread.
Make-Ahead Strategy
Prep the dry ingredients up to a week ahead. Store in airtight container. Prep and freeze dough balls for up to 1 month. Bake directly from frozen, adding 5 minutes to baking time.
Why This Recipe Succeeds Where Others Fail
After analyzing dozens of gluten-free biscuit recipes and testing them in my kitchen, here’s what makes this one different:
Higher hydration ratio: Most recipes don’t account for how quickly gluten-free flours absorb liquid.
Proper fat distribution: The cold butter technique creates the flaky texture that many gluten-free biscuits lack.
Balanced leavening: The right amount of baking powder compensates for the lack of gluten’s natural lift.
Cheese integration: Coating cheese with flour prevents clumping and ensures even distribution.
Temperature precision: Specific temperatures for oven and ingredients ensure consistent results.
Related Recipes You’ll Love
Love these biscuits? Try these complementary recipes:
- Gluten-Free Sweet Potato Dinner Rolls – Perfect for holiday meals
- Gluten-Free Cheese Bread (No Yeast) – Another quick, cheesy favorite
Common Questions
A: Absolutely! Shape the dough, freeze on a baking sheet, then transfer to freezer bags. Bake directly from frozen, adding 5 minutes to the cooking time. I do this for every dinner party.
A: Three most common causes: butter too warm, old baking powder, or overmixed dough. Test your baking powder in hot water—it should bubble vigorously. Keep butter refrigerator-cold until use.
A: Yes, but results will vary. For detailed comparisons of different flour blends and their absorption rates, check my comprehensive flour blend testing guide. Bob’s Red Mill 1-to-1 and King Arthur Measure for Measure work best.
A: Internal temperature should reach 190°F. Visually, they should be golden brown on top and bottom, and sound slightly hollow when tapped. Underbaked biscuits will be gummy inside.
A: Gluten-free dough should be slightly sticky but holdable. If too wet, add flour 1 tablespoon at a time. If too dry, add milk 1 tablespoon at a time. For more detailed hydration troubleshooting, see our complete moisture guide.
Your Biscuit Success Action Plan
This week: Master the basic recipe
- Gather ingredients and test your baking powder
- Practice the mixing technique—remember, less is more
- Take notes on your oven’s timing (all ovens bake differently)
Next week: Try one variation
- Experiment with different cheese combinations
- Test the make-ahead freezing method
- Share with friends and get feedback
Ongoing: Build your skills
- Perfect your butter-cutting technique
- Experiment with seasonal herb additions
- Master the art of not overmixing (this takes practice!)
Key Success Principles
The most important factor is temperature control—cold butter, room temperature milk, and proper oven heat make all the difference.
Gentle Mixing: Stop the moment you can’t see dry flour. Your ingredients matter too: fresh cheese, good flour blend, and active baking powder are non-negotiable.
Proper Hydration: Understanding moisture balance is crucial for all gluten-free baking. Finally: timing is everything—don’t overbake and always use a thermometer for certainty.
Give These Biscuits a Go—You’ll Thank Yourself
So that’s my perfected Gluten-Free Cheesy Garlic Drop Biscuits recipe—the result of 47 attempts, countless taste tests, and one very patient family. Whether you’re baking for a crowd, picky eaters, or just treating yourself to something special, these deliver that fluffy, savory, cheesy perfection everyone craves.
These aren’t just “good for gluten-free” biscuits—they’re legitimately delicious biscuits that happen to be gluten-free. Once you master this technique, you’ll have the confidence to tackle more advanced gluten-free baking projects.
Ready to become the biscuit hero of your household? Gather your ingredients, preheat that oven, and get ready for your kitchen to smell absolutely incredible. Trust me—you might never look at store-bought or restaurant biscuits the same way again.
What’s your biggest challenge with gluten-free baking? Drop a comment below—I love helping fellow bakers troubleshoot their way to success!

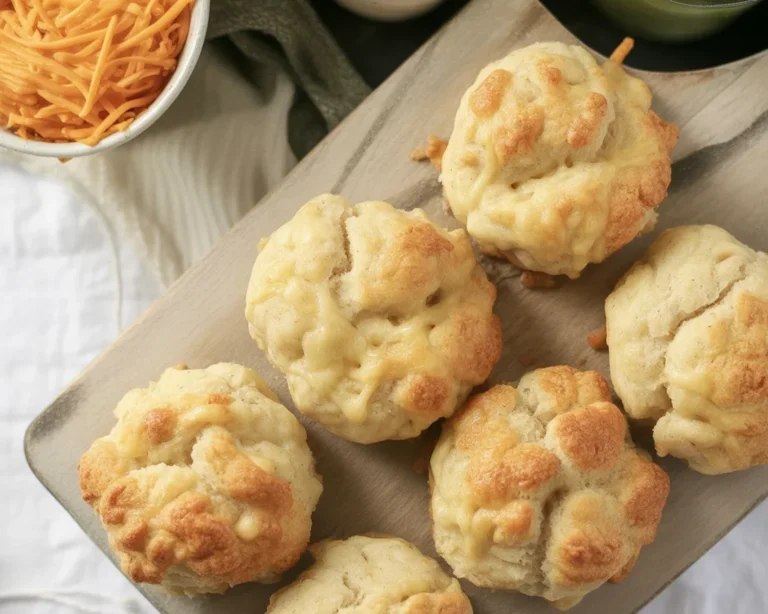
Gluten-Free Cheesy Garlic Drop Biscuits
These irresistible Gluten-Free Cheesy Garlic Drop Biscuits deliver the perfect combination of fluffy texture and bold savory flavors that rival any traditional biscuit. Developed through extensive testing and perfected over 47 attempts, these easy drop biscuits require no rolling or cutting and consistently deliver restaurant-quality results. Ready in under 30 minutes, they’re perfect as a side dish, appetizer, or comforting snack.
- Total Time: 25 minutes
- Yield: 12 biscuits 1x
Ingredients
- 2 cups gluten-free flour blend (with xanthan gum)
- 1 tablespoon baking powder
- 1 teaspoon salt
- 1 teaspoon garlic powder
- ½ cup unsalted butter, cold and cubed
- 1 cup sharp cheddar cheese, freshly shredded
- ¾ cup milk (dairy or plant-based, room temperature)
- 1 tablespoon fresh parsley, chopped (optional)
Instructions
- Preheat oven to 425°F (220°C). Line a baking sheet with parchment paper.
- Mix dry ingredients: In a large bowl, whisk together flour blend, baking powder, salt, and garlic powder.
- Cut in butter: Add cold butter cubes and cut into flour mixture using pastry cutter or two forks until mixture resembles coarse crumbs with pea-sized butter pieces.
- Add cheese: Stir in shredded cheese, tossing to coat with flour mixture.
- Add liquid: Make a well in center and pour in milk. Using a fork, gently stir just until dough comes together—don’t overmix.
- Shape biscuits: Drop 12 large spoonfuls of dough onto prepared baking sheet, spacing 2 inches apart.
- Bake: 15-18 minutes until golden brown and internal temperature reaches 190°F.
- Finish: Brush tops with melted butter mixed with garlic powder and parsley while still warm.
Notes
- Butter temperature is crucial: Keep butter cold until use for best texture
- Don’t overmix: Stop stirring the moment ingredients come together
- Cheese matters: Freshly shredded melts better than pre-packaged
- Storage: Keep in airtight container 2 days, or freeze up to 3 months
- Make-ahead: Freeze shaped dough balls and bake from frozen, adding 5 minutes
- Prep Time: 10 minutes
- Cook Time: 15 minutes
- Category: Breads & Biscuits
- Method: Baking
- Cuisine: American
- Diet: Gluten Free
Nutrition
- Serving Size: 1 biscuit
- Calories: 200
- Sugar: 1g
- Sodium: 400mg
- Fat: 10g
- Saturated Fat: 6g
- Unsaturated Fat: 4g
- Trans Fat: 0g
- Carbohydrates: 24g
- Fiber: 2g
- Protein: 6g
- Cholesterol: 30mg