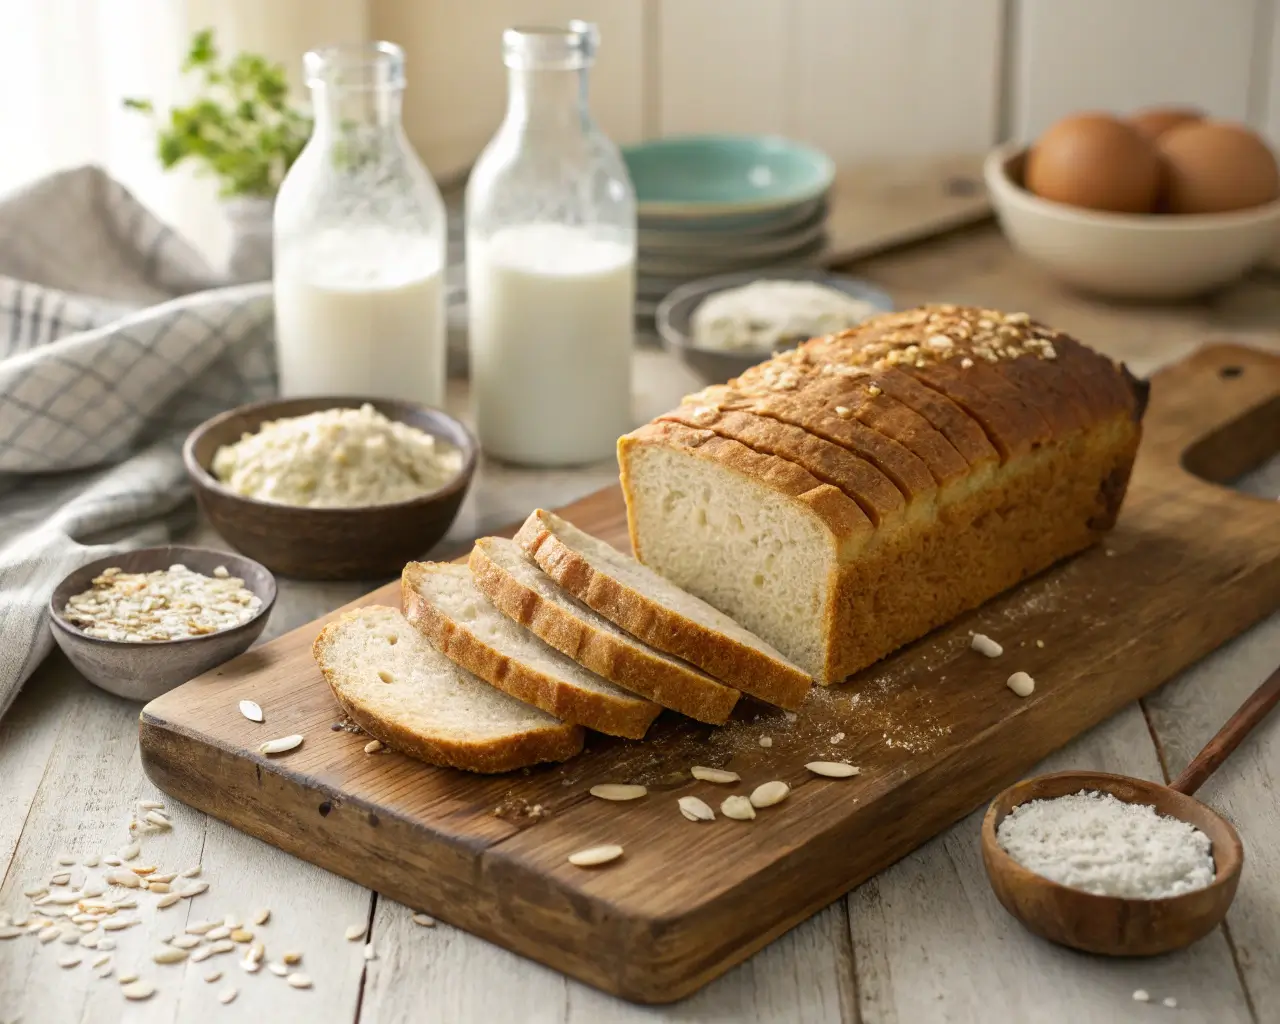
Three years ago, I stood in the baking aisle overwhelmed by choices, holding my daughter’s hand while she asked why we couldn’t just buy regular bread anymore. That day, I promised her we’d figure out how to make gluten-free dairy-free bread that tasted like the real thing—it just took 47 failed loaves to get there.
After spending what felt like a small fortune on flours that turned my bread into expensive doorstops, I learned that success isn’t about buying every specialty ingredient—it’s about understanding how a few key players work together. The heartbreak of dense, crumbly loaves that fell apart at first bite taught me more about ingredient behavior than any cookbook ever did.
If you’ve ever spent $30 on specialty flours only to produce an inedible brick, or stared at rows of unfamiliar plant milks wondering which ones will actually work, I understand that frustration completely. Navigating both gluten-free and dairy-free baking can feel overwhelming, but the truth is, you don’t need a pantry full of exotic ingredients—you need the right foundation.
This guide will help you understand which flours create structure, which plant milks enhance texture, and how to combine them for bread that your family will actually ask for seconds of. We’ll explore budget-friendly options, storage tips, and troubleshooting strategies that’ll save you both money and heartache.
Understanding Gluten-Free Flour Fundamentals
Here’s what I wish someone had told me on day one: gluten-free flours behave completely differently than wheat flour, and dairy-free baking adds another layer of complexity that most recipes don’t address.
How Gluten-Free Flours Behave Differently
Traditional wheat bread relies on gluten proteins to create that elastic, stretchy network that traps air and gives bread its structure. When you remove gluten, you’re essentially taking away the architectural foundation of bread. What I discovered after months of trial and error is that successful gluten-free, dairy-free bread requires rebuilding that structure from scratch.
Protein content varies dramatically between gluten-free flours. Rice flour contains about 6-7% protein, while almond flour can have up to 21%. This isn’t just a nutrition label detail—it directly affects how your bread rises, holds together, and tastes. Recent research on gluten-free flour properties shows that higher protein flours create more structure but can also make bread dense if not balanced properly.
Moisture absorption is another game-changer that nobody warns you about. Coconut flour absorbs liquid like a sponge—up to six times its weight in liquid—while rice flour needs much less. I learned this the hard way when my first coconut flour loaf turned into what my family lovingly called a “coconut hockey puck.”
The key insight: Instead of trying to make gluten-free flour behave like wheat flour, you need to work with its unique properties and build structure through combination and technique. For beginners looking for tested recipes, our gluten-free bread recipes for beginners guide provides foolproof starting points.
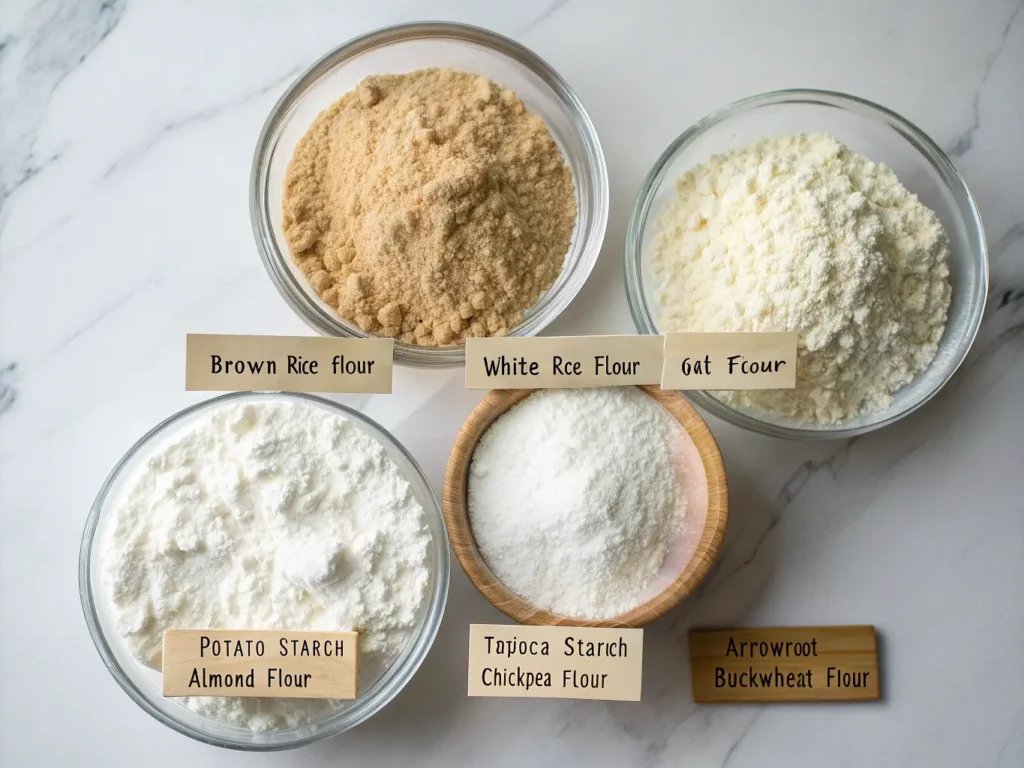
The Four Essential Flour Categories
After testing dozens of combinations, I’ve organized gluten-free flours into four essential categories that work together like a team:
Base Flours (40-50% of your blend): These provide structure and bulk without overwhelming flavor. Brown rice flour is my go-to here—mild, reliable, and affordable. White rice flour creates lighter texture but less nutrition. Oat flour (make sure it’s certified gluten-free) adds natural sweetness and helps bind ingredients together.
Starch Flours (20-30% of your blend): These create the tender, bread-like texture we’re craving. Potato starch is magic for moisture retention and creates that satisfying chew. Tapioca starch adds elasticity and helps ingredients stick together. Arrowroot starch is gentler on digestion if that’s a concern for your family.
Protein Flours (15-25% of your blend): These add richness, nutrition, and binding power. Almond flour creates incredibly moist, tender bread but can be pricey. Chickpea flour is budget-friendly and protein-packed but has a distinctive taste that some love and others find overwhelming.
Specialty Flours (5-15% of your blend): These add character and nutrition without dominating. Teff flour brings a subtle molasses-like flavor and complete protein. Buckwheat flour (despite its name, it’s gluten-free) adds earthy, nutty notes that work beautifully in heartier breads.
Binding Agents and Their Roles
This is where many bakers get stuck, and honestly, it’s where I made my biggest mistakes early on. Scientific studies on gluten-free bread technology confirm that binding agents replace gluten’s job, but they each work differently.
Xanthan gum is the most common choice—a little goes a long way. Too much creates gummy, unpleasant texture (trust me on this one). Start with 1 teaspoon per cup of flour blend.
Psyllium husk powder is my secret weapon for bread specifically. It creates incredible elasticity and helps trap air for better rise. Unlike whole psyllium husks, the powder integrates smoothly without creating weird texture.
Ground flaxseed and chia seeds provide natural binding plus omega-3 fatty acids and fiber. They work especially well in heartier, seeded breads.
The breakthrough moment came when I realized you can combine binding agents for better results than using just one. Understanding xanthan gum in gluten-free bread is crucial for achieving proper texture and structure.
Top Gluten-Free Flour Options for Bread Making
Let me walk you through the flours that have consistently delivered results in my kitchen, along with the ones that taught me expensive lessons.
Single Flours: The Good, The Challenging, and The Surprising
Brown Rice Flour: The Reliable Foundation This became my best friend for good reason. It has a mild, slightly nutty flavor that doesn’t compete with other ingredients. The protein content (6-7%) provides decent structure without heaviness. Cost-wise, buying from Asian markets often saves 50% compared to health food stores.
Best for: Daily sandwich bread, base for most blends
Watch out for: Can be gritty if not finely ground
Budget tip: Buy in 5-10 pound bags for significant savings
Almond Flour: The Moisture Master Nothing creates tender, moist bread quite like almond flour. The high fat content (about 50%) means your bread stays fresh longer and tastes incredibly rich. My family’s favorite sandwich bread uses 25% almond flour for that bakery-quality texture.
Best for: Rich sandwich breads, sweet breads
Watch out for: Expensive—budget accordingly
Storage tip: Keep refrigerated to prevent rancidity
Coconut Flour: The Absorption Challenge I have a love-hate relationship with coconut flour. When used correctly (5-10% of total blend), it adds subtle sweetness and incredible nutrition. When overdone, it creates dense, dry results that taste like coconut sawdust.
Best for: Adding nutrition and subtle sweetness
Watch out for: Absorbs 6x its weight in liquid—adjust recipes accordingly
Success ratio: Never more than 10% of total flour blend for bread
Oat Flour: The Natural Sweetener Certified gluten-free oat flour brings natural sweetness and excellent binding properties. I often use it as 20-30% of my blend for sandwich bread. You can make your own by grinding certified GF oats, but store-bought is more consistent.
Best for: Family-friendly bread with subtle sweetness
Watch out for: Ensure certified gluten-free labeling
Pro tip: Toast oats before grinding for deeper flavor
Specialty Flours for Enhanced Nutrition
Teff Flour: The Complete Protein This tiny ancient grain packs serious nutritional punch—complete protein, iron, and calcium. The flavor is mild with subtle molasses notes. I use 10-15% in my heartier bread blends.
Best for: Nutritious family bread, slightly sweet applications
Cost reality: More expensive but worth it nutritionally
Storage: Refrigerate for freshness—high oil content
Chickpea Flour: The Protein Powerhouse At 22% protein, chickpea flour creates incredibly satisfying bread. The flavor is distinctive—earthy and slightly beany—so I limit it to 15% of total blend. Some family members love it; others need time to adjust.
Best for: High-protein needs, savory applications
Flavor tip: Toast before using to mellow the taste
Budget win: Often cheaper per pound than almond flour
Starch Flours for Texture Perfection
Potato Starch: The Moisture Magnet This is my secret for bread that stays soft for days. Potato starch holds onto moisture like nothing else I’ve tested. I use it as 15-20% of my blend for tender, bakery-quality texture.
Best for: Soft sandwich bread, extending freshness
Not the same as: Potato flour (which is much heavier)
Storage: Cool, dry place—clumps easily in humidity
Tapioca Starch: The Chew Creator When you want that satisfying bread chew, tapioca starch delivers. It creates elasticity and helps hold everything together. Too much makes bread gummy, so I stick to 10-15% of total blend.
Best for: Artisan-style bread, pizza dough
Heat note: Becomes stringy when overheated
Alternative names: Also called tapioca flour—same thing
Creating the Perfect Flour Blend Formulations
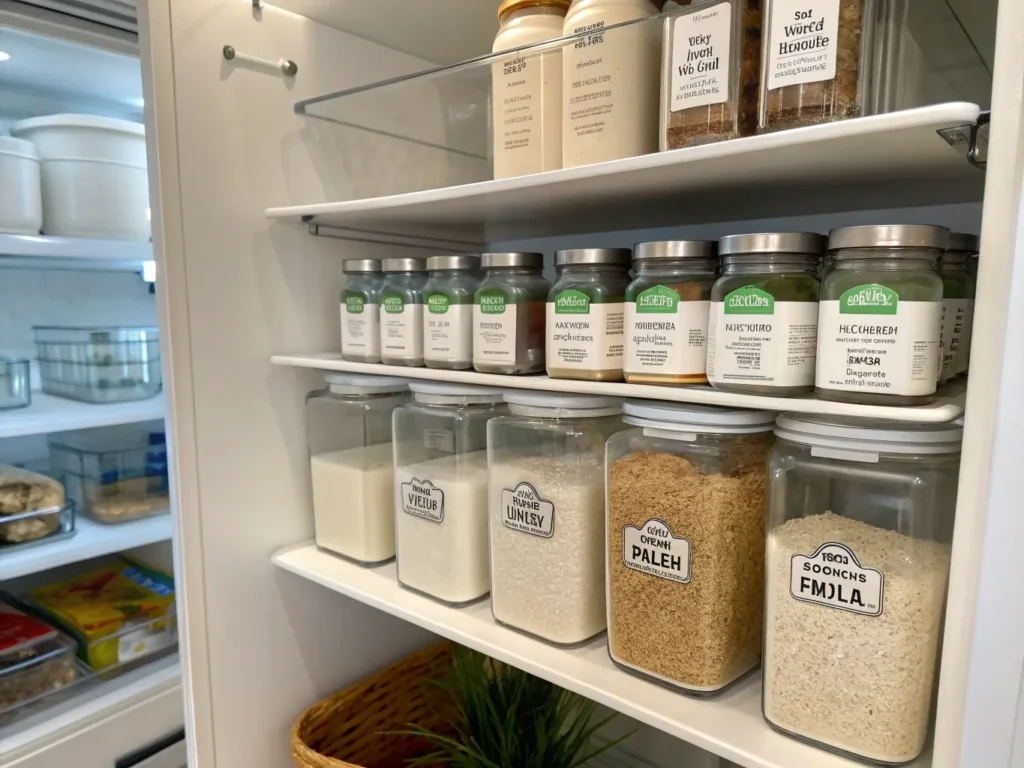
After two years of testing, I’ve developed three go-to blends that work consistently. I keep them pre-mixed in labeled jars for stress-free weeknight baking.
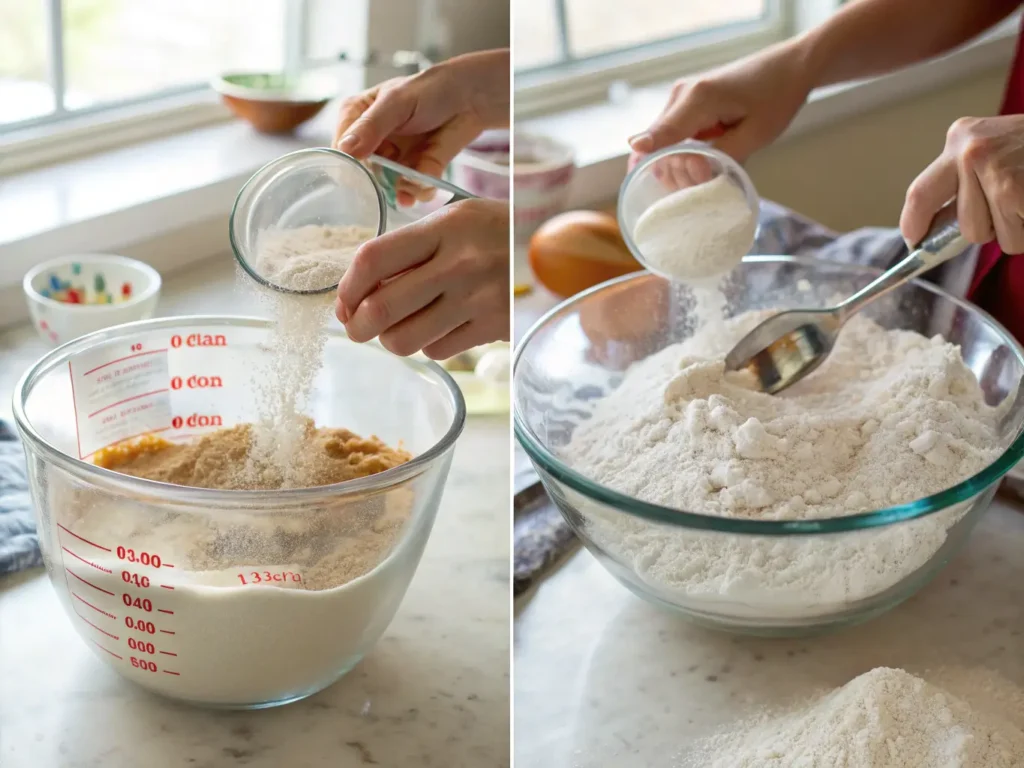
The Master Blend Formula
This is my everyday bread blend that works for sandwiches, toast, and basic family needs:
- 40% Brown rice flour (structure and mild flavor)
- 20% Potato starch (moisture and tenderness)
- 15% Almond flour (richness and protein)
- 10% Tapioca starch (chew and binding)
- 10% Oat flour (sweetness and binding)
- 5% Teff flour (nutrition and depth)
- 1 tsp xanthan gum per cup (structure)
- 1 tbsp psyllium husk powder per 3 cups (elasticity)
This combination creates bread that actually tastes like bread—not like a science experiment. For more specialized techniques, explore our comprehensive artisan gluten-free bread guide for advanced methods.
Specialty Blend Variations
Budget-Friendly Blend (Under $3 per loaf):
- 50% Brown rice flour
- 25% Potato starch
- 15% Tapioca starch
- 10% Oat flour
- Standard binding agents
Result: Light, tender bread without premium ingredients
High-Protein Blend (For active families):
- 30% Brown rice flour
- 25% Almond flour
- 20% Chickpea flour
- 15% Potato starch
- 10% Tapioca starch
- Standard binding agents
Result: Satisfying, protein-rich bread that keeps hunger at bay
Ancient Grain Blend (Maximum nutrition):
- 35% Brown rice flour
- 20% Teff flour
- 15% Sorghum flour
- 15% Potato starch
- 10% Tapioca starch
- 5% Millet flour
- Standard binding agents
Result: Complex flavors and complete nutrition profile
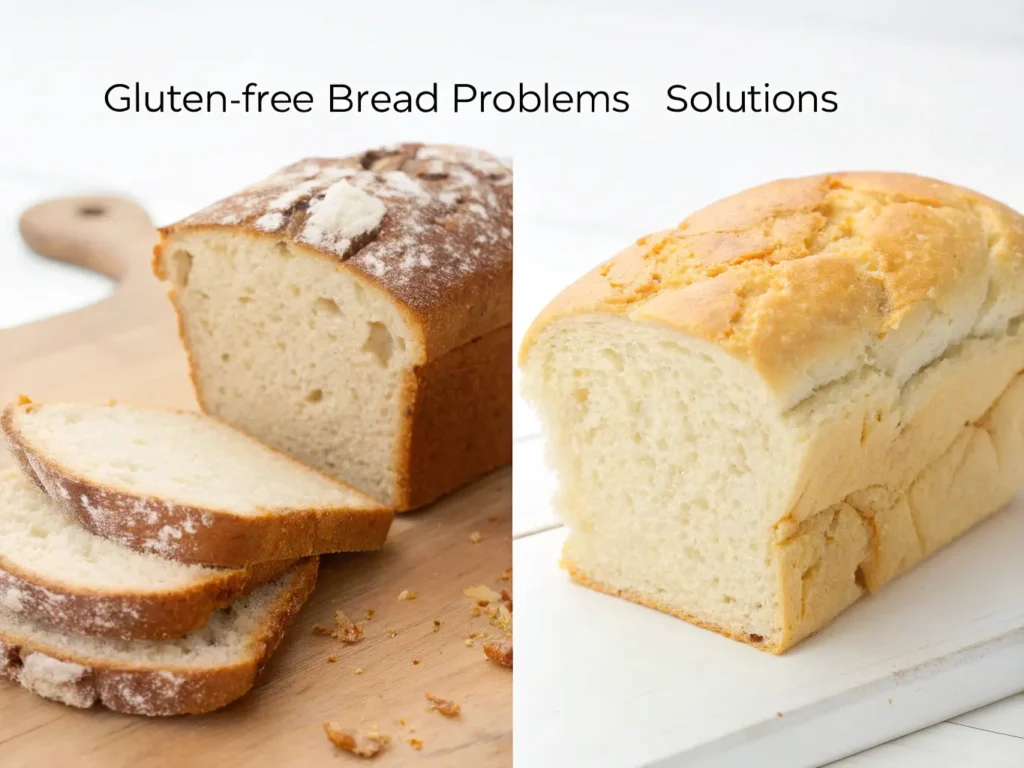
Troubleshooting Common Blend Issues
Too Dense? Increase starch flour percentage and reduce protein flours. Add extra liquid—gluten-free bread needs more moisture than you think.
Crumbly Texture? Not enough binding agents. Increase xanthan gum by ½ teaspoon or add psyllium husk powder.
Strange Aftertaste? Usually from too much coconut flour or chickpea flour. Reduce these to 10% or less of total blend.
Poor Rise? Check that your binding agents are fresh. Old xanthan gum loses effectiveness. Also ensure your liquid temperature isn’t killing yeast if using. For comprehensive problem-solving, consult our detailed gluten-free bread troubleshooting guide.
Dairy-Free Milk Alternatives: Complete Comparison
Choosing the right plant milk for bread isn’t just about dietary restrictions—it dramatically affects texture, flavor, and how long your bread stays fresh.
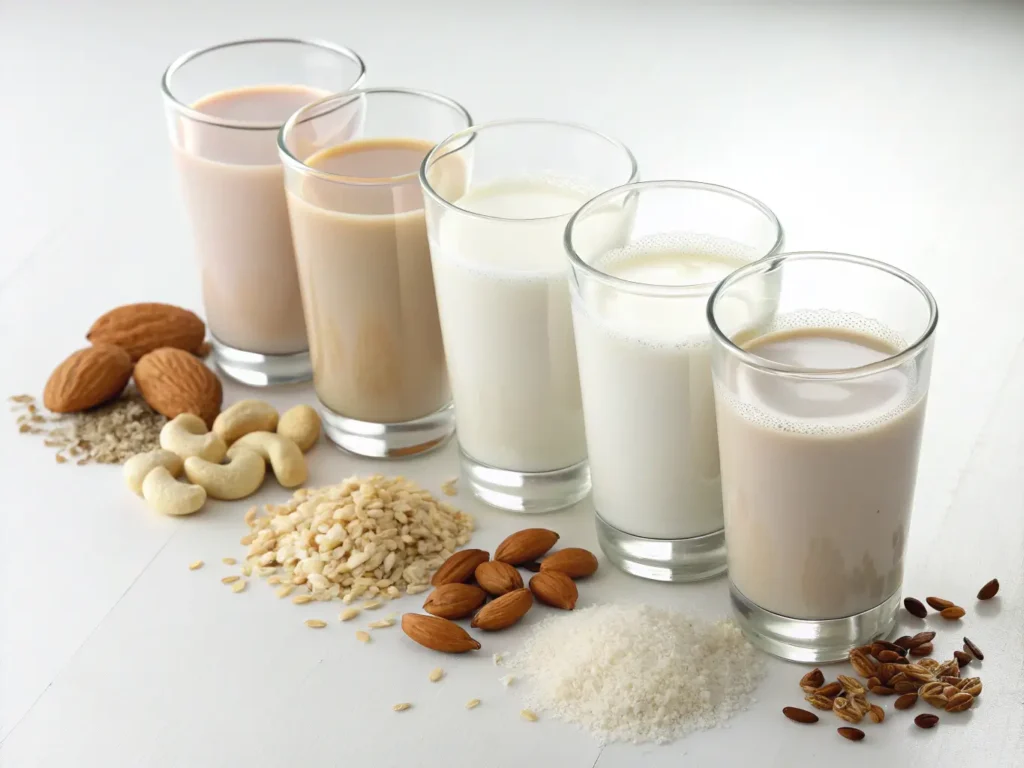
Nut-Based Milk Options
Almond Milk: The Versatile Choice Unsweetened almond milk is my default for most bread recipes. It’s light enough not to interfere with other flavors but has enough body to create good texture. The protein content varies by brand—look for versions with 1-2g protein per cup.
Best for: Daily sandwich bread, light textures
Texture impact: Creates tender crumb without heaviness
Cost consideration: Mid-range pricing, often on sale
Homemade option: Blend 1 cup almonds with 4 cups water, strain
Cashew Milk: The Creamy Dream When I want rich, bakery-quality bread, cashew milk is my secret weapon. It’s naturally creamy without being heavy, and the mild flavor works beautifully in both sweet and savory applications.
Best for: Rich sandwich bread, brioche-style loaves
Texture impact: Creates incredibly tender, moist crumb
Cost reality: More expensive but worth it for special occasions
DIY tip: Cashews don’t need straining when blended well
Grain and Seed-Based Alternatives
Oat Milk: The Natural Sweetener Oat milk brings subtle sweetness and creates beautifully golden crusts. The natural fiber content helps bind ingredients together, making it particularly good for gluten-free applications.
Best for: Slightly sweet breads, family-friendly options
Texture impact: Creates moist crumb with good structure
Consistency note: Varies by brand—some are quite thick
Allergy consideration: Ensure certified gluten-free oats were used
Rice Milk: The Budget-Friendly Option Rice milk is thin and very mild, making it perfect when you don’t want the plant milk to interfere with other flavors. It’s also typically the most affordable option.
Best for: When you want neutral flavor, budget-conscious baking
Texture impact: Light, airy bread texture
Limitation: May need fat added elsewhere for richness
Tip: Works well combined 50/50 with richer plant milks
Coconut and Legume Options
Coconut Milk: The Richness Champion Canned full-fat coconut milk creates the most luxurious bread texture I’ve achieved. The high fat content (about 24%) rivals heavy cream for creating tender, bakery-quality results.
Best for: Special occasion bread, incredibly rich texture
Flavor consideration: Subtle coconut taste—most people don’t notice
Cost factor: More expensive per cup but you use less
Light version: Works but won’t give the same rich results
Soy Milk: The Protein Powerhouse Research comparing plant milk nutritional profiles confirms that unsweetened soy milk has the highest protein content of plant milks (6-8g per cup), which helps with structure and browning. The neutral flavor works well in most applications.
Best for: High-protein needs, excellent rise and structure
Texture impact: Creates sturdy bread that holds up to hearty fillings
Controversy note: Some avoid for hormone concerns
Storage tip: Refrigerated versions have better consistency than shelf-stable
How Dairy-Free Milks Impact Bread Texture
Understanding how different plant milks affect your final results helps you choose the right one for each type of bread you’re making.
Fat Content and Its Effects
Fat creates tenderness and extends freshness—this is baking science 101. When you remove dairy milk’s natural fat content, you need to replace it strategically.
High-fat plant milks (coconut, cashew, macadamia) create incredibly tender bread that stays soft for days. I use these when I want bakery-quality results or when making bread for special occasions.
Medium-fat options (whole soy milk, some oat milks) provide good balance between richness and lighter texture. These work well for everyday sandwich bread.
Low-fat choices (rice milk, light almond milk) create lighter, airier bread but may need additional fat from other sources. I sometimes add a tablespoon of neutral oil when using these.
Protein Levels and Structure Building
Protein helps with browning, structure, and that satisfying bread texture. Expert analysis of plant milk baking properties shows what I’ve learned about protein content in plant milks:
High-protein plant milks (soy, pea milk) create bread with better structure and beautiful golden crusts. The protein coagulates during baking, helping hold everything together.
Medium-protein options (almond, oat) provide moderate structure support. They work well when combined with protein-rich flours.
Low-protein choices (rice, coconut) rely more heavily on your flour blend and binding agents for structure. They’re not problematic—just different.
Sugar Content Considerations
Natural sugars in plant milk affect fermentation, browning, and flavor. Always choose unsweetened versions for bread making—you want to control sweetness yourself.
Naturally sweet plant milks (oat, rice) add subtle sweetness that most families love. They also promote beautiful golden-brown crusts.
Neutral options (unsweetened almond, soy) let other flavors shine through and give you complete control over sweetness levels.
Tip: If your bread isn’t browning enough, try switching to a plant milk with higher natural sugar content.
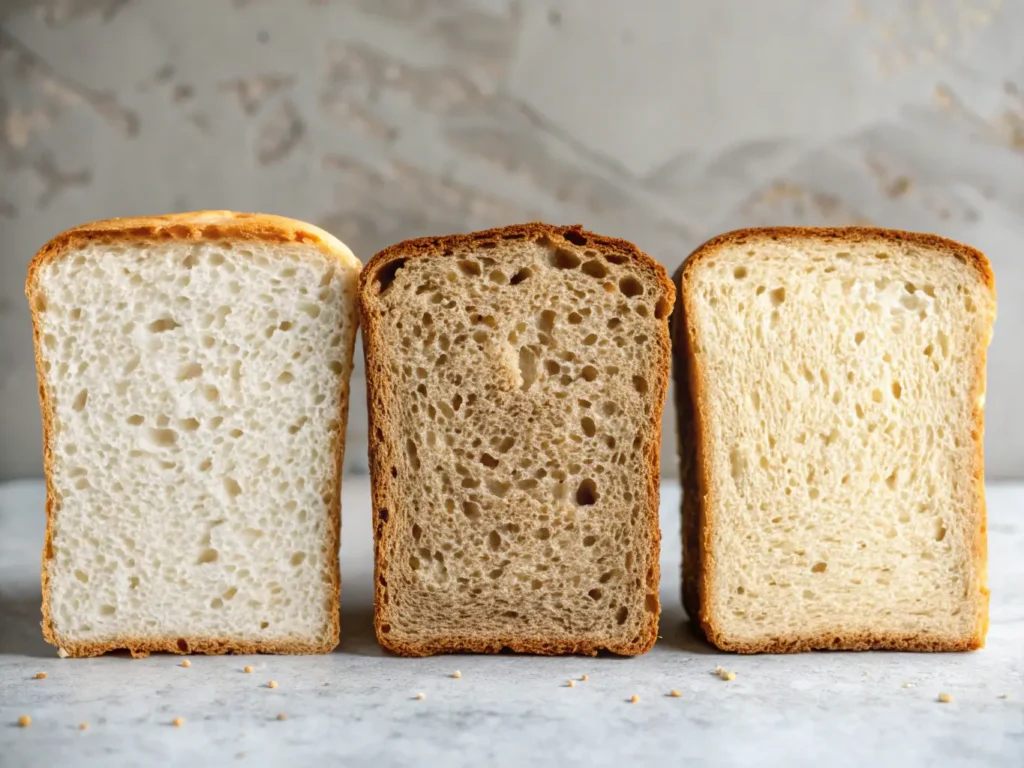
Best Flour and Milk Combinations for Different Bread Types
After hundreds of loaves, I’ve discovered that certain combinations consistently deliver better results than others. Here are my tested favorites:
Sandwich Bread Combinations
For daily eating, you want bread that’s tender but sturdy, with mild flavor that works with both sweet and savory fillings.
My go-to combination:
- Master Blend Formula (from above)
- Unsweetened oat milk for subtle sweetness and good structure
- Result: Soft, family-friendly bread that holds up to peanut butter and jelly or hearty sandwiches
For a proven recipe using these principles, try our best gluten-free sandwich bread recipe.
Budget version:
- Budget-Friendly Blend (from above)
- Rice milk for neutral flavor
- Add 1 tablespoon olive oil for richness
- Result: Light, affordable bread perfect for everyday use

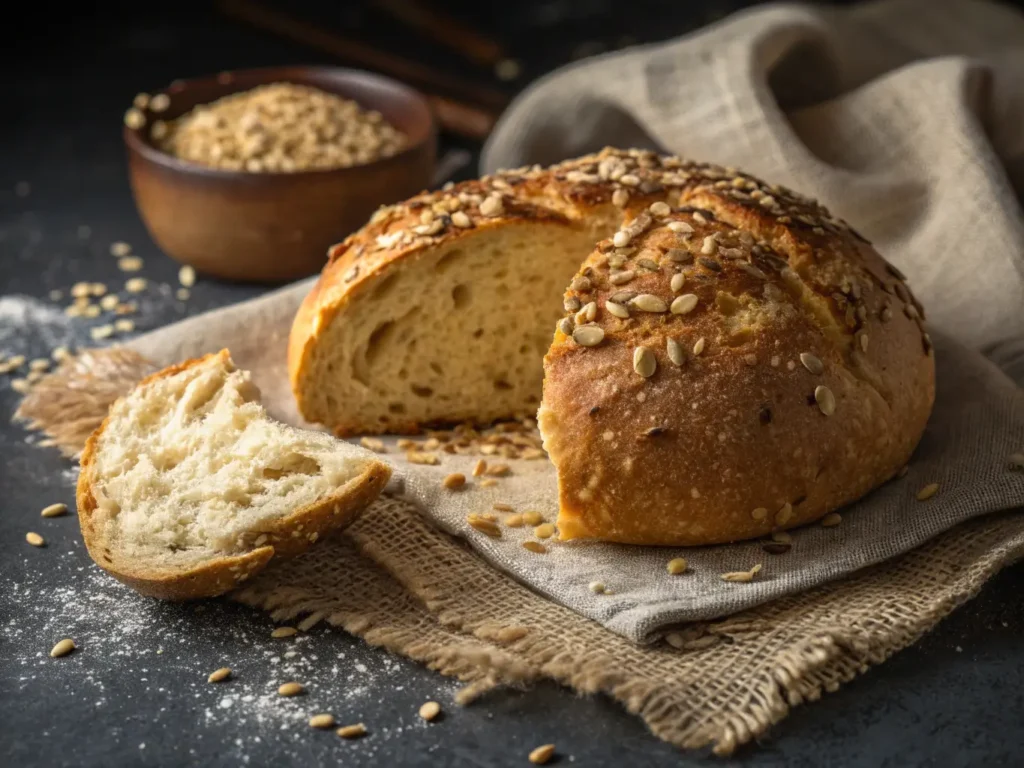
Artisan and Crusty Breads
When you want that bakery-quality chew and complex flavor, different combinations work better.
Recommended pairing:
- Higher percentage of protein flours (30% total)
- Include 10% buckwheat flour for depth
- Use full-fat canned coconut milk
- Result: Dense, satisfying bread with authentic artisan texture
Flavor enhancement:
- Add 1 tablespoon of malt syrup or honey
- Include seeds on top for visual appeal
- Let dough ferment longer for complex flavor development
Sweet Breads and Quick Breads
For cinnamon bread, banana bread, or other sweet applications, certain combinations enhance the overall experience.
Sweet bread success formula:
- 25% almond flour for richness
- 15% oat flour for natural sweetness
- Cashew milk for creamy texture
- Result: Tender, moist sweet bread that rivals traditional versions
For specific dairy-free sweet bread recipes, explore our gluten-free dairy-free cinnamon rolls and other sweet options.
Shopping Smart: Cost and Quality Considerations
Let’s talk money because quality gluten-free, dairy-free ingredients can be expensive. After three years of trial and error, here’s how to get the best results without breaking the bank.
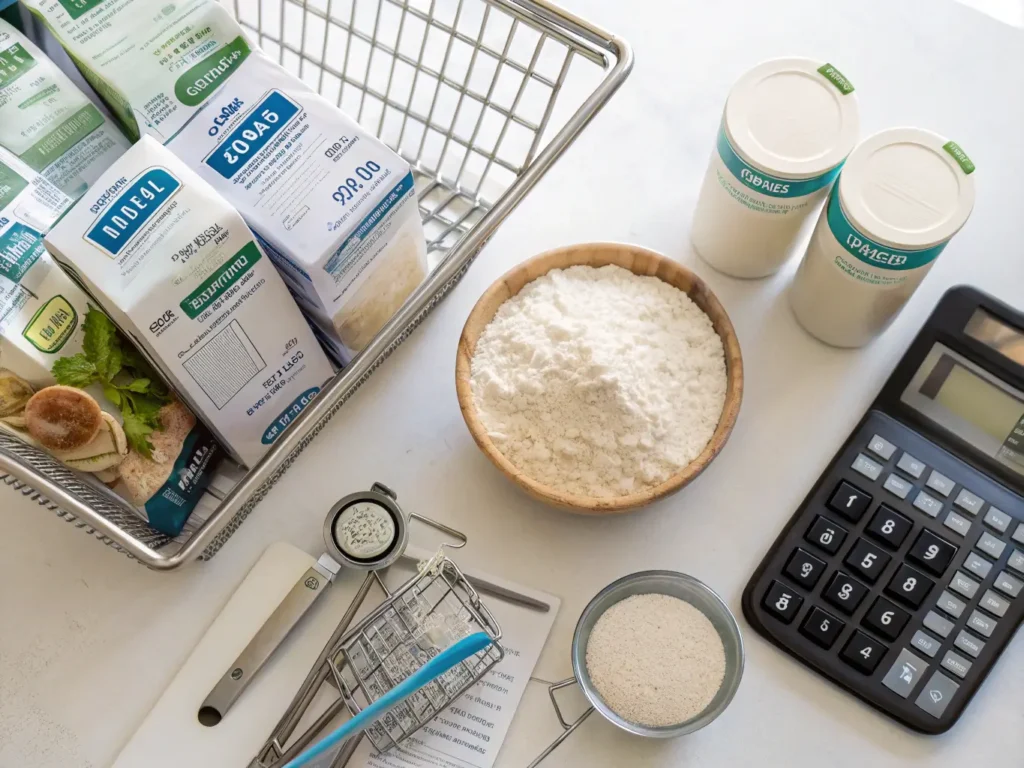
Budget-Friendly Strategies
Bulk buying saves serious money. I buy brown rice flour, potato starch, and tapioca starch in 5-10 pound bags. Stored properly, they last 6-12 months and cost about 40% less per pound.
Asian markets are goldmines for rice flour, potato starch, and tapioca starch. Same quality as health food stores, often half the price.
Make your own oat flour. Buy certified gluten-free oats in bulk and grind as needed. Fresh-ground tastes better and costs significantly less.
Generic plant milks work fine for most applications. Save the premium brands for special occasion baking.
Buy almond flour on sale and freeze it. Watch for sales and stock up—frozen almond flour lasts up to a year.
Quality Indicators to Look For
Freshness matters more than brands. Check dates carefully and buy from stores with good turnover. Rancid flour ruins everything.
Protein content varies by brand. Read labels if you’re following specific blend ratios—some brands have significantly different protein levels.
Certification is crucial for gluten-free flours. Don’t risk cross-contamination with uncertified products.
Texture indicates quality in plant milks. Watery, separated, or chalky consistency usually means lower quality.
Where to Shop for Best Prices
Online retailers often have the best bulk prices, especially for specialty flours like teff or almond flour.
Warehouse clubs are excellent for basics like rice flour and plant milks you use regularly.
Local co-ops and buying clubs sometimes offer significant savings on organic specialty flours.
Seasonal sales happen predictably—stock up during January health kicks and back-to-school seasons.
Storage and Freshness Tips
Nothing’s more frustrating than rancid flour ruining a batch of bread. Here’s how to keep your investment fresh and flavorful.
Flour Storage Best Practices
Airtight containers are non-negotiable. I use large glass jars with tight-fitting lids for everyday flours and vacuum-sealed bags for bulk storage.
Refrigerate high-fat flours like almond, coconut, and nut flours. They’ll stay fresh 6-12 months refrigerated versus 1-3 months at room temperature.
Freeze for long-term storage. Most gluten-free flours freeze beautifully for up to a year. Just bring to room temperature before using.
Label everything with dates. Trust me—you won’t remember when you bought that teff flour six months from now. For comprehensive storage guidance, see our detailed guide on storing gluten-free bread to maximize freshness.
Plant Milk Storage
Shelf-stable vs. refrigerated versions have different storage lives once opened. Refrigerated usually lasts 7-10 days; shelf-stable often lasts up to two weeks once opened.
Homemade plant milks should be used within 3-5 days and stored in the coldest part of your refrigerator.
Freeze plant milk in ice cube trays for small batch baking. Each cube is usually about 2 tablespoons.
Signs of Spoilage to Watch For
Flour: Rancid smell (especially noticeable in nut flours), unusual discoloration, or insects/larvae
Plant milk: Sour smell, chunky texture, separation that doesn’t remix, or off taste
General rule: When in doubt, throw it out. Spoiled ingredients ruin entire batches of bread.
Common Questions and Real Answers
No, and this was my first expensive mistake. Each flour behaves completely differently. Coconut flour absorbs 6x more liquid than rice flour. Almond flour is 50% fat while rice flour has almost none. Always use tested blend ratios or adjust other ingredients accordingly.
Full-fat soy milk comes closest in protein and behavior, while full-fat coconut milk mimics the richness. For most applications, I actually prefer oat milk because it adds subtle sweetness and helps with browning.
The dough should hold together when squeezed but not be dry or crumbly. After baking, good bread springs back when gently pressed and doesn’t leave your fingers feeling gummy or wet.
For everyday baking, probably not—the convenience of store-bought wins. But for special occasion bread where you want maximum creaminess, homemade cashew milk is incredible.
Stored in airtight containers, 3-6 months depending on ingredients. Blends with nut flours should be refrigerated and used within 3 months. Label with the earliest expiration date of your ingredients.
Start with brown rice flour, potato starch, tapioca starch, and xanthan gum. These four ingredients can make decent bread while you gradually add other flours for improved nutrition and flavor. Learn more about creating effective gluten-free flour blends on a budget.
Thinner milks (rice, almond) may need extra fat added elsewhere. Richer milks (coconut, cashew) might need slightly less oil in the recipe. Start with the original amounts and adjust next time based on results.
Your Path to Perfect Dual-Free Bread
Your first loaf might not look Instagram-perfect, and that’s completely okay. Mine looked like a science experiment gone wrong, but it tasted like hope. What matters is understanding your ingredients and building from there.
The combination of the right flour blend and compatible plant milk creates bread that your family will actually ask for seconds of. My daughter now prefers our homemade loaves to regular store-bought bread, and honestly, that makes every failed experiment worth it.
Start with one tested combination rather than trying to innovate immediately. Master the basics, then experiment with flavors and textures. Keep detailed notes about what works—your future self will thank you when you’re trying to recreate that perfect loaf.
Remember, every “failed” loaf teaches you something valuable about ingredient behavior. Those dense doorstops and crumbly messes aren’t failures—they’re education. The goal isn’t perfection on the first try; it’s understanding your ingredients well enough to consistently create bread your family loves.
Ready to transform your gluten-free, dairy-free baking? Choose one flour blend and one plant milk combination from this guide, gather your ingredients, and start your own journey to bread that actually tastes like bread. Your family’s going to be amazed at what you can create with the right foundation.
For specialized dietary needs, explore our gluten-free dairy-free sandwich bread guide for detailed dual-free recipes, or check out troubleshooting gluten-free dairy-free bread if you encounter challenges along the way.
Share your bread-making successes and challenges—this journey is so much better when we support each other along the way.
Print
Gluten-Free Dairy-Free Bread
A guide to creating delicious gluten-free and dairy-free bread using the right flour blends and plant milk.
- Total Time: 45 minutes
- Yield: 1 loaf 1x
Ingredients
- 40% Brown rice flour
- 20% Potato starch
- 15% Almond flour
- 10% Tapioca starch
- 10% Oat flour
- 5% Teff flour
- 1 tsp Xanthan gum per cup
- 1 tbsp Psyllium husk powder per 3 cups
Instructions
- Combine the brown rice flour, potato starch, almond flour, tapioca starch, oat flour, and teff flour in a large bowl.
- Mix in the xanthan gum and psyllium husk powder.
- Add the plant milk of your choice and any additional ingredients needed.
- Knead the dough until well combined and let it rise in a warm place until doubled in size.
- Bake in a preheated oven at 350°F (175°C) for about 30-45 minutes or until golden brown.
Notes
Experiment with different plant milks to find the best flavor and texture. Adjust baking time as necessary depending on your oven.
- Prep Time: 15 minutes
- Cook Time: 30 minutes
- Category: Bread
- Method: Baking
- Cuisine: Gluten-Free
- Diet: Dairy-Free, Gluten-Free
Nutrition
- Serving Size: 1 slice
- Calories: 200
- Sugar: 1g
- Sodium: 150mg
- Fat: 5g
- Saturated Fat: 0.5g
- Unsaturated Fat: 4g
- Trans Fat: 0g
- Carbohydrates: 35g
- Fiber: 4g
- Protein: 5g
- Cholesterol: 0mg