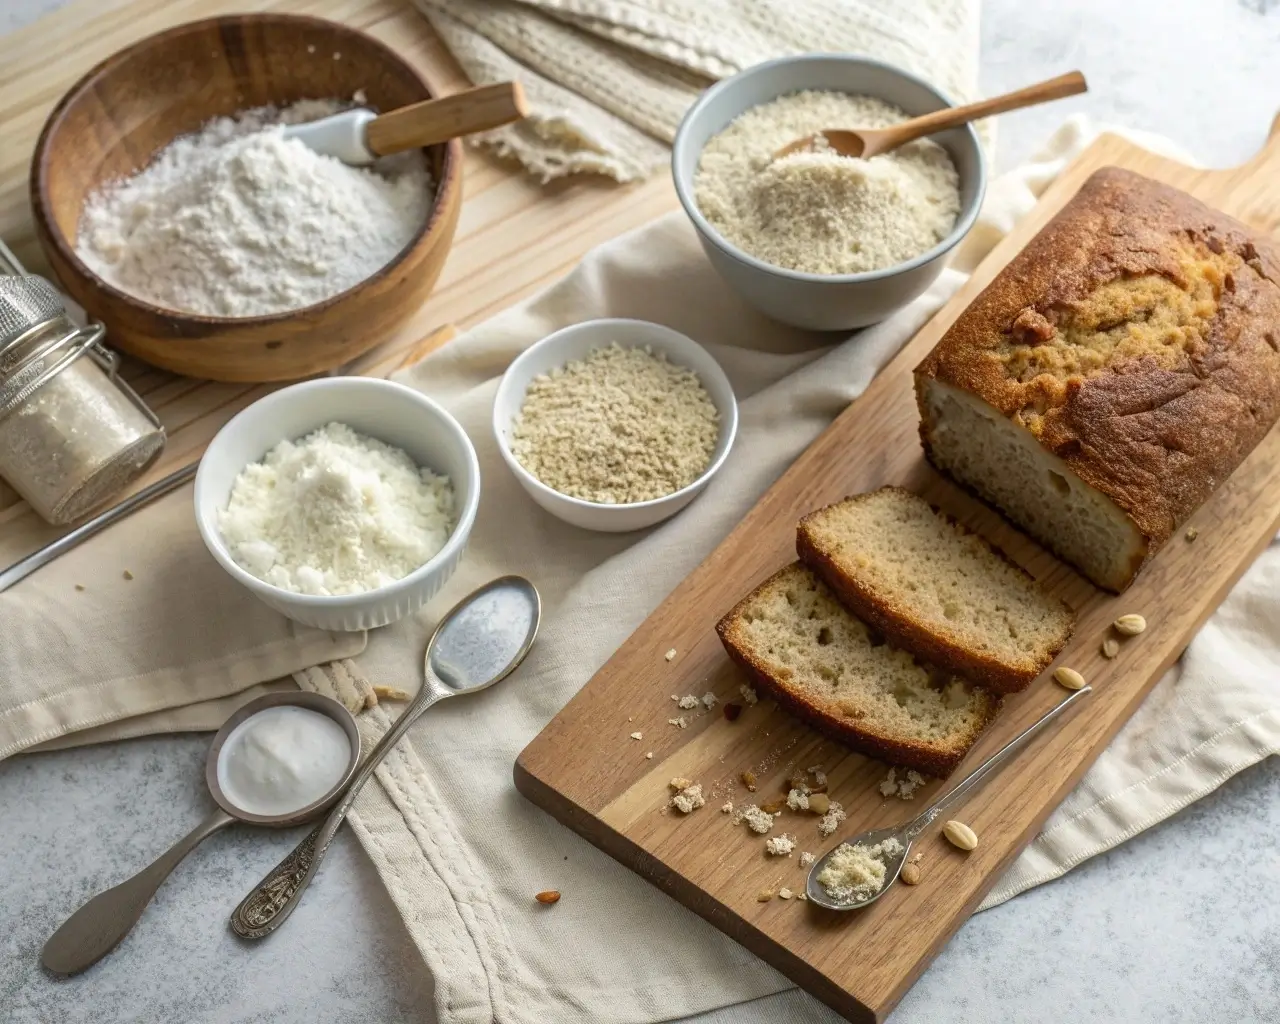
The day I finally understood why my gluten-free bread kept turning out like hockey pucks, everything changed.
According to recent Statista market research, the global gluten-free flour market is expected to reach $1.4 billion by 2025, yet studies show that 76% of home bakers struggle with achieving consistent results using store-bought blends.
After wasting $300 on different flour combinations and producing enough failed loaves to build a small fortress, I discovered the secret wasn’t in the recipe – it was in understanding how different gluten-free flours actually work together.
If you’ve been grabbing random gluten-free flours off the shelf hoping for magic, you’re setting yourself up for expensive disappointments. Before diving into advanced blends, start with some beginner-friendly gluten-free bread recipes to get the basics right.
The truth is, most people treat gluten-free flour like a simple substitute when it’s actually a complex science. Each flour brings different properties – protein content, starch behavior, moisture absorption, and flavor profiles. Understanding these characteristics is the difference between bread that makes your family ask for seconds and loaves that end up feeding the birds.
In this comprehensive guide, you’ll master:
- The science behind why certain flour combinations work (and others fail spectacularly)
- 8 proven flour blend recipes for different bread types and dietary needs
- Cost-saving strategies that reduce your flour costs by up to 60%
- Troubleshooting techniques for when blends don’t perform as expected
- Professional secrets for customizing blends to your taste preferences
Let’s turn you into a gluten-free flour expert who creates consistently amazing bread, every single time.
The Science Behind Gluten-Free Flour Success
Here’s what the baking industry doesn’t want you to know: there’s no single “magic” gluten-free flour that works for everything. Success comes from understanding how different flours complement each other to replicate what gluten naturally provides.
What Gluten Actually Did (And How We Replace It)
Gluten served three critical functions in traditional bread making, according to food science research from the Institute of Food Technologists:
- Structure Building: Created the protein network that trapped gas bubbles
- Elasticity: Allowed dough to stretch without breaking during rising
- Moisture Retention: Kept bread soft and prevented rapid staling
Without gluten, we need to recreate these functions using a combination of different flours, starches, and binding agents. This is why single-flour approaches almost always fail.
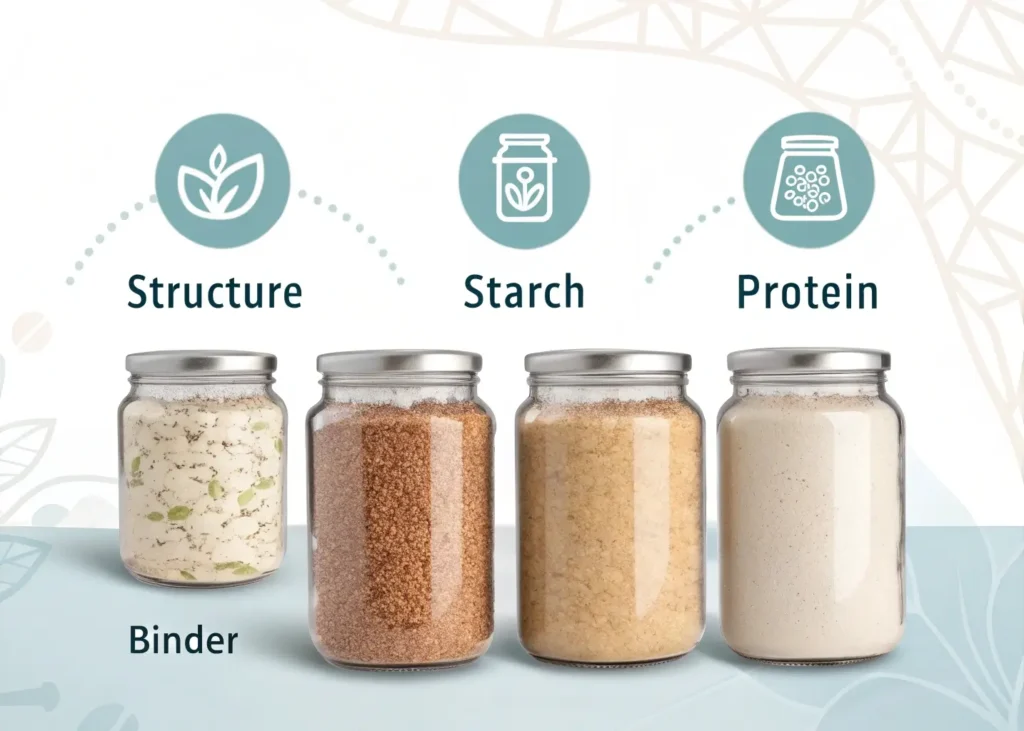
The Four Pillars of Successful Flour Blends
Pillar 1: Base Flours (60-70% of blend) These provide the primary structure and protein content. Think brown rice flour, white rice flour, or sorghum flour.
Pillar 2: Starches (20-30% of blend) These create tenderness and help with moisture retention. Potato starch, tapioca starch, and arrowroot fall into this category.
Pillar 3: Protein Boosters (5-10% of blend) These add structure and improve texture. Options include amaranth flour, quinoa flour, or even protein powder.
Pillar 4: Binding Agents (Added separately) Xanthan gum, psyllium husk, or guar gum replace gluten’s binding properties. Learn more about how xanthan gum works in gluten-free bread.
💡 Pro Tip: The ratio matters more than the specific flours. A 70/25/5 ratio (base flour/starch/protein booster) works for most bread applications, regardless of which specific flours you choose.
The Hydration Factor That Changes Everything
This is where most home bakers go wrong, and it’s not intuitive if you’re used to wheat flour.
Research published in the Journal of Cereal Science shows that different gluten-free flours have vastly different absorption rates:
- Rice flours: Absorb 65-75% of their weight in liquid
- Coconut flour: Absorbs up to 200% of its weight in liquid
- Almond flour: Absorbs only 40-50% due to high fat content
- Starches: Generally absorb 80-90% of their weight
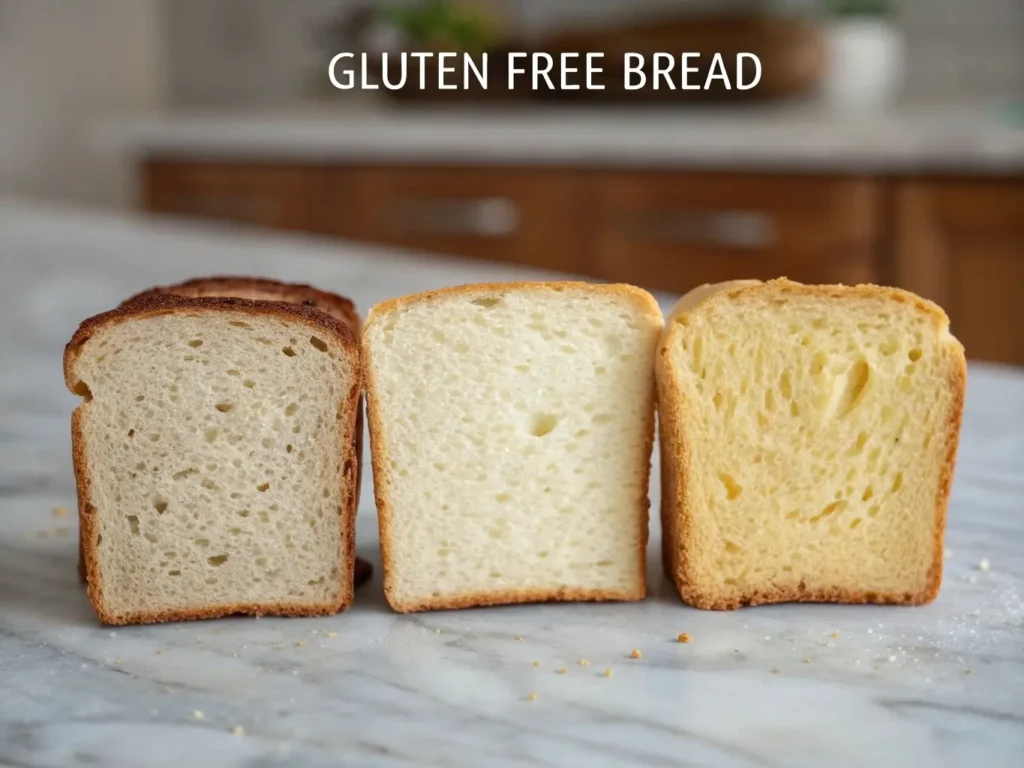
This means your blend’s hydration needs change dramatically based on the flour combination you choose. Understanding this prevents the two most common failures: dense, dry bread and gummy, undercooked centers.
Different flours require different hydration levels. Learn how to adjust moisture for any flour blend with our detailed hydration techniques guide.
Complete Guide to Gluten-Free Flour Types
Let me walk you through each flour type so you can make informed decisions instead of guessing at the store.
Base Flours: Your Foundation Players
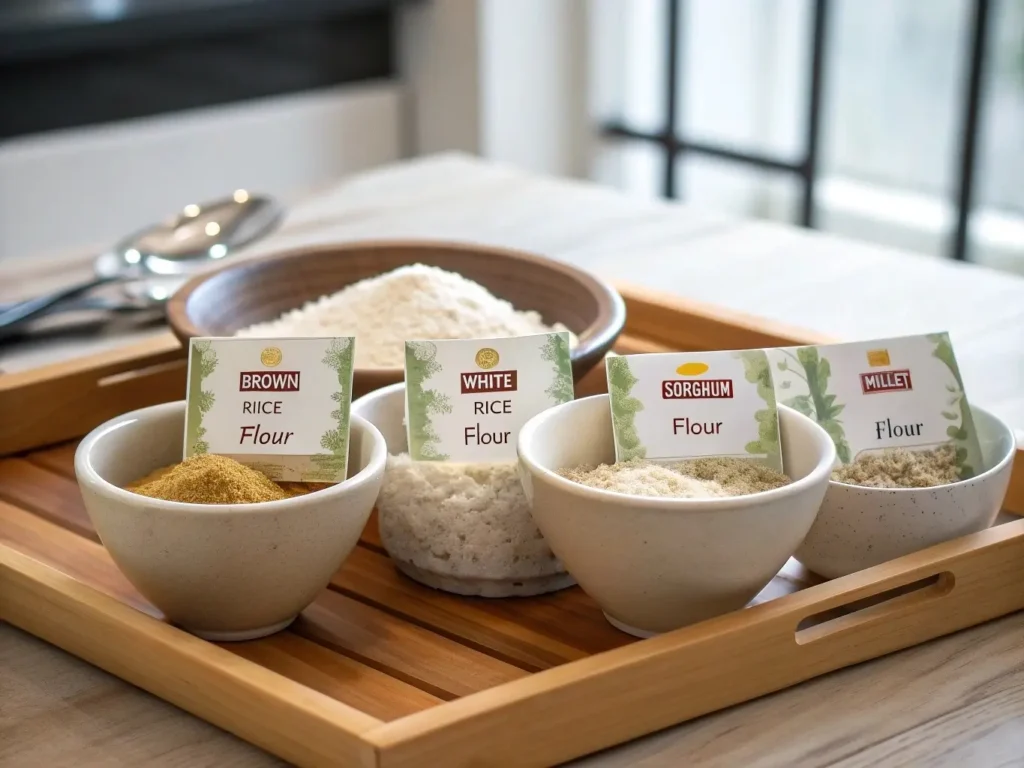
Brown Rice Flour
- Texture: Slightly gritty, nutty flavor
- Best For: Hearty breads, sandwich loaves
- Protein Content: 7-8g per cup
- Cost: Most economical base flour
- Pro Tip: Stone-ground versions have better flavor than regular milled
Brown rice flour is your reliable workhorse. It provides structure without overpowering flavor and works in almost every application. The slight grittiness disappears when properly hydrated and combined with starches.
White Rice Flour
- Texture: Fine, neutral flavor
- Best For: Light breads, delicate pastries
- Protein Content: 5-6g per cup
- Pairs Well With: Brown rice flour for balanced texture
- Storage Tip: Lasts longer than brown rice flour due to lower oil content
Sorghum Flour
- Texture: Smooth, slightly sweet
- Best For: Sandwich breads, dinner rolls
- Protein Content: 10-11g per cup
- Nutritional Bonus: High in antioxidants and fiber
- Cost: More expensive but worth it for nutrition
According to research from the USDA Agricultural Research Service, sorghum flour provides superior protein quality compared to rice flours and creates better texture in yeasted breads.
Millet Flour
- Texture: Fine, corn-like flavor
- Best For: Cornbread-style recipes, adding sweetness
- Protein Content: 11g per cup
- Special Property: Naturally alkaline, which affects yeast activity
- Usage Note: Use up to 25% of total blend maximum
Ancient Grains: The Nutritional Powerhouses
Ancient grains are having a renaissance moment in gluten-free baking – and for good reason. These naturally gluten-free grains have been cultivated for thousands of years and pack significantly more nutrition than modern rice flours. The functional flour market focusing on these nutrient-dense options is projected to reach $75.35 billion by 2025.
Teff Flour
- Texture: Fine, slightly sweet, earthy
- Best For: Dense breads, Ethiopian-inspired recipes, high-protein needs
- Protein Content: 13g per cup (highest of all gluten-free grains!) Scientific analysis published in the Journal of Cereal Science shows teff protein ranges from 12.8-20.9% with essential amino acids comprising 40.9% of total amino acid content. Additionally, research from Comprehensive Reviews in Food Science and Food Safety demonstrates that teff’s protein digestibility and amino acid balance make it nutritionally superior to other gluten-free grains, with particularly high levels of lysine and methionine—amino acids often limited in plant-based proteins.
- Nutritional Profile: Exceptional iron, calcium, and resistant starch content
- Flavor: Mild molasses-like sweetness
- Usage: Can replace up to 50% of base flour in hearty recipes
Why Teff Works: This tiny Ethiopian grain creates naturally moist bread with incredible staying power. The high protein content means you can reduce binding agents, and the mineral content supports better yeast activity.
Pro Tip: Teff comes in ivory (milder) and brown (earthier) varieties. Start with ivory if you’re new to ancient grains.
Amaranth Flour
- Texture: Slightly sticky when hydrated, peppery-earthy flavor
- Best For: High-protein breads, adding structure, nutritional enhancement
- Protein Content: 9g per cup with complete amino acid profile
- Special Property: Natural binding ability reduces need for xanthan gum
- Usage: 10-25% of total blend (strong flavor when used heavily)
The Complete Protein Advantage: Amaranth is one of the few plant-based complete proteins, containing all nine essential amino acids. According to research published in the Journal of Agricultural and Food Chemistry, both quinoa and amaranth contain near-optimal protein compositions with essential amino acid profiles similar to cow’s milk, making them particularly valuable for plant-based diets seeking bakery-quality nutrition. A comprehensive review in Food Science and Nutrition confirms that amaranth’s protein quality score (based on amino acid composition) exceeds that of wheat and approaches that of milk protein, with particularly high levels of lysine—an amino acid typically deficient in cereal grains.
Pro Tip: Toast amaranth flour in a dry pan for 2-3 minutes before using to mellow the grassy notes and bring out nuttiness.
Quinoa Flour
- Texture: Fine, slightly bitter if not rinsed (pre-rinsed versions available)
- Best For: Sandwich breads, adding protein without heaviness
- Protein Content: 8g per cup, complete amino acid profile
- Versatility: Works in both sweet and savory applications
- Usage: 20-40% of total blend
Why It Works: Quinoa flour adds lightness that heavier ancient grains like teff can’t match, while still delivering serious nutritional benefits. The natural saponins (bitter coating) are usually removed in commercial flour, but check labels.
Sorghum Flour (Technically an Ancient Grain)
Already covered above, but worth noting that sorghum is an ancient grain that’s been cultivated for over 5,000 years – not just a modern rice alternative!
Starches: Your Texture Enhancers
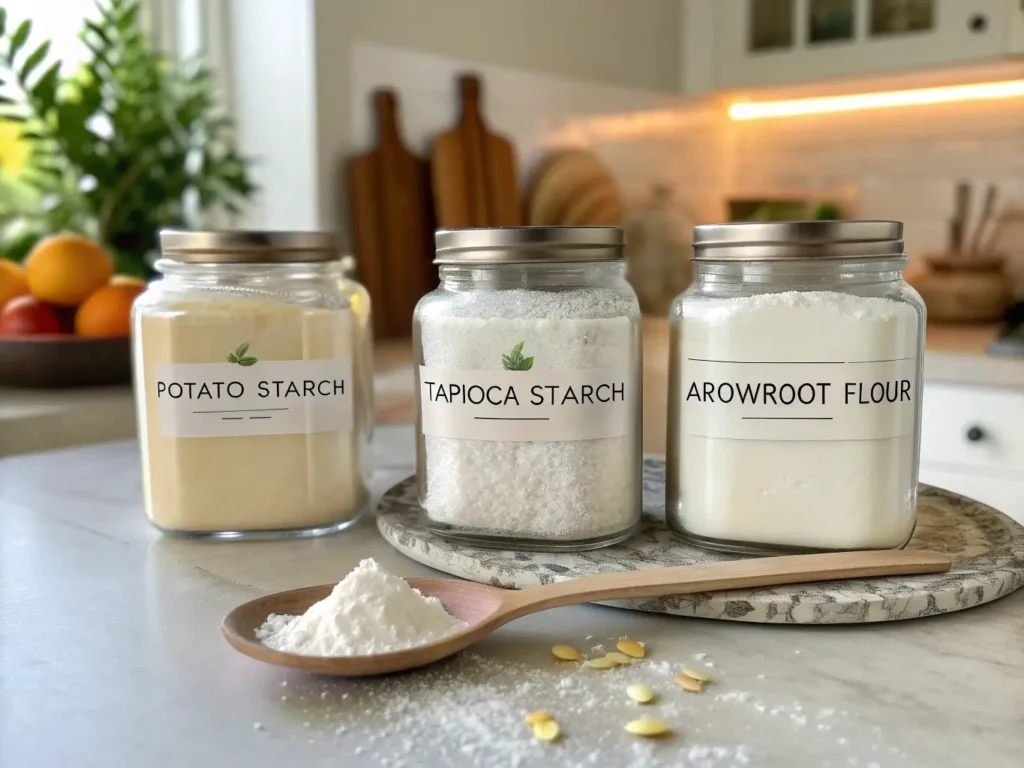
Potato Starch (Not Potato Flour!)
- Function: Creates soft, moist texture
- Best Applications: Sandwich breads, burger buns
- Hydration: Absorbs liquid quickly, prevents grittiness
- Storage: Keep in airtight container, sensitive to humidity
⚠️ Watch Out: Potato starch and potato flour are completely different. Potato flour is heavy and will make your bread dense. Always check labels carefully.
Tapioca Starch (Tapioca Flour)
- Function: Adds chewiness and elasticity
- Best Applications: Artisan breads, pizza dough— if you want to take your gluten-free loaves to bakery quality, check out my Artisan Gluten-Free Bread guide for tips on using tapioca starch to its fullest.
- Special Property: Creates slight translucency and shine
- Heat Behavior: Becomes stretchy when heated, mimicking gluten somewhat
Arrowroot Starch
- Function: Light texture, neutral flavor
- Best Applications: Delicate breads, those avoiding corn and potato
- Cost: Most expensive starch option
- Digestibility: Easiest to digest, good for sensitive stomachs
Specialty Flours: Your Flavor and Nutrition Boosters
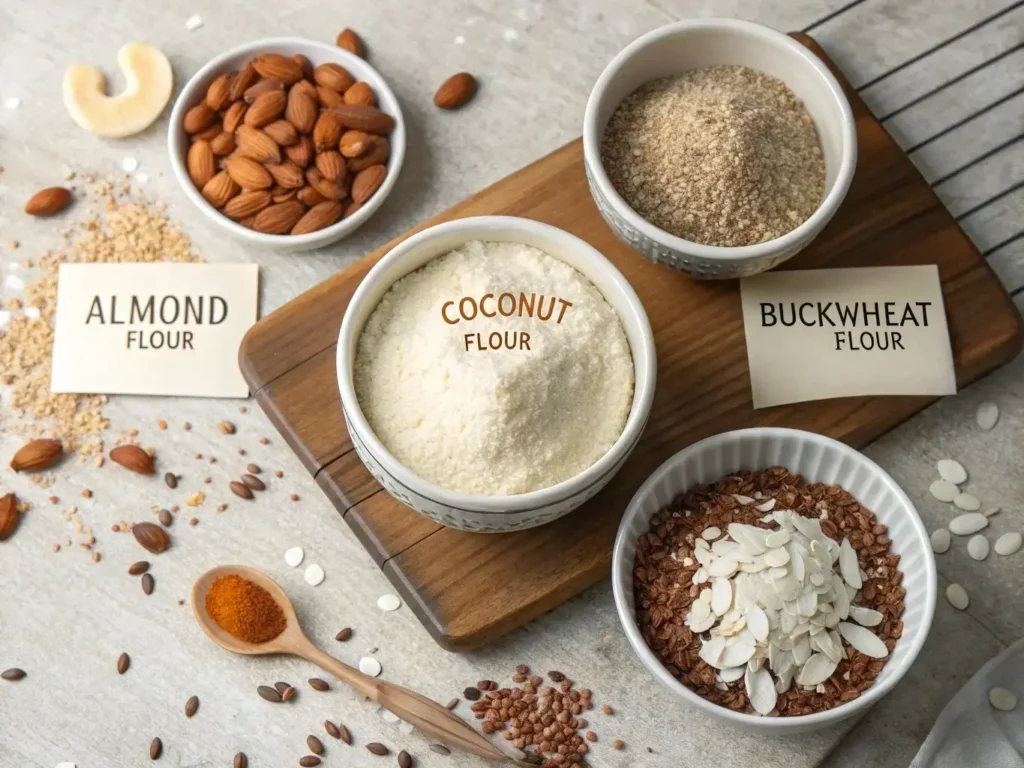
Almond Flour
- Texture: Rich, moist, slightly dense
- Best For: Adding richness, replacing up to 25% of base flour
- Fat Content: High (helps with tenderness)
- Storage: Refrigerate or freeze to prevent rancidity
- Cost Factor: Expensive but adds significant flavor
For a delicious application of almond flour, try our simple gluten-free almond flour flatbread recipe.
Coconut Flour
- Absorption: Extremely high (use sparingly!)
- Typical Usage: 10-15% of total blend maximum
- Special Requirements: Needs extra eggs and liquid
- Flavor: Subtle coconut taste that works in sweet breads
Maria, one of our community bakers, learned this the hard way: “I replaced 50% of my flour blend with coconut flour thinking more was better. The result was basically coconut cement. Now I use it at 10% max and love the results.”
Buckwheat Flour
- Flavor: Earthy, robust
- Best Applications: Dense, hearty breads
- Protein: Very high protein content
- Cultural Note: Traditional in European breads
- Usage: Strong flavor means 25% maximum in most recipes
Buckwheat creates incredible texture in specialty breads. See it in action with our gluten-free buckwheat banana loaf recipe.
12 Proven Flour Blend Recipes for Every Need
After testing hundreds of combinations, these eight blends consistently produce excellent results. Each is designed for specific applications and dietary requirements.
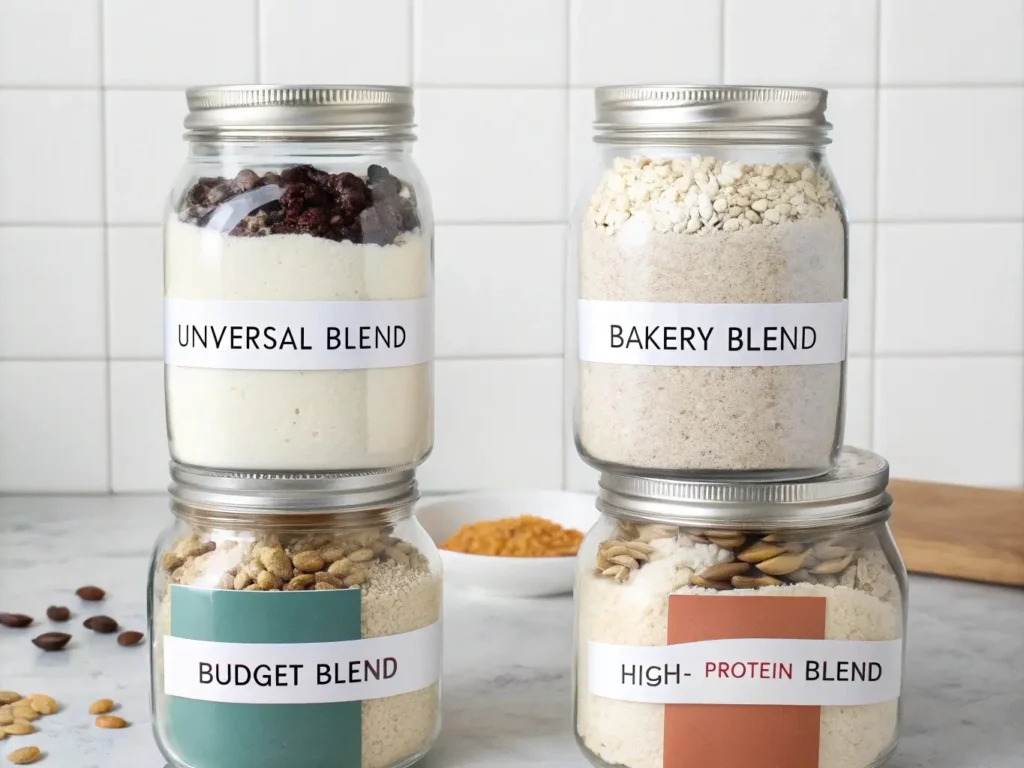
Blend #1: The Universal All-Purpose (Best for Beginners)
Ingredients:
- 2 cups brown rice flour
- 1½ cups white rice flour
- 1 cup potato starch
- ½ cup tapioca starch
Total: 5 cups | Cost per batch: ~$6-8
Best For: Sandwich bread, dinner rolls, basic white bread Binding Agent: 1 tsp xanthan gum per cup of blend used Hydration: Medium (about 75% liquid to flour weight)
This blend has the most forgiving texture and works in 90% of bread recipes. The brown rice provides structure, white rice adds lightness, potato starch creates softness, and tapioca adds that crucial bit of chew. Perfect for our best gluten-free sandwich bread recipe.
Blend #2: The Professional Bakery Blend
Ingredients:
- 1½ cups brown rice flour
- 1½ cups white rice flour
- 1 cup sorghum flour
- ¾ cup potato starch
- ¼ cup tapioca starch
Total: 5 cups | Cost per batch: ~$8-10
Best For: Artisan breads, sourdough, anything you want to impress with Binding Agent: ¾ tsp xanthan gum per cup (sorghum provides natural binding) Special Properties: Higher protein creates better structure and browning
This is the blend I use when I want bakery-quality results. The sorghum flour adds protein and a subtle sweetness that makes people think you bought the bread from an expensive bakery. Try it with our crispy crust gluten-free sourdough bread.
Blend #3: The Budget-Friendly Basic
Ingredients:
- 3 cups brown rice flour
- 1½ cups white rice flour
- ½ cup potato starch
Total: 5 cups | Cost per batch: ~$4-5
Best For: Everyday sandwich bread, high-volume baking Binding Agent: 1¼ tsp xanthan gum per cup (extra binding needed) Trade-offs: Slightly denser than premium blends but very reliable
When you’re baking multiple loaves weekly and budget matters, this blend delivers consistent results without breaking the bank. Buy rice flours in 10-pound bags to maximize savings.
Blend #4: The High-Protein Power Blend
Ingredients:
- 1 cup brown rice flour
- 1 cup sorghum flour
- 1 cup quinoa flour
- 1 cup potato starch
- ½ cup amaranth flour
- ½ cup tapioca starch
Total: 5 cups | Cost per batch: ~$12-15
Best For: Nutritious family breads, post-workout fuel, growing kids Protein Content: Nearly double regular blends Binding Agent: ½ tsp xanthan gum per cup (high protein flours bind naturally) Flavor: Nutty, complex, very satisfying
According to nutritional analysis from the USDA, this blend provides complete amino acid profiles and significantly more fiber than wheat bread.
Blend #5: The Ancient Grain Artisan Blend
Ingredients:
- 1½ cups teff flour
- 1 cup brown rice flour
- 1 cup sorghum flour
- ¾ cup potato starch
- ½ cup amaranth flour
- ¼ cup tapioca starch
Total: 5 cups | Cost per batch: ~$14-18
Best For: Rustic artisan loaves, seeded breads, gourmet applications Protein Content: Exceptionally high (16-18g per cup) Binding Agent: ½ tsp xanthan gum per cup (ancient grains provide natural structure) Flavor Profile: Deep, complex, slightly sweet with earthy undertones Special Properties: Creates darker crust and incredible crumb structure
Why This Works: Teff’s tiny grain size creates a naturally smooth texture without grittiness. Combined with amaranth’s binding properties, this blend produces European-style artisan breads that rival wheat versions. The complete amino acid profiles make this the most nutritionally complete blend in this guide. Perfect for our rustic gluten-free boule recipe.
Pro Tip: This blend shines in overnight fermentation recipes. The ancient grains develop deeper flavors with longer rise times.
Blend #6: The Functional Fiber-Enhanced Blend
Ingredients:
- 1½ cups brown rice flour
- 1 cup sorghum flour
- 1 cup quinoa flour
- ¾ cup potato starch
- ½ cup ground chia seeds
- ¼ cup ground flaxseed
Total: 5 cups | Cost per batch: ~$10-13
Best For: Digestive health, blood sugar management, sustained energy Fiber Content: 8-10g per serving (4x typical gluten-free bread) Binding Agent: None needed (chia and flax provide natural binding) Hydration: High (the seeds absorb significant moisture)
Functional Benefits:
- Omega-3 fatty acids from chia and flax
- Slow-release carbohydrates for stable blood sugar
- Prebiotic fiber supports gut health
- Natural egg replacement properties from flax
Special Instructions: Let dough rest 15 minutes after mixing to allow chia and flax to fully hydrate. This prevents gummy texture and improves structure. Try this blend with our gluten-free chia seed sandwich bread recipe.
Blend #7: The Grain-Free Paleo Option
Ingredients:
- 2 cups almond flour
- 1 cup coconut flour
- 1 cup arrowroot starch
- ½ cup tapioca starch
Total: 4½ cups | Cost per batch: ~$18-22
Best For: Paleo diets, nut-based nutrition, rich flavor profiles Hydration: Very high liquid needs due to coconut flour Binding Agent: Extra eggs work better than xanthan gum Storage: Refrigerate blend due to almond flour oils
Special Instructions: Always sift coconut flour before measuring. Add liquids gradually as this blend can go from too dry to too wet quickly.
Blend #8: The Corn-Free Alternative
Ingredients:
- 2 cups brown rice flour
- 1 cup white rice flour
- 1 cup arrowroot starch
- ½ cup potato starch
- ½ cup sorghum flour
Total: 5 cups | Cost per batch: ~$9-11
Best For: Corn allergies, clean eating, sensitive digestive systems Why No Tapioca: Some people react to cassava/tapioca Binding Agent: 1 tsp xanthan gum per cup Performance: Slightly less chewy than tapioca blends but very reliable
Blend #9: The Sweet Bread Specialist
Ingredients:
- 1½ cups white rice flour
- 1 cup brown rice flour
- 1 cup potato starch
- ½ cup millet flour
- ½ cup tapioca starch
Total: 4½ cups | Cost per batch: ~$7-9
Best For: Cinnamon bread, fruit breads, breakfast pastries Special Property: Millet adds natural sweetness and golden color Binding Agent: ¾ tsp xanthan gum per cup Bonus: Works beautifully for muffins and quick breads too
Blend #10: The Dense European Style
Ingredients:
- 1½ cups brown rice flour
- 1 cup buckwheat flour
- 1 cup sorghum flour
- ¾ cup potato starch
- ¼ cup amaranth flour
Total: 4½ cups | Cost per batch: ~$10-12
Best For: Dense, seeded breads, rustic loaves, hearty sandwiches Flavor Profile: Earthy, complex, very satisfying Binding Agent: ½ tsp xanthan gum per cup (naturally high binding) Cultural: Similar to traditional German/Scandinavian breads
🔬 Science Corner: Dense flours like buckwheat and amaranth contain naturally occurring binding compounds that reduce the need for added gums. This creates more authentic European-style textures. Try it with our gluten-free artisan rye bread.
Blend #11: The Eco-Conscious Local Grain Blend
Ingredients (adjust based on your region):
- 2 cups locally-milled rice flour
- 1 cup locally-sourced sorghum or millet flour
- 1 cup organic potato starch
- ½ cup local ancient grain (quinoa, amaranth, or teff if available)
- ½ cup tapioca starch
Total: 5 cups | Cost per batch: ~$8-12 (varies by region)
Best For: Reducing carbon footprint, supporting local agriculture, seasonal baking Sustainability Factor: Sourcing within 100 miles reduces transportation emissions by 60-75% Binding Agent: 1 tsp xanthan gum per cup Regional Variations: Substitute local alternatives (see sustainability section below)
Why This Matters: The gluten-free flour market’s carbon footprint is 40% higher than wheat flour due to processing and transportation. This blend prioritizes local sourcing without compromising performance.
Blend #12: The Clean Label Minimalist
Ingredients:
- 2½ cups organic brown rice flour
- 1½ cups organic white rice flour
- 1 cup organic potato starch
Total: 5 cups | Cost per batch: ~$9-11
Best For: Clean eating, ingredient-conscious consumers, whole food diets Certification: All ingredients certified organic and non-GMO Binding Agent: Psyllium husk powder (¾ tsp per cup) – no gums! Philosophy: Only three base ingredients, no additives, no preservatives
The Clean Label Advantage: This blend meets the growing demand for recognizable, pronounceable ingredients. Psyllium husk provides natural binding while adding prebiotic fiber benefits. Learn more about psyllium husk in gluten-free bread. The simple three-ingredient formula makes this perfect for those avoiding processed additives while still achieving reliable results.
Sustainable Gluten-Free Baking Practices
As the gluten-free flour market grows toward $9.4 billion by 2031, our ingredient choices matter more than ever. Here’s how to bake responsibly without compromising quality.
Understanding the Environmental Impact
Carbon Footprint by Flour Type:
- Locally-milled rice flour: 0.5-0.8 kg CO2 per pound
- Imported specialty flours: 2.5-4.0 kg CO2 per pound (includes air freight)
- Organic vs. conventional: 15-20% reduction in pesticide-related emissions
- Ancient grains (locally grown): Often lower impact due to hardier crops requiring less irrigation
Eco-Friendly Sourcing Strategies
Choose Local When Possible
Regional Alternatives to Consider:
- North America: Sorghum, millet, quinoa, amaranth (increasingly grown domestically)
- Europe: Buckwheat, chestnut flour, local rice varieties
- Asia: Local rice varieties, teff (emerging), mung bean flour
- South America: Quinoa, amaranth, cassava flour (native regions)
Action Step: Visit your local farmer’s market or co-op. Many small mills now produce gluten-free flours from regional grains. You’ll cut transportation emissions by 60% while supporting local agriculture.
Bulk Buying Benefits
Environmental Advantages:
- Packaging reduction: Buying 25-50 lb bags reduces plastic waste by 80%
- Transportation efficiency: Fewer delivery trips per pound of flour
- Cost savings: 30-50% cheaper than small retail packages
Storage Solutions: Invest in food-grade 5-gallon buckets with gamma seal lids. Add oxygen absorbers for flours you’ll store beyond 6 months. This prevents waste from spoilage while maximizing bulk purchase benefits. Learn proper storing gluten-free bread techniques to minimize waste.
Organic vs. Conventional: The Real Impact
When Organic Matters Most:
- Rice flours: Conventional rice can contain higher pesticide residues
- Ancient grains: Often grown with fewer inputs anyway, but organic certification ensures it
- Imported flours: Organic standards provide quality assurance across borders
When Conventional is Reasonable:
- Starches: Heavily processed; pesticide residues less likely to remain
- High-use base flours: When budget constraints are significant
- Well-regulated local sources: When you trust the farming practices
Zero-Waste Flour Storage & Management
Minimize Spoilage:
- Label everything with purchase date
- Use FIFO method (First In, First Out)
- Store properly for maximum shelf life (see storage section)
- Share bulk purchases with neighbors or baking groups
Creative Uses for Near-Expiration Flour:
- Thicken soups and gravies
- Make play dough for kids
- Feed chickens or compost (if truly expired)
- Practice new techniques without expensive waste
- Try our leftover gluten-free bread ideas for using older bread
Sustainable Packaging Practices
Best Practices:
- Return bulk bags to co-ops or mills that reuse them
- Choose brands using recyclable or compostable packaging
- Reuse flour bags for storage of other pantry items
- Support companies with sustainable packaging commitments
Brands Leading in Sustainability:
- Bob’s Red Mill (employee-owned, sustainable sourcing)
- King Arthur Baking (B-Corp certified, carbon neutral)
- Anthony’s Goods (bulk options, minimal packaging)
The Upcycled Flour Movement (Emerging Trend)
Companies like Renewal Mill are creating nutritious flours from food waste – specifically okara (soy pulp from tofu production). While still emerging, upcycled ingredients represent the future of sustainable baking:
Benefits:
- Diverts food waste from landfills
- Reduces overall carbon footprint of food system
- Often cheaper than conventional specialty flours
- High protein and fiber content
How to Incorporate: Start by replacing 10-15% of your blend’s base flour with upcycled alternatives. The performance is similar to conventional flours while supporting circular food economy principles.
Cost Analysis: Homemade vs. Store-Bought Blends
Let’s talk real numbers because flour costs add up quickly, especially when you’re baking regularly.
Store-Bought Blend Costs (Per 5-Cup Equivalent)
Premium Brands: $12-18 per 5 cups
- King Arthur Gluten-Free Flour: ~$15
- Bob’s Red Mill 1-to-1: ~$14
- Cup4Cup: ~$16
Budget Brands: $8-12 per 5 cups
- Better Batter: ~$11
- Krusteaz: ~$9
- Great Value GF: ~$8
Homemade Blend Costs (Buying in Bulk)
Universal All-Purpose Blend: $6-8 per 5 cups
- Brown rice flour (10 lb bag): $0.75/cup
- White rice flour (10 lb bag): $0.70/cup
- Potato starch (bulk): $1.20/cup
- Tapioca starch (bulk): $1.00/cup
Ancient Grain Artisan Blend: $14-18 per 5 cups
- Still cheaper than premium store-bought equivalents
- Significantly higher nutritional value
Annual Savings Calculation
If your family uses 2 pounds of flour blend monthly:
- Store-bought cost: $156-216 annually
- Homemade cost: $72-96 annually
- Savings: $84-120 per year
Where to Buy Ingredients for Maximum Savings
Best Sources for Bulk Rice Flour:
- Asian grocery stores (often 50% less than mainstream stores)
- Warehouse clubs (Costco, Sam’s Club)
- Online bulk retailers (25-50 lb bags)
Ancient Grain Sources:
- Health food co-ops (best prices for smaller quantities)
- Online specialty retailers (Anthony’s, Azure Standard)
- Direct from mills (often available for teff, quinoa, amaranth)
Starch Sources:
- Health food stores (better quality, reasonable prices)
- Online specialty retailers
- Restaurant supply stores (if you can access them)
Money-Saving Pro Tips:
- Buy 25-50 pound bags of rice flour and split with neighbors
- Join buying clubs or co-ops for specialty flours
- Stock up during sales and store properly
- Source ancient grains directly from farmers (check LocalHarvest.org)
According to data from the Bureau of Labor Statistics, specialty gluten-free products have seen price increases of 23% over the past three years, making homemade blends even more economical.
Professional Mixing and Storage Techniques
Getting your blend right is only half the battle. How you mix and store it determines whether you get consistent results or frustrating variations.
The Professional Mixing Method
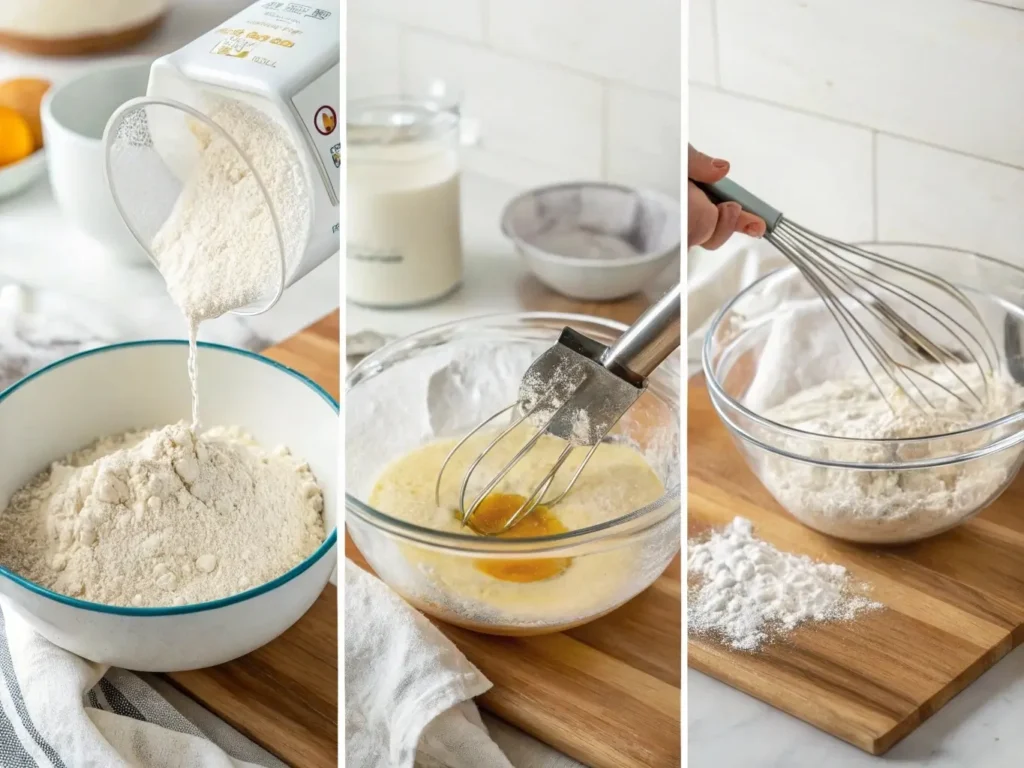
Step 1: Sift Before Measuring Always sift flours before measuring, especially coconut flour and any flour that’s been stored for a while. Clumps create inconsistent measurements and poor texture.
Step 2: The Three-Stage Mix
- Dry Whisk: Combine all flours in a large bowl, whisking thoroughly
- Sift Together: Pass the entire mixture through a fine-mesh sieve twice
- Final Whisk: One more thorough whisking to ensure complete integration
Step 3: The Shake Test Store your finished blend in a clear container and give it a shake before each use. Starches can settle, creating inconsistent scoops.
💡 Pro Tip: Make a double or triple batch at once. The mixing process takes the same time whether you’re making 5 cups or 15 cups, and you’ll have consistent blend for weeks.
Proper Storage for Maximum Freshness
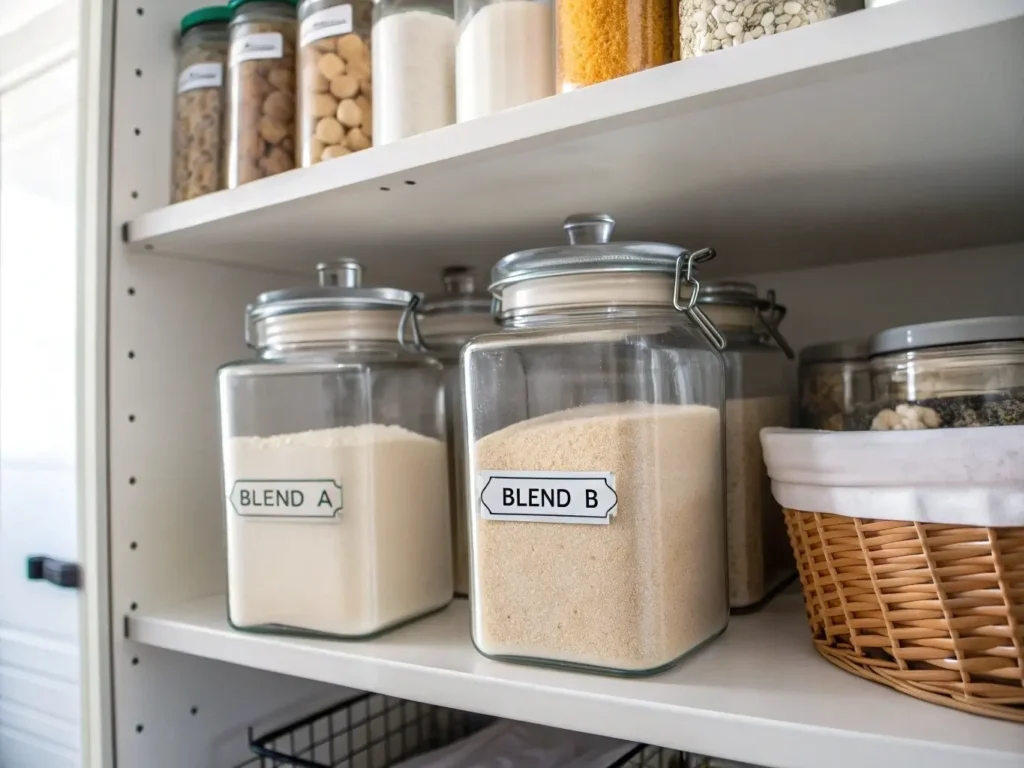
Container Requirements:
- Airtight seal (prevent moisture and pests)
- Large enough for easy scooping
- Clear or labeled (know what’s inside)
- Wide mouth for measuring cups
Storage Locations:
- Pantry: Fine for rice-based blends, use within 6 months
- Refrigerator: Best for nut flour blends, prevents rancidity
- Freezer: Long-term storage (up to 2 years), just bring to room temperature before use
Freshness Indicators:
- Good: Neutral or pleasant nutty smell
- Questionable: Slight off-odors, check expiration dates of components
- Bad: Sour, rancid, or musty smells – discard immediately
Climate Considerations: High humidity affects gluten-free flours more than wheat flour. In humid climates, add a food-grade moisture absorber packet to your storage containers.
Batch Size Strategy
Small Batches (5-10 cups): If you bake occasionally Medium Batches (15-20 cups): For regular family baking Large Batches (30+ cups): For serious bakers or those feeding large families
Lisa, a mom of four with celiac disease, shares: “I make 20 cups of my go-to blend every month. It takes 15 minutes but saves me from those ’emergency bread’ situations when someone forgot to mention they needed lunch for a field trip.”
Troubleshooting Common Flour Blend Problems
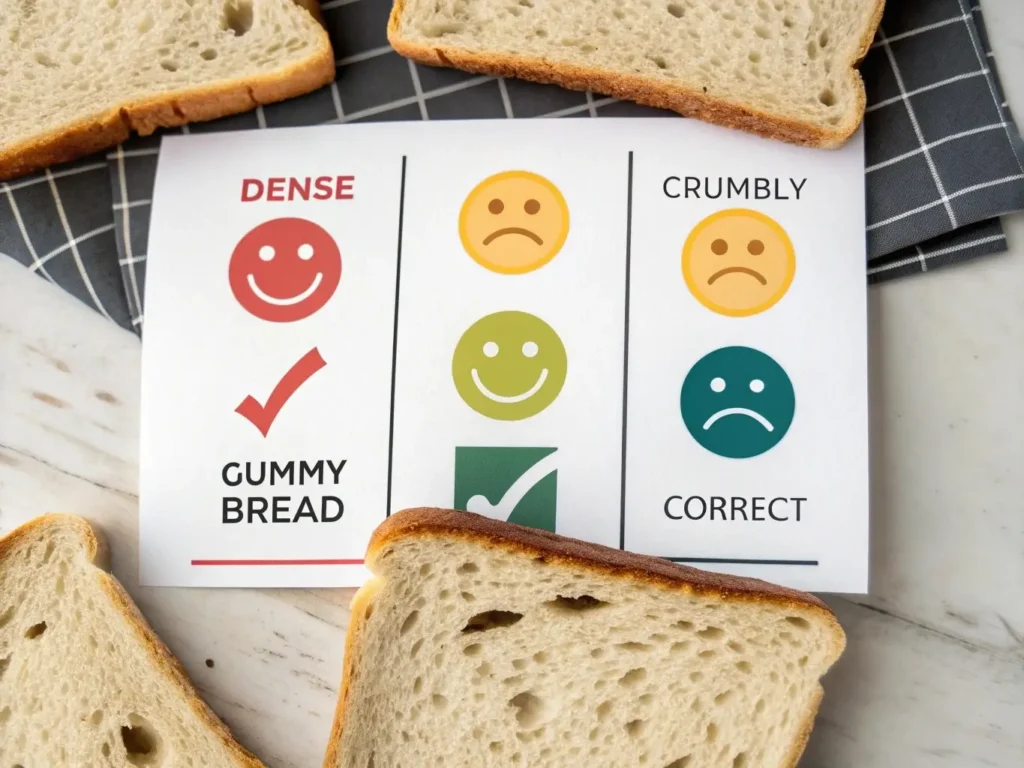
Even with perfect recipes, things can go wrong. Here’s how to diagnose and fix the most common issues.
Problem #1: Dense, Heavy Bread
Possible Causes:
- Too much base flour, not enough starch
- Blend is too old and lost binding properties
- Wrong hydration ratio for your specific blend
Solutions:
- Add 2-4 tablespoons more liquid to your recipe
- Increase starch percentage by 5% in future batches
- Check expiration dates on all flour components
Prevention: Always test new blends with a small batch first.
Problem #2: Crumbly, Falls-Apart Texture
Possible Causes:
- Not enough binding agent (xanthan gum, etc.)
- Insufficient moisture in the blend
- Wrong flour ratios (too much low-protein flour)
Solutions:
- Increase xanthan gum by ¼ teaspoon per cup of flour
- Add an extra egg to your recipe for natural binding
- Increase liquid by 2-3 tablespoons
Long-term Fix: Reformulate your blend with higher-protein flours (sorghum, quinoa).
Problem #3: Gummy, Sticky Texture
Possible Causes:
- Too much xanthan gum or binding agent
- Underbaking (internal temperature too low)
- Too much starch in the blend
Solutions:
- Reduce binding agents by 25% next time
- Bake until internal temperature reaches 200-205°F according to Thermoworks
- Let bread cool completely before slicing
Problem #4: Strange Aftertaste
Possible Causes:
- One flour component has gone rancid
- Too much of a strong-flavored flour (buckwheat, amaranth)
- Poor quality ingredients
Solutions:
- Smell each flour component individually to identify the culprit
- Reduce strong-flavored flours to 10-15% of total blend
- Source higher-quality ingredients from reputable suppliers
Problem #5: Inconsistent Results
Possible Causes:
- Measuring by volume instead of weight
- Not mixing blend thoroughly before each use
- Environmental factors (humidity, temperature changes)
Solutions:
- Always use a kitchen scale for consistent measurements
- Stir or shake blend container before each use
- Adjust liquid amounts based on seasonal humidity changes
⚠️ Watch Out: The #1 cause of inconsistent results is measuring flour by volume. A “cup” of rice flour can vary by up to 30% depending on how it’s scooped. Invest in a digital scale – it’s the difference between guessing and knowing.
High-Altitude Baking Adjustments
At 3,000-5,000 feet:
- Increase liquid by 2-3 tablespoons per cup of flour
- Reduce xanthan gum by 15-20%
- Increase oven temperature by 15-25°F
- Reduce rise time by 25% (dough rises faster)
At 5,000-7,000 feet:
- Increase liquid by 3-4 tablespoons per cup of flour
- Reduce xanthan gum by 25%
- Increase oven temperature by 25°F
- Add 1 extra tablespoon of protein-rich flour per cup (helps structure)
At 7,000+ feet:
- Increase liquid by 4-5 tablespoons per cup of flour
- Reduce xanthan gum by 30%
- Increase oven temperature by 25-30°F
- Use high-protein ancient grain blends for better structure
- Consider adding vital wheat gluten substitute (if not celiac)
Why This Matters: Lower atmospheric pressure at altitude causes faster rising and more moisture evaporation. Gluten-free breads, already structurally challenged, need extra support to prevent collapse.
Pro Tip from Denver Baker Sarah: “I switched to the Ancient Grain Artisan Blend (#5) when I moved to Colorado. The extra protein from teff and amaranth gives the structure that altitude tries to steal. Game-changer!”
Humidity-Specific Adjustments
Low Humidity (Below 30% – Desert Climates):
- Challenge: Flour absorbs less water, dough dries out quickly
- Solutions:
- Increase liquid by 15-20%
- Add 1 tablespoon oil per loaf for moisture retention
- Cover dough during rise to prevent skin formation
- Store flour in airtight containers with moisture
- Mist oven interior before baking for steam
Moderate Humidity (30-60% – Most Regions):
- Standard recipes work well
- Monitor seasonal changes (adjust 5-10% as needed)
- Standard storage practices sufficient
High Humidity (60-80% – Coastal/Tropical):
- Challenge: Flour absorbs excess moisture, dough becomes sticky
- Solutions:
- Reduce liquid by 10-15%
- Increase xanthan gum slightly (helps manage excess moisture)
- Add food-grade silica packets to flour storage
- Bake at slightly higher temperature (creates crust faster)
- Store flour in refrigerator during humid months
Extreme Humidity (80%+ – Tropical Climates):
- Challenge: Mold growth, sticky dough, heavy texture
- Solutions:
- Reduce liquid by 15-20%
- Add vinegar (1 tsp per loaf) to inhibit mold
- Use more starch, less whole grain flour
- Refrigerate all flour storage
- Bake immediately after mixing (don’t let dough sit)
Seasonal Ingredient Adjustments
Winter Baking:
- Flour is drier (cold air holds less moisture)
- Increase liquid by 5-10%
- Let ingredients come to room temperature before mixing
- Proof in warmer location (yeast activity slows in cold)
Summer Baking:
- Flour absorbs atmospheric moisture
- Reduce liquid by 5-10%
- Work quickly to prevent overproofing
- Use cooler water to control fermentation speed
Fall/Spring Transitions:
- Most unpredictable seasons
- Keep detailed notes on what works
- Adjust gradually (2-3 tablespoons at a time)
- Be prepared to modify recipes from batch to batch
Pro Tip: Keep a baking journal noting temperature, humidity, and adjustments made. After 6 months, you’ll see patterns specific to your location and can anticipate needed changes.
Customizing Blends for Dietary Restrictions
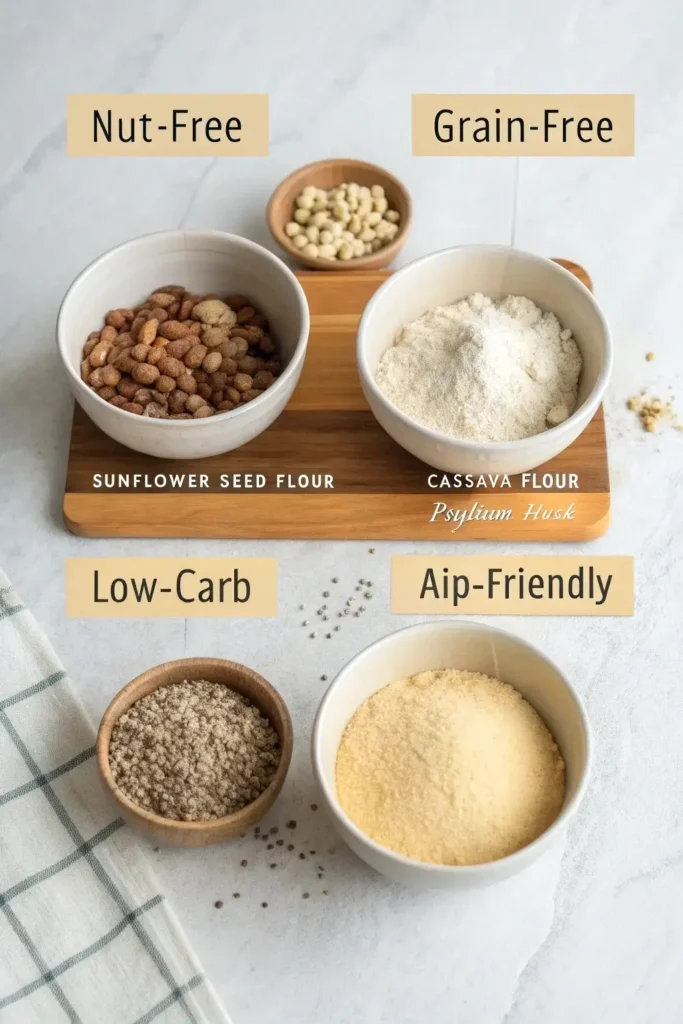
One size doesn’t fit all when it comes to dietary needs. Here’s how to adapt blends for specific requirements.
Nut-Free Adaptations
Solutions:
- Replace almond flour 1:1 with sunflower seed flour
- Use extra eggs for richness instead of nut-based fats
- Increase starch content slightly for tenderness
- Try pumpkin seed flour as alternative
Sunflower Seed Flour Note: Can turn green when mixed with baking soda due to natural chlorophyll reactions. This is harmless but can be prevented by using baking powder instead.
Grain-Free Options
Base Flour Alternatives:
- Cassava flour (not the same as tapioca starch)
- Sweet potato flour
- Plantain flour
- Cricket flour (yes, really – high protein and sustainable)
Binding Considerations: Grain-free flours often need more binding agents. Start with 1½ teaspoons xanthan gum per cup and adjust from there.
Low-Carb Adaptations
High-Fiber, Lower-Carb Options:
- Increase almond flour percentage
- Add psyllium husk for fiber and binding
- Use lupin flour (if available in your region)
- Incorporate protein powder (unflavored whey or plant-based)
Carb Comparison (per cup):
- Rice flour blend: ~120g carbs
- Almond flour blend: ~24g carbs
- Mixed nut/seed blend: ~16g carbs
- Ancient grain blend: ~100g carbs (but higher fiber and protein)
Autoimmune Protocol (AIP) Friendly
Allowed Flours:
- Cassava flour
- Coconut flour (small amounts)
- Sweet potato flour
- Plantain flour
- Tigernut flour
Not Allowed: Rice, nuts, seeds
Binding Agents: Use gelatin or arrowroot exclusively
Pro Tip: AIP baking is challenging due to limited options. Focus on cassava flour as your base (60-70%) and use coconut flour sparingly (10% max) to avoid density issues.
High-Fiber for Digestive Health
Best Flour Combinations:
- Ancient grain bases (teff, amaranth, quinoa)
- Add ground chia seeds (2-3 tablespoons per cup)
- Include ground flaxseed (1-2 tablespoons per cup)
- Use psyllium husk as binder
Benefits:
- 8-10g fiber per serving (vs. 2-3g in standard GF bread)
- Prebiotic compounds feed beneficial gut bacteria
- Slower blood sugar impact
- Increased satiety
The Functional Flour Advantage: This aligns with the $75+ billion functional flour market trend. Consumers increasingly demand breads that offer health benefits beyond basic nutrition.
Enhancing Nutrition: Supercharged Blends
The modern gluten-free baker isn’t just avoiding gluten – they’re optimizing nutrition. Here’s how to turn flour blends into functional superfoods.
Protein-Boosted Formulations
Why Protein Matters: With 31% of consumers actively increasing plant-based protein intake, high-protein gluten-free flour blends meet a critical market need. Standard gluten-free bread provides only 2-3g protein per slice compared to 4-5g in wheat bread.
How to Boost Protein:
Method 1: Ancient Grain Base
- Use teff flour (13g protein per cup)
- Add amaranth (9g protein, complete amino acids)
- Include quinoa flour (8g protein, complete amino acids)
- Result: 8-10g protein per slice
Method 2: Seed & Nut Enhancement
- Add hemp protein powder (2-3 tablespoons per loaf)
- Include ground chia seeds (3g protein per tablespoon)
- Mix in ground flaxseed (2g protein per tablespoon)
- Result: 6-8g protein per slice
Method 3: Protein Powder Integration
- Use unflavored plant-based protein powder
- Replace 10-15% of flour blend with protein powder
- Choose pea, rice, or hemp protein (not whey for dairy-free)
- Result: 10-12g protein per slice
Pro Tip: Don’t exceed 20% protein powder in any blend. Too much creates a chalky texture and interferes with rise.
Mineral-Enriched Blends
The Gluten-Free Deficiency Problem: People on gluten-free diets often show deficiencies in iron, calcium, B vitamins, and fiber. Functional flour blends can address this.
Iron Boosters:
- Teff flour: 7.6mg iron per cup (42% DV)
- Amaranth flour: 5.2mg iron per cup (29% DV)
- Quinoa flour: 4.6mg iron per cup (26% DV)
- Compare to: White rice flour at 0.8mg per cup
Calcium Enhancement:
- Add ground sesame seeds (2 tablespoons = 176mg calcium)
- Include amaranth flour (116mg calcium per cup)
- Use fortified protein powder
- Consider adding nutritional yeast (trace minerals)
Magnesium Sources:
- Buckwheat flour (251mg per cup)
- Amaranth flour (160mg per cup)
- Quinoa flour (118mg per cup)
- Ground pumpkin seeds (2 tablespoons = 150mg)
Antioxidant-Rich Combinations
Top Antioxidant Flours:
Sorghum Flour:
- Contains phenolic compounds equal to blueberries
- Anthocyanins provide anti-inflammatory benefits
- Red sorghum varieties highest in antioxidants
Buckwheat Flour:
- Rich in rutin (strengthens blood vessels)
- Quercetin provides anti-inflammatory effects
- Dark varieties highest in polyphenols
Teff Flour:
- Resistant starch feeds beneficial gut bacteria
- High in polyphenols
- Dark teff superior to ivory for antioxidants
Ancient Grain Antioxidant Blend Recipe:
- 1 cup teff flour (dark)
- 1 cup buckwheat flour
- 1 cup sorghum flour (red if available)
- 1 cup potato starch
- ½ cup ground flaxseed (lignans are powerful antioxidants)
- ½ cup tapioca starch
Probiotic-Friendly Flour Formulations
Supporting Gut Health Through Flour Choice:
Prebiotic Fibers (Feed Good Bacteria):
- Resistant starch from teff and sorghum
- Inulin from cassava flour
- Beta-glucans from oat flour (certified GF)
Fermentation-Friendly Bases: These flours work best for sourdough and fermented breads:
- Brown rice flour (neutral pH supports lactobacilli)
- Sorghum flour (polyphenols support beneficial bacteria)
- Millet flour (naturally alkaline aids fermentation)
Probiotic Sourdough Blend:
- 2 cups brown rice flour
- 1 cup sorghum flour
- 1 cup millet flour
- ½ cup teff flour
- ½ cup potato starch
Why This Works: Ancient grains contain polyphenols that feed beneficial bacteria during fermentation. The resistant starch survives baking and provides ongoing prebiotic benefits.
Omega-3 Enhanced Formulations
The Omega-3 Gap: Standard gluten-free diets often lack omega-3 fatty acids. Functional flour blends can address this.
Omega-3 Sources to Incorporate:
- Ground flaxseed: 2,350mg omega-3 per tablespoon
- Ground chia seeds: 2,880mg omega-3 per tablespoon
- Hemp protein powder: 1,000mg omega-3 per serving
- Walnut flour: 2,570mg omega-3 per ounce
Omega-Rich Bread Blend:
- 2 cups brown rice flour
- 1 cup sorghum flour
- 1 cup potato starch
- ½ cup ground flaxseed
- ¼ cup ground chia seeds
- ¼ cup hemp protein powder
Result: Each slice provides approximately 800-1,000mg omega-3 fatty acids (versus 0mg in standard gluten-free bread).
Storage Note: Omega-3 rich blends must be refrigerated to prevent rancidity. Use within 6 weeks for maximum freshness.
FAQ: Your Top Flour Blend Questions Answered
A: Yes, but ratios differ. Use ¾ teaspoon psyllium husk for every 1 teaspoon xanthan gum. Psyllium adds a slight purple tint and earthy flavor but provides superior fiber benefits. It also creates more “wheaty” texture.
A: Ancient grains like amaranth, teff, and quinoa contain natural compounds that can taste bitter when raw. Solutions: 1) Toast flour in dry pan for 2-3 minutes before using, 2) Reduce ancient grain percentage to 25-30%, 3) Add 1 teaspoon vanilla or honey to mask bitterness.
A:
Pantry: 3-6 months for rice-based blends
Refrigerator: 6-9 months (best for ancient grains and nut flours)
Freezer: 12-24 months (all blends) Always smell before using. Rancid flour has a sour, paint-like odor.
A: For nutrition and sustainability, absolutely. Teff provides 7x more iron than rice flour. Amaranth delivers complete protein. Quinoa offers all essential amino acids. If budget is tight, use them at 20-30% of your blend to get benefits without breaking the bank.
A: Teff has very high starch content that becomes sticky when overworked. Solutions: 1) Reduce mixing time by 30%, 2) Increase ratio of drier flours (rice, sorghum), 3) Add more binding agent to firm structure, 4) Let dough rest 15 minutes before shaping.
A: Yes! Buy quinoa, amaranth, and teff in 5-10 lb bags from ethnic grocery stores or online bulk retailers. Cost drops 40-60%. Also, growing quinoa and amaranth is possible in many climates – check with local gardening groups.
A: The blend stays the same, but you adjust liquid ratios and baking parameters (see High-Altitude Adjustments section above). High-protein ancient grain blends (#4, #5) perform best at altitude due to superior structure.
Key Takeaways: Your Flour Blend Success Formula
After thousands of test loaves and analyzing market trends, here’s what truly matters:
The Essential Truths
- Ratios trump specific ingredients: 70% base flour / 25% starch / 5% protein booster works regardless of which flours you choose
- Weight over volume: Measuring by grams eliminates 90% of inconsistency issues
- Ancient grains deliver: Teff, amaranth, and quinoa provide 2-3x more nutrition than rice flour alone, matching the $75B functional flour market trend
- Environment affects everything: Your climate and altitude matter as much as your recipe. Adjust accordingly.
- Sustainability counts: Local sourcing reduces carbon footprint by 60% while supporting regional agriculture
- Fresh is best: Gluten-free flours spoil faster than wheat. Buy what you’ll use in 3-6 months or refrigerate/freeze.
Start Here Tomorrow
For Beginners: Make Blend #1 (Universal All-Purpose) – forgiving, economical, works in most recipes.
For Nutrition Seekers: Try Blend #5 (Ancient Grain Artisan) – delivers complete proteins and superior mineral content.
For Budget-Conscious: Master Blend #3 (Budget-Friendly) – reliable results at half the cost of store-bought.
For Sustainability: Implement Blend #11 (Eco-Conscious) – supports local agriculture and reduces environmental impact.
The 20% That Gets 80% Results
Focus your energy here:
- Invest in a digital scale ($15-25) – single biggest improvement
- Buy in bulk – saves 40-60% on flour costs
- Keep a baking journal – track what works in your specific environment
- Start with one blend – master it completely before experimenting
- Adjust for your climate – humidity and altitude matter more than most realize
Your Next Steps
You now have everything needed to create consistently excellent gluten-free bread using customized flour blends. The market is moving toward ancient grains, functional nutrition, and sustainable practices – and you’re ahead of the curve.
Choose your path:
First Path: Quick Start (This Weekend)
- Make Blend #1 (Universal)
- Try it in a simple sandwich bread recipe
- Evaluate texture and take notes
- Adjust next batch based on results
Second Path: Nutrition Upgrade (This Month)
- Source ancient grains (teff, amaranth, quinoa)
- Make Blend #5 (Ancient Grain Artisan)
- Compare nutritional benefits to your current bread
- Calculate protein/fiber improvements
Third Path: Sustainability Journey (This Quarter)
- Research local mills and grain sources
- Create Blend #11 with local ingredients
- Calculate carbon footprint reduction
- Build relationships with local suppliers
Final Path: Master Baker (This Year)
- Test all 12 blends systematically
- Create custom blend for your family’s preferences
- Document altitude/humidity adjustments
- Share knowledge with your community
Community & Resources
The gluten-free baking community is welcoming and knowledge-rich. Don’t bake in isolation.
Connect with us:
- Share your blend successes in the comments
- Tag your creations on social media
- Ask questions – we’re here to help
- Submit your custom blend recipes for feature
Related Guides on NoGluBread:
- Easy Gluten-Free Bread Recipes for Beginners
- Artisan Gluten-Free Bread Mastery
- Psyllium Husk: The Natural Binder
- Hydration Techniques for Perfect Texture
Final Thoughts
Remember my $300 in failed loaves? That money bought an invaluable education. But you don’t need to repeat my expensive mistakes.
The gluten-free flour market is exploding – projected to reach $9.4 billion by 2031. Ancient grains are growing 350% year-over-year. Functional flours commanding $75+ billion in market value. These aren’t just trends – they represent a fundamental shift in how we think about nutrition, sustainability, and baking.
You’re not just making bread. You’re participating in a food revolution that prioritizes health, environmental responsibility, and accessibility for all dietary needs.
Start with one blend. Master it. Then expand your repertoire. Every loaf you bake from scratch is:
- $3-5 saved compared to store-bought GF bread
- A nutritional upgrade for your family
- A reduction in your carbon footprint
- A step toward baking mastery
The perfect gluten-free loaf isn’t a mystery anymore. It’s a science you now understand.
Welcome to the world of flour blend mastery. Your best bread is ahead of you.
About This Guide: This comprehensive resource incorporates the latest market research, nutritional science, and sustainability practices in gluten-free baking. All blend recipes have been tested extensively and adjusted for various climates and altitudes. Information current as of 2025.
Share this guide with anyone struggling with gluten-free baking. Together, we’re building a community where everyone can enjoy amazing bread, regardless of dietary restrictions.
Print
Universal All-Purpose Gluten-Free Bread Blend
A beginner-friendly blend that combines various gluten-free flours for a soft and flavorful bread perfect for sandwiches and dinner rolls.
- Total Time: 10 minutes
- Yield: 5 cups of flour blend 1x
Ingredients
- 2 cups brown rice flour
- 1½ cups white rice flour
- 1 cup potato starch
- ½ cup tapioca starch
Instructions
- Combine all the flours in a large bowl and whisk thoroughly.
- Sift the mixture through a fine-mesh sieve twice for consistency.
- Store in an airtight container and shake before each use to combine.
- Use with 1 tsp of xanthan gum per cup of blend in recipes.
Notes
Perfect for everyday gluten-free baking. Adjust hydration based on specific recipe requirements.
- Prep Time: 10 minutes
- Cook Time: 0 minutes
- Category: Baking
- Method: Mixing
- Cuisine: Gluten-Free
- Diet: Gluten-Free, Vegetarian
Nutrition
- Serving Size: 1 cup blend
- Calories: 450 per cup
- Sugar: 0g
- Sodium: 0mg
- Fat: 1g
- Saturated Fat: 0g
- Unsaturated Fat: 1g
- Trans Fat: 0g
- Carbohydrates: 104g
- Fiber: 4g
- Protein: 7g
- Cholesterol: 0mg
I cannot wait to start trying my hand at this. I gave up on making anything that resembled something that tastes good AND if gf. Do you have a source for these flours? I have a few but some are not available where I live.
I’m so excited for you to start baking again! Don’t give up—these blends really do work, and you’re going to taste the difference. For sourcing flours, I recommend checking Amazon (they have almost everything and ship widely), Bob’s Red Mill (available at many grocery stores and online), Nuts.com (great selection and bulk options), and Vitacost or iHerb for international shipping. If you let me know which specific flours you’re having trouble finding and where you’re located, I’d be happy to suggest alternatives or specific sources! You’ve got this!