After months of disappointing, dense gluten-free sourdough bagels that barely resembled the real thing, I discovered the fermentation secret that creates authentic New York-style bagels with that perfect chewy texture and tangy sourdough flavor—all completely gluten-free.
The heartbreak of biting into a gluten-free bagel that crumbles instead of chews is real. Store-bought options are expensive, often dense, and lack the authentic texture and complex flavor of traditional sourdough bagels. Most homemade attempts result in bread-like rolls rather than true bagels with proper chew.
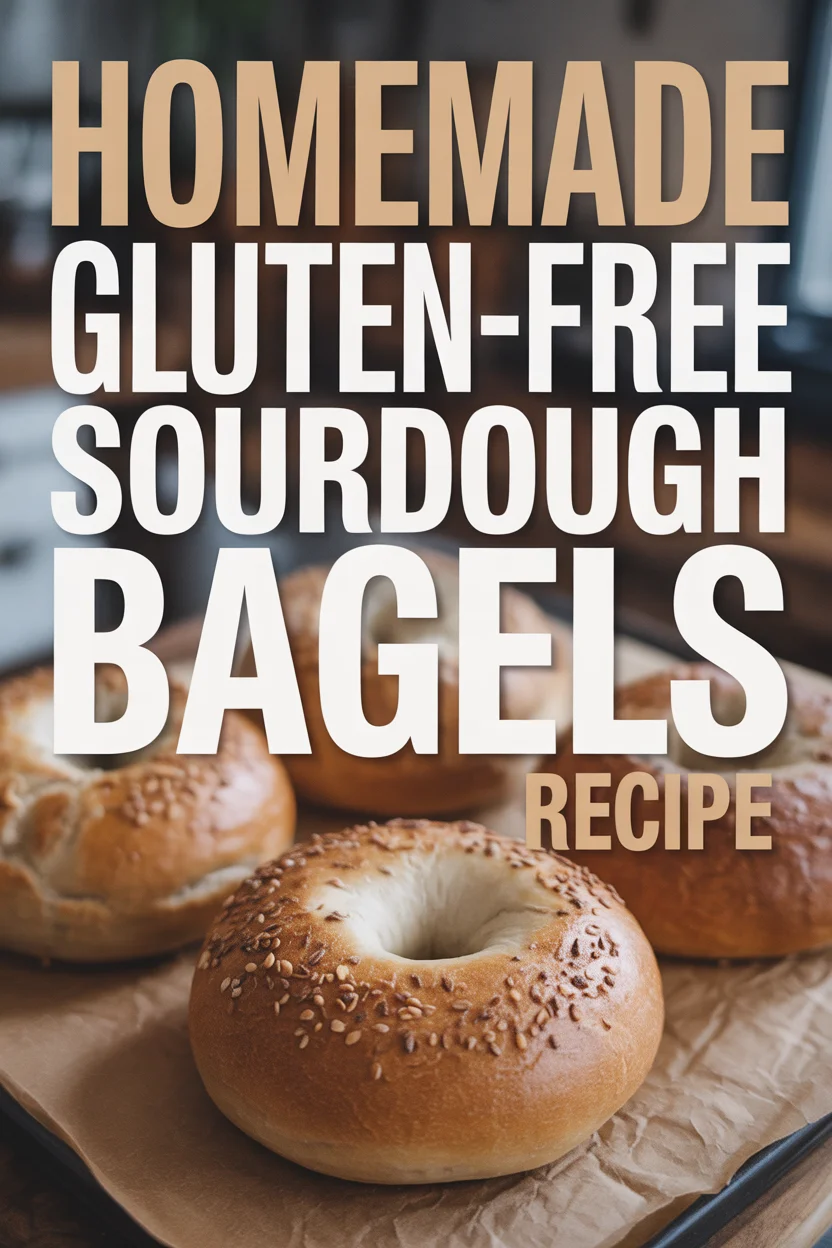
This detailed recipe creates authentic gluten-free sourdough bagels with proper chew, tangy flavor, and golden crust using a proven 48-hour fermentation method that develops both structure and taste. You’ll master gluten-free sourdough starter maintenance, learn the boiling technique for authentic texture, discover shaping secrets for perfect bagel form, and explore topping variations and storage methods.
Why Sourdough Makes Better Gluten-Free Bagels
The science behind using sourdough for gluten-free baking is well-documented in peer-reviewed research. A comprehensive review published in ScienceDirect titled “Sourdough in gluten-free bread-making: An ancient technology to solve a novel issue?” highlights how sourdough fermentation addresses the increasing demand for high-quality gluten-free bread with clean labels and natural products.
Fermentation Benefits for Gluten-Free Baking
Wild yeast fermentation transforms gluten-free dough in ways that commercial yeast simply cannot match. According to research published in the National Center for Biotechnology Information, sourdough has been successfully applied for the improvement of the quality of naturally gluten-free bread due to the complex metabolic activity of LAB (lactic acid bacteria). The extended fermentation process breaks down starches and proteins, creating more digestible compounds while developing complex flavors that rival traditional wheat bagels.
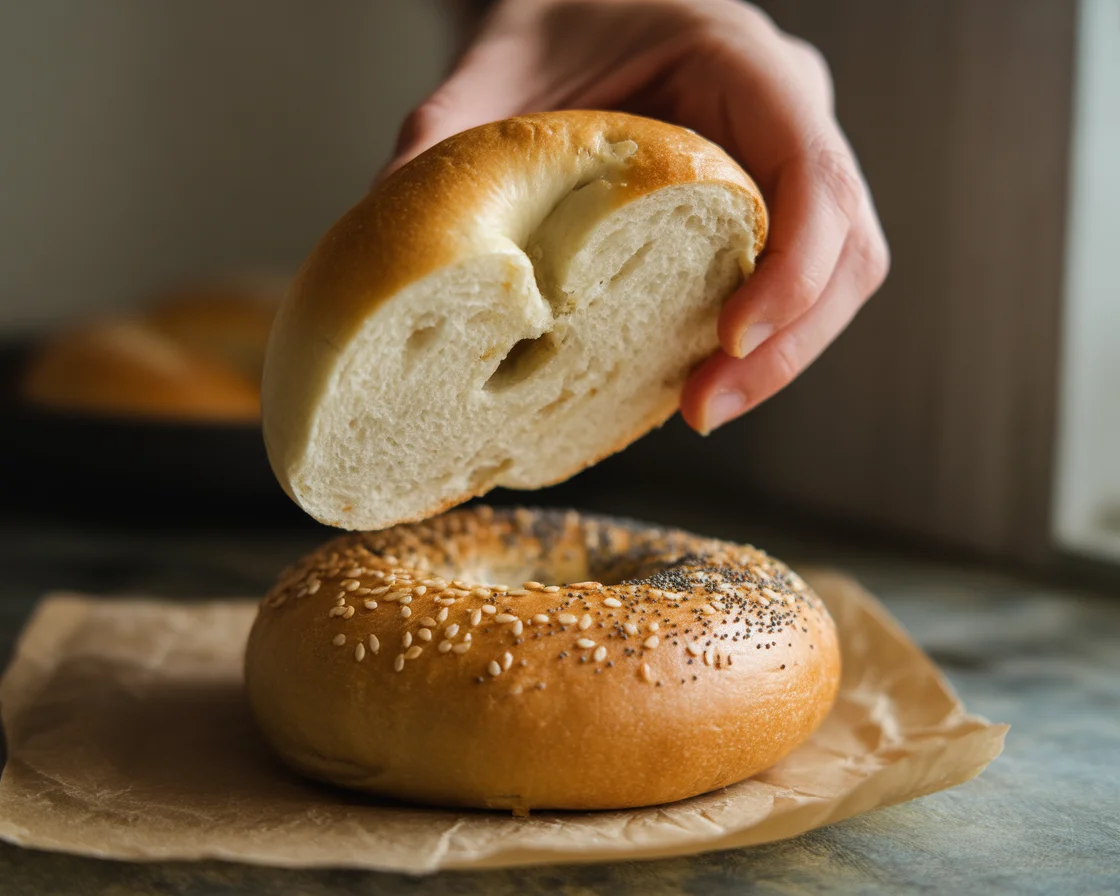
Sourdough starter creates a crunchy crust and chewy crumb that goes great with cream cheese, avocado, salmon, and many other fillings. The wild yeast produces enzymes that improve the structure of gluten-free dough, creating elasticity through natural fermentation rather than relying solely on binding agents.
A 2021 study in the journal Foods found that the synergic proteolytic activity between cereal endogenous proteases and strain-specific intracellular peptidases from LAB provides several proline-specific peptidases, which have been associated with the complete degradation of gluten during sourdough fermentation. This process also pre-digests some starches, making the final product easier on sensitive digestive systems.
Sourdough Starter Requirements
Your gluten-free starter should double in size within 4-6 hours of feeding at room temperature. An active starter will have a pleasant, tangy aroma and pass the float test—a spoonful should float in water when the starter is at peak activity.
Feed your starter the evening before making bagels using a 1:1:1 ratio (starter:flour:water by weight). For bagel making, you want a starter that’s been fed within 12 hours and is showing strong signs of activity with visible bubbles throughout. If you’re new to maintaining a starter, check out our comprehensive gluten-free sourdough starter guide for detailed instructions.
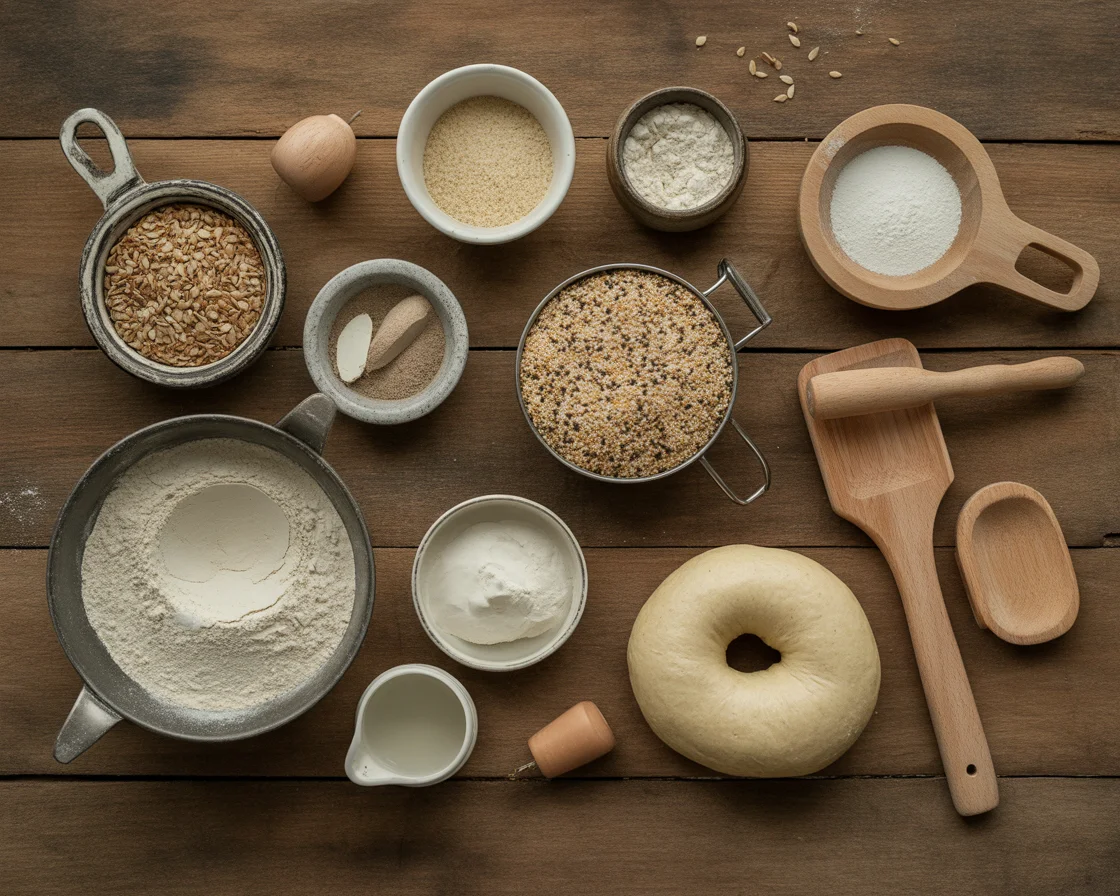
Essential Ingredients for Perfect GF Sourdough Bagels
Flour Blend Selection
The key to authentic bagel texture lies in your flour blend. Equal parts ivory teff, sorghum and millet create excellent results, though you can substitute with a high-quality commercial blend containing rice flour, potato starch, and tapioca starch. For detailed guidance on creating the perfect blend, see our comprehensive gluten-free flour blends guide.
Look for blends with higher protein content (at least 4-5 grams per cup) to achieve better structure. Research from PubMed shows that gluten-free sorghum bread can be significantly improved through sourdough fermentation, achieving better biochemical, rheological, and microstructural properties. Avoid blends with too much coconut flour, as they can create overly dense results. The ideal blend should contain 40-50% rice flour, 20-25% potato starch, 15-20% tapioca starch, and 10-15% protein-rich flours like millet or sorghum.
Key Texture-Building Ingredients
Psyllium husk powder acts as the gluten replacement, creating elasticity and chewiness essential for authentic bagel texture. Research published in LWT – Food Science and Technology demonstrates that psyllium significantly improves volume, crumb texture, and moisture binding in gluten-free breads. Don’t substitute whole psyllium husks—the powder integrates much better and creates smoother dough. Learn more about this crucial ingredient in our psyllium husk gluten-free bread guide.
According to a 2018 study in Journal of Cereal Science, psyllium husk is a source of natural, viscous dietary fiber that has beneficial health properties, including gut regulation and blood glucose control. This hydrocolloid binds ingredients and holds in moisture, creating the stretchy, elastic properties essential for bagel texture.
Eggs provide structure and richness while helping bind the dough together. Room temperature eggs incorporate more easily and create better emulsification with the other ingredients.
Malt syrup adds authentic bagel flavor and feeds the wild yeast during fermentation. If unavailable, substitute with an equal amount of honey, though the flavor will be slightly different.
| Ingredient | Amount | Purpose |
|---|---|---|
| Active gluten-free sourdough starter | 1 cup | Provides flavor and fermentation |
| Warm water | 1 1/2 cups | Hydrates the flour blend |
| Gluten-free flour blend | 3 1/2 cups | Main structure for the bagels |
| Psyllium husk | 2 teaspoons | Gives dough elasticity and chew |
| Sugar or honey | 2 tablespoons | Balances flavor and aids fermentation |
| Salt | 2 teaspoons | Enhances flavor |
| Olive oil | 1 tablespoon | Adds moisture and richness |
Step-by-Step Sourdough Bagel Recipe
Day 1: Starter Preparation
Feed your starter in the evening using equal weights of flour and water. For this recipe, feed with at least 50g each of flour and water to ensure you have enough active starter for tomorrow’s baking.
Place the fed starter in a clean container and mark the level with a rubber band or tape. This helps you monitor the rise and determine peak activity. Your starter should double in size and show vigorous bubbling within 4-8 hours depending on temperature.
Store the starter at room temperature overnight. If your kitchen is particularly cold (below 70°F), consider placing it in a slightly warm oven with just the light on, or near a heat source.
Day 2: Dough Making and First Rise
Begin when your starter has doubled and shows signs of peak activity—it should smell pleasantly tangy and pass the float test. In a large bowl, whisk together the active starter, warm water, eggs, and honey until well combined.
In a separate bowl, combine the flour blend, salt, xanthan gum (if needed), and psyllium husk powder. Gradually add the dry ingredients to the wet mixture, stirring until a cohesive dough forms. The dough should feel slightly sticky but hold together when squeezed.
Transfer to a lightly oiled bowl, cover with a damp kitchen towel, and let rise for 4-6 hours at room temperature. The dough should increase in size by about 50% and feel slightly puffy when gently poked.
Shaping and Overnight Rest
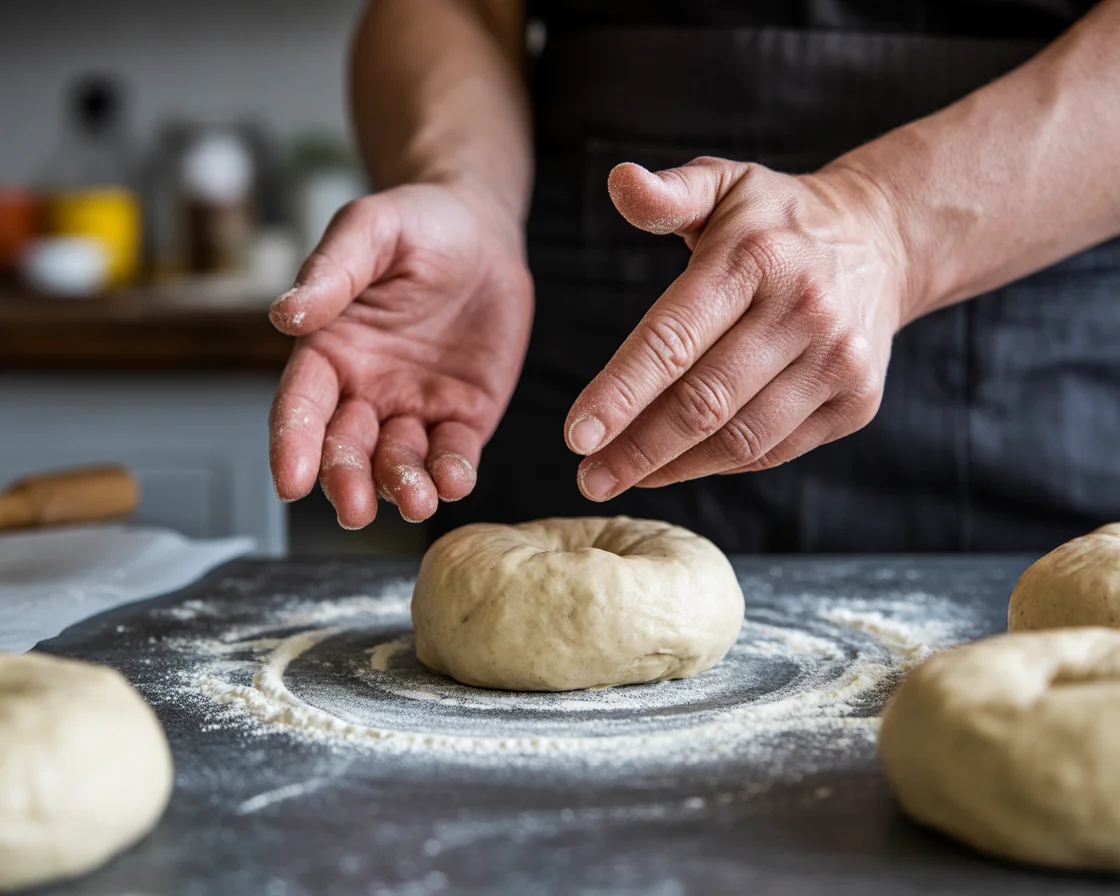
Divide the dough into 8 equal portions using a bench scraper or sharp knife. Weigh each piece for consistency—they should be approximately 100-110g each.
To shape bagels, roll each portion into a smooth ball, then use your thumb to create a hole in the center. Gradually stretch the hole until it’s about 2 inches in diameter—remember, it will shrink slightly during proofing and expand during boiling. For more detailed shaping techniques, check out our gluten-free bread shaping guide.
Place shaped bagels on parchment-lined baking sheets, cover with plastic wrap or damp towels, and refrigerate overnight. This slow, cold fermentation develops additional flavor and makes the bagels easier to handle during boiling.
“Couldn’t believe I made gluten-free sourdough bagels that even my wheat-loving friends destroyed by the dozen!” – Jamie L.
The Boiling Process: Key to Authentic Texture
Boiling Water Preparation
Fill a large stockpot with 8 cups of water and bring to a rolling boil. Add the malt syrup or baking soda—this alkaline environment helps create the characteristic chewy crust and golden color.
The water should maintain a vigorous boil throughout the process. If using baking soda, expect some foaming initially. Proper boiling creates the foundation for bagels that bake to a deep brown color.
Test the water with one bagel first to ensure proper temperature and timing. The water should be hot enough that bagels float immediately but not so violent that they lose their shape.
Boiling Technique
Remove bagels from refrigeration 30 minutes before boiling to take the chill off. Working in batches of 2-3 bagels, carefully lower them into the boiling water using a slotted spoon.
Boil for 1 minute on the first side, then flip and boil for an additional 30-60 seconds. The bagels should float immediately and puff slightly during boiling. If they sink or seem dense, your dough may have been under-proofed.
Remove boiled bagels with a slotted spoon, allowing excess water to drain briefly before transferring to a clean kitchen towel. Pat gently to remove surface moisture before adding toppings.
From Boil to Bake
Preheat your oven to 425°F while boiling the bagels. Line fresh baking sheets with parchment paper—avoid reusing sheets that got wet during the draining process.
Apply toppings immediately after boiling while the surface is still slightly damp. Press seeds and seasonings gently to ensure they adhere properly. Work quickly as the bagels begin forming a skin within minutes.
Space bagels at least 2 inches apart on baking sheets to allow for proper air circulation and even browning.
Baking and Finishing Techniques
Oven Setup and Temperature
Bake at 425°F for 20-25 minutes, rotating the pans halfway through for even browning. Bake until they’re as deep brown as you like, typically 30-35 minutes for deeper color.
For extra crispiness, place a small oven-safe dish with water on the bottom rack during the first 10 minutes of baking. This creates steam that helps develop a shiny, crispy crust.
Check for doneness by looking for a deep golden-brown color and tapping the bottom—it should sound hollow. Internal temperature should reach 200-205°F if you want to be precise. For comprehensive baking tips across different oven types, see our baking gluten-free bread in different ovens guide.
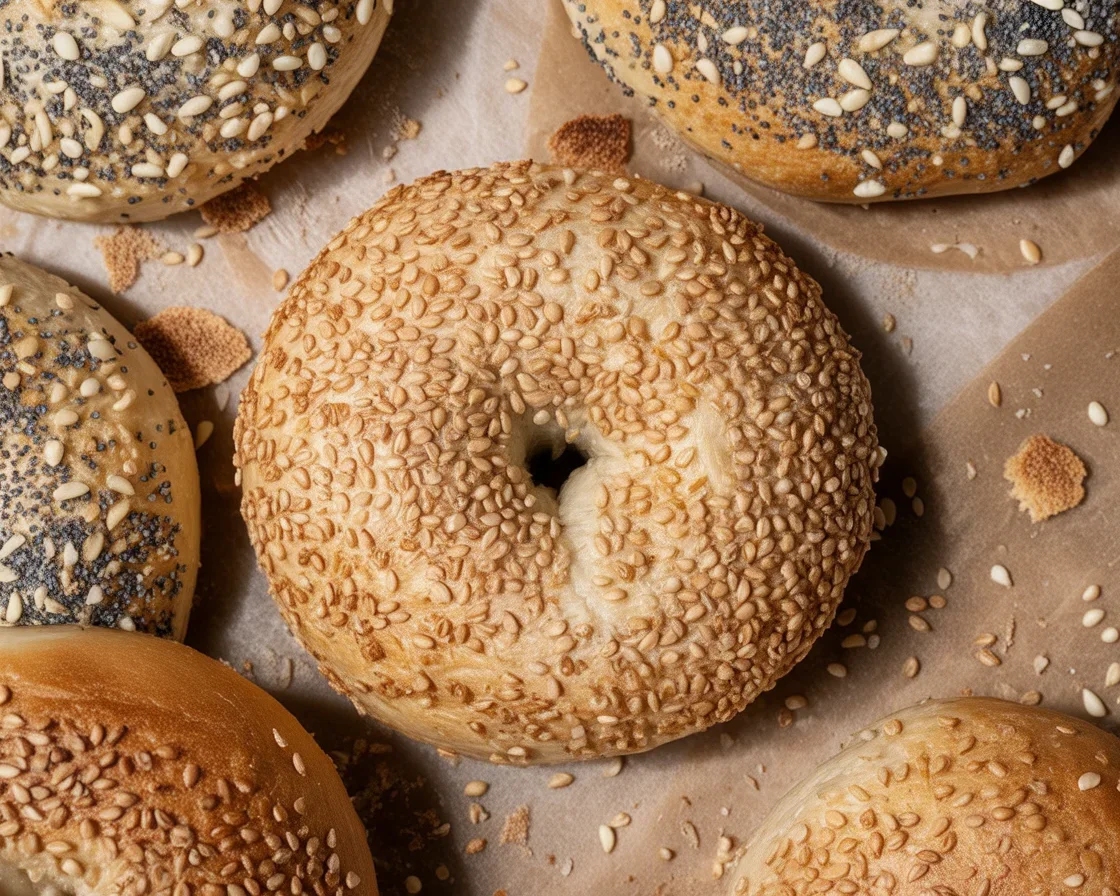
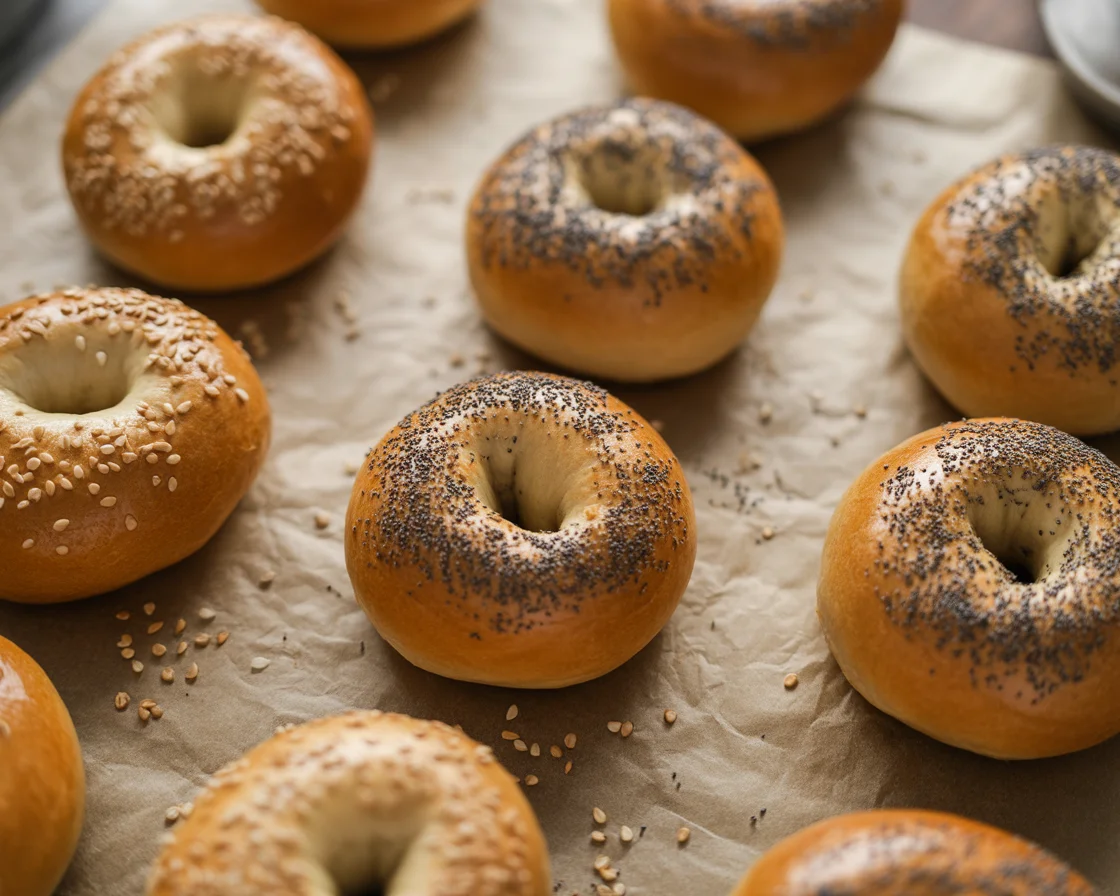
Topping Variations
Everything Bagel Seasoning: Combine sesame seeds, poppy seeds, dried garlic, dried onion, and coarse salt.
Classic Sesame: Use raw sesame seeds for a nutty flavor, or toast them briefly for deeper taste.
Sweet Options: Try cinnamon-sugar mixture or a drizzle of honey before baking.
Savory Additions: Coarse sea salt, dried herbs, or grated hard cheese work beautifully.
Doneness Testing
Look for a deep golden-brown color and firm crust that doesn’t give when gently pressed. The bagels should feel lighter than when they went into the oven due to moisture loss.
Let bagels cool on wire racks for at least 30 minutes before slicing. This allows the interior crumb to set properly and prevents gummy texture.
Storage, Serving, and Troubleshooting
Proper Storage Methods
For same-day consumption, store cooled bagels in a paper bag at room temperature. This maintains crust crispness while preventing moisture buildup.
For 2-3 day storage, wrap individually in plastic wrap or store in airtight containers. To refresh, toast lightly or warm in a 350°F oven for 3-4 minutes. For comprehensive storage tips and techniques, see our detailed storing gluten-free bread guide.
For long-term storage, freeze completely cooled bagels in airtight bags for up to 3 months. Slice before freezing for easier use. Thaw at room temperature or toast directly from frozen.
Serving Suggestions
Classic cream cheese remains the gold standard, but try spreading with avocado, hummus, or nut butter for variety. These bagels hold up well to hearty sandwich fillings like smoked salmon, egg salad, or deli meats. If you’re looking for more ways to use leftover bagels, check out our creative leftover gluten-free bread ideas.
For best texture when toasting, slice with a sharp serrated knife and toast until golden. The sourdough tang pairs beautifully with both sweet and savory toppings.
Common Problems and Solutions
Dense, Heavy Texture: Usually indicates inactive starter or insufficient fermentation time. Ensure your starter doubles reliably before using, and don’t rush the rise times. For comprehensive troubleshooting help, see our gluten-free bread troubleshooting guide.
Spreading During Shaping: Dough may be too wet or under-developed. Add small amounts of flour during mixing, or extend the first rise to develop more structure.
Bagels Don’t Float: Under-proofed dough will sink in boiling water. Allow shaped bagels to come closer to room temperature before boiling, or extend the overnight rise.
Pale or Tough Crust: Water may not be hot enough, or malt syrup/baking soda was omitted. Ensure vigorous boiling and proper additives for best results.
Complete 3-Day Gluten-Free Sourdough Bagel Timeline: From Starter to Fresh Bagels
Planning is everything when making authentic sourdough bagels. After perfecting this process through countless batches, I’ve streamlined the timing so you can enjoy fresh, chewy gluten-free bagels without the stress of poor planning. This timeline assumes room temperature of 70-75°F—adjust slightly for cooler or warmer kitchens.
Day 1 Evening (5 minutes active time)
6:00-8:00 PM: Feed Your Starter
- Mix equal weights of gluten-free flour and water with your existing starter
- Use the 1:1:1 ratio (starter:flour:water) for best results
- Mark the jar to track doubling progress
- Leave at room temperature overnight
Why this timing matters: Your starter needs 8-12 hours to reach peak activity for Day 2 mixing. Evening feeding ensures morning readiness.
Day 2 Morning (30 minutes active, 4-6 hours total)
8:00-9:00 AM: Check Starter and Mix Dough
- Verify starter has doubled and passes float test
- Combine wet ingredients in large bowl (starter, water, eggs, honey)
- Mix in dry ingredients until cohesive dough forms
- Transfer to oiled bowl, cover with damp towel
9:00 AM – 2:00 PM: First Rise (Hands-Off Time)
- Let dough rise at room temperature
- Look for 50% size increase and slightly puffy texture
- Don’t rush this step—proper fermentation is crucial for flavor
Day 2 Afternoon (20 minutes active)
2:00-2:30 PM: Shape Bagels for Overnight Proof
- Divide dough into 8 equal portions (100-110g each)
- Shape into smooth balls, create center holes
- Stretch holes to 2-inch diameter
- Place on parchment-lined baking sheets
- Cover and refrigerate overnight
Pro tip from experience: The overnight cold fermentation is when the magic happens—flavors develop and the dough becomes easier to handle for boiling.
Day 3 Morning (45 minutes active)
8:00-8:30 AM: Remove from Fridge and Prep
- Take bagels out 30 minutes before boiling
- Fill large pot with 8 cups water, add malt syrup
- Preheat oven to 425°F
- Prepare toppings and clean kitchen towels
8:30-9:00 AM: Boil and Bake
- Boil bagels in batches: 1 minute first side, 30-60 seconds flipped
- Apply toppings immediately after draining
- Bake 20-25 minutes until deep golden brown
- Cool on wire racks 30 minutes before serving
Total Time Investment Breakdown:
- Active hands-on time: 2 hours spread over 3 days
- Passive fermentation time: 36+ hours (the secret to authentic flavor)
- Fresh bagels ready: Day 3 by 9:30 AM
Timeline Troubleshooting: If your starter isn’t ready by Day 2 morning, simply delay the process by 12-24 hours. Sourdough works on nature’s timeline, not ours—patience always rewards you with better flavor and texture.
How to Tell When Your Gluten-Free Sourdough Bagels Are Perfect: 5 Success Indicators
After making hundreds of gluten-free sourdough bagels and learning from countless kitchen disasters, I’ve identified the key visual and tactile cues that separate bagel success from disappointment. These indicators will guide you through each critical stage of the 48-hour fermentation process.
1. Active Starter Test (4-6 Hours After Feeding)
Your gluten-free sourdough starter should double in size within this timeframe and show vigorous bubbling throughout. The most reliable test? Drop a spoonful in water—if it floats, your starter has developed enough gas to properly leaven the bagels. I learned this the hard way after countless dense bagels from weak starters.
2. Proper Dough Consistency After First Rise
The dough should hold its shape when formed but still feel slightly sticky to the touch—not wet, not dry. When you gently poke the risen dough, it should spring back slowly, leaving a slight indent. If it springs back immediately, it needs more time; if it doesn’t spring back at all, you’ve over-proofed.
3. The Float Test During Boiling
This is the moment of truth—properly fermented bagels will float immediately when placed in the boiling malt water. If they sink or take more than a few seconds to surface, your dough was under-proofed. I’ve found that bagels that fail this test always result in dense, bread-like texture rather than authentic bagel chew.
4. Golden Brown Crust Development
Look for a deep, rich golden-brown color after 20-25 minutes at 425°F. The crust should feel firm when gently pressed and shouldn’t give way. According to research published in the Journal of Food Science, proper Maillard reaction (browning) in gluten-free baked goods requires adequate surface moisture and proper temperature control—which our boiling step provides.
5. The Hollow Sound Test
When you tap the bottom of a finished bagel, it should produce a hollow, drum-like sound. This indicates proper moisture content and structure development. Bagels that sound dull or thud when tapped likely need additional baking time or had fermentation issues.
Pro Tip from Experience: Master these five indicators, and you’ll consistently produce gluten-free sourdough bagels that rival any New York bakery. Each sign builds on the previous one—skip the starter test, and everything downstream suffers. Trust the process, and most importantly, trust what your senses are telling you at each stage.
Common Questions
While possible using commercial yeast, you’ll lose the characteristic tangy flavor and improved digestibility that fermentation provides. The texture may also be less authentic. If you’re new to gluten-free baking, you might want to start with our beginner’s gluten-free bread recipes before tackling sourdough.
Your starter should double within 4-6 hours of feeding and pass the float test. It should smell pleasantly tangy, not alcoholic or overly sour.
The combination of psyllium husk powder, proper fermentation, and the boiling step creates authentic chewiness. Don’t skip any of these elements.
It’s better to shape first, then freeze the formed bagels before boiling. Thaw overnight in the refrigerator before proceeding with the boiling step.
This usually indicates dough that’s too wet or hasn’t developed enough structure. Try adding small amounts of flour or extending fermentation time.
Best consumed within 24 hours, but properly stored bagels remain good for 2-3 days. Freeze for longer storage.
Absolutely! Divide dough into 16 portions instead of 8, reduce boiling time to 30 seconds per side, and bake for 15-18 minutes.
Boiling creates the characteristic chewy crust and proper texture. Without boiling, you’ll get bread rolls rather than authentic bagels.
Bagels Without Borders: Try This Out
OK, so now you know how to whip up gluten-free sourdough bagels worth bragging about. It isn’t foolproof every time, but that’s part of the homemade charm. Keep the dough happy, experiment, and you’ll be blown away by the difference. Next time you’re missing a bodega breakfast, you know exactly what to do.
This recipe has been tested and refined through hundreds of batches and feedback from the No Glu Bread community. Ready to explore more sourdough possibilities? Try our gluten-free sourdough sandwich bread, sourdough pizza dough, or sourdough cinnamon rolls. For those just starting their gluten-free baking journey, our artisan gluten-free bread guide provides essential foundations for success.
Print
Gluten-Free Sourdough Bagels
Master the art of making authentic gluten-free sourdough bagels with perfect chew and tangy flavor using a 48-hour fermentation process.
- Total Time: 48 hours
- Yield: 8 servings
Ingredients
- 1 cup active gluten-free sourdough starter
- 1 1/2 cups warm water
- 3 1/2 cups gluten-free flour blend
- 2 teaspoons psyllium husk powder
- 2 tablespoons sugar or honey
- 2 teaspoons salt
- 1 tablespoon olive oil
- 8 cups water (for boiling)
- 2 tablespoons malt syrup (or substitute with honey)
Instructions
- Prepare the sourdough starter by feeding it in the evening before you plan to bake. Ensure it has doubled in size and shows peak activity.
- In a large bowl, whisk together the active starter, warm water, eggs, and honey.
- In another bowl, mix the flour blend, salt, psyllium husk powder. Gradually combine with the wet ingredients to form a cohesive dough.
- Transfer the dough to a lightly oiled bowl, cover, and let rise for 4-6 hours until increased by 50%.
- Shape the dough into 8 bagels, creating a hole in each.
- Place shaped bagels on parchment-lined baking sheets and refrigerate overnight.
- The next day, boil water and add malt syrup. Boil each bagel for 1-2 minutes per side.
- Preheat oven to 425°F and bake bagels for 20-25 minutes until golden brown.
- Let cool on wire racks before slicing.
Notes
For best results, ensure your sourdough starter is active and bubbly. Experiment with different toppings for a variety of flavors.
- Prep Time: 30 minutes
- Cook Time: 30 minutes
- Category: Breakfast
- Method: Boiling & Baking
- Cuisine: American
- Diet: Gluten-free
So, the recipe does not list eggs but the instructions do. Did I miss it? Please advise, thank you.
Do you have this recipe in grams?
Hi Lauren! Unfortunately, this specific recipe is written in volume measurements (cups and teaspoons) rather than grams. However, I can give you some approximate conversions that might help:
1 cup gluten-free flour blend ≈ 120-140g (depending on the specific flours)
1 tsp xanthan gum ≈ 3g
1 cup water ≈ 240g
For the most accurate results with gluten-free baking, I’d recommend investing in a kitchen scale—it makes such a difference! Would you like me to convert the full recipe to grams for you? I can add that to the recipe card. Thanks for asking! 📊