I test and tweak gluten-free breads all the time, and this version gives reliably soft, sliceable loaves without gummy crumbs or odd metallic aftertastes. It’s forgiving for home bakers and stays tender for several days when stored properly — I often make two loaves at once so there’s always one ready for sandwiches. For a quick comparison to other recipes I’ve tried, see this best gluten-free sandwich bread roundup.
Why Make This Recipe
- Soft, tender crumb that slices cleanly for sandwiches and toast.
- Uses pantry-friendly gluten-free flours and minimal specialty ingredients.
- Freezer-friendly: you can freeze slices and pull them out for quick meals.
- Reliable rise and texture thanks to balance of starches, protein, and xanthan gum.
- I love this recipe because it finally solved the dry, crumbly loaves I used to get — a small increase in hydration made a big difference; see my notes below and also check recommended mixes like these recommended gluten-free flours and milks when selecting ingredients.
Recipe Overview
- Prep time: 20 minutes active, plus 60–75 minutes rising.
- Bake time: 35–45 minutes.
- Total time: About 2 hours (includes cooling).
- Servings: 12 slices (1 standard 9×5-inch loaf).
- Difficulty: Easy–Medium — straightforward mixing with a stand mixer or vigorous hand mixing.
- Cooking method: Yeasted loaf baked at 350°F (175°C) in a greased 9×5-inch loaf pan; uses a combination of gluten-free flours and starches for structure. For a sense of how this compares to store options, this link is helpful: store-bought gluten-free loaves.
My Experience Making This Recipe
I tested this loaf across different flour blends and hydration levels; increasing liquid by about 10% produced a noticeably softer crumb without making the dough runny. Early test loaves were dense until I added an extra egg white and a short second rise — those small changes made the texture sandwich-worthy.
How to Make The Best Soft Gluten Free Sandwich Bread
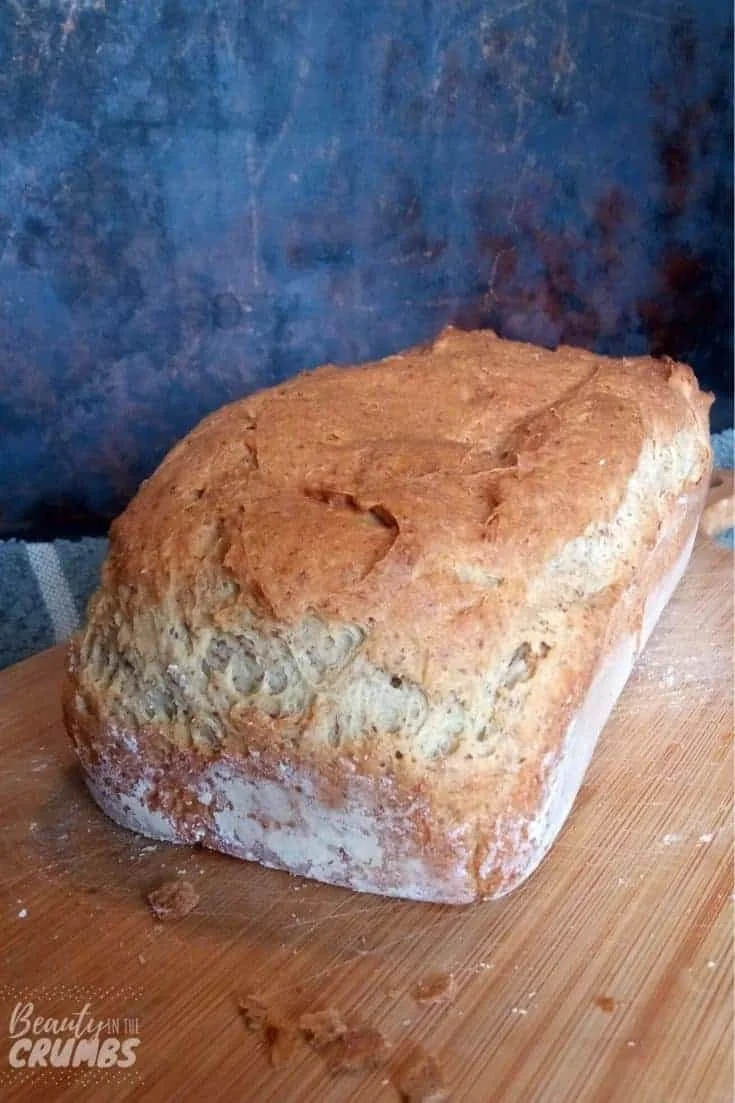
The process is simple: hydrate a blend of gluten-free flours/starches, mix in instant yeast, eggs, oil, and a little sugar, then beat until the batter is smooth and slightly thick (it will be more batter-like than traditional dough). Transfer to a greased 9×5-inch pan, let it rise until domed (about 40–60 minutes at around 75°F), then bake at 350°F (175°C) until the internal temperature reaches 200–205°F (93–96°C). Expect a light golden crust and a moist, tender crumb that holds together well for slicing.
Expert Tips for Success
- Use a scale when possible — 1 cup can vary a lot with gluten-free flours. For best results: 250 g total flour/starch blend (for a 9×5 loaf).
- Warm liquids: aim for 100–110°F (38–43°C) to activate yeast without killing it. If you don’t have a thermometer, the liquid should feel warm, not hot.
- Don’t skimp on xanthan gum or psyllium husk; 1 tsp xanthan gum per loaf or 2 tsp psyllium husk powder helps bind and create stretch. For different structuring tips, see this gluten-free bread rolls guide.
- Use a stand mixer with a paddle attachment or whisk vigorously by hand for 3–5 minutes; this builds air into the batter and improves rise.
- Let the bread cool fully (at least 1 hour) before slicing — cutting while hot will compress and make crumbs gummy.
How to Serve The Best Soft Gluten Free Sandwich Bread
- Classic sandwiches: turkey and avocado, grilled cheese using sharp cheddar, or peanut butter and jam.
- Toast it for breakfast: brush with butter and toast to deep golden for excellent texture. For a seeded option, try the chia seed sandwich bread variation.
- Use for French toast: slightly stale slices soak up the batter and make rich, custardy French toast.
- Party platter: cube the bread for mini open-faced canapés with herbed cream cheese and smoked salmon.
Storage and Reheating Guide
- Room temperature: store sliced in an airtight container or heavy-duty zip-top bag for up to 3 days.
- Refrigerator: not recommended for long-term softness (it can dry bread out), but will keep it safe for up to 5 days if you live in a hot climate.
- Freezing: slice and flash-freeze on a tray, then transfer to a freezer bag for up to 3 months. Reheat from frozen in a toaster or 350°F (175°C) oven for 8–12 minutes.
- Reheating: thaw slices at room temperature or pop frozen slices straight into a toaster; for whole loaves, wrap in foil and warm at 300°F (150°C) for 15–20 minutes to refresh.
Recipe Variations
- Dairy-free: swap milk for unsweetened almond or oat milk and use neutral oil (such as canola or light olive oil). See recommended milks in the flour/milk guide above.
- Egg-free (vegan): use 1/4 cup aquafaba per egg and add 1–2 tbsp ground flaxseed plus extra water; expect a slightly denser loaf.
- Seeded: fold in 2–3 tbsp mixed seeds (flax, chia, sesame) for texture and fiber, or sprinkle seeds on top before baking.
- Whole-grain boost: replace up to 25% of the starches with finely milled sorghum or buckwheat flour for more flavor and nutrients; increase hydration by 10–15%.
Nutritional Highlights
- Higher in complex carbs and usually lower in added sugar than many commercial gluten-free breads.
- Can be made with heart-healthy oils and seeds for added omega-3s and fiber.
- Allergen note: recipe typically contains eggs and may contain dairy if milk is used; adapt with aquafaba and plant milk for egg/dairy-free diets. Portion: one slice (about 40–50 g) is a standard serving for sandwiches.
Troubleshooting Common Issues
- Dense loaf: usually from under-aeration or expired yeast. Solution: check yeast date, ensure warm water, and beat batter 3–5 minutes to incorporate air.
- Gummy crumb: underbaking or too much liquid. Solution: bake until internal temp reaches 200–205°F and measure liquids carefully.
- Crust too hard: oven too hot or loaf cooled in a draft. Solution: bake at 350°F and tent with foil for the last 10 minutes if crust sets too quickly.
Frequently Asked Questions
Q: Can I use all-purpose gluten-free flour instead of a flour/starch mix?
A: Yes, but many single blends lack the starch ratio that creates a soft crumb. If using an all-purpose mix, add 20–30% tapioca or potato starch to lighten the texture and add 1 tsp xanthan gum if the blend is gum-free.
Q: How do I know when it’s fully baked without a thermometer?
A: The loaf should be deep golden, spring back lightly when pressed, and a skewer inserted into the center should come out mostly clean with a few moist crumbs. For reliability, an instant-read thermometer showing 200–205°F is best.
Q: Can I double the recipe to bake two loaves at once?
A: Yes — bake two pans on separate oven racks, rotating halfway through. Make sure the pans aren’t touching and allow a few extra minutes of baking time if the oven is crowded.
Q: Is xanthan gum necessary and can I replace it?
A: It’s highly recommended for structure in gluten-free bread. You can replace it with psyllium husk powder (2–3 tsp) for a more elastic crumb; results vary, so test once and adjust hydration.
Conclusion
For an easy, dependable loaf you can slice for sandwiches or toast, this method delivers consistent results. If you want another tested recipe to compare or adapt, try this Easy Gluten Free Sandwich Bread – The Loopy Whisk for additional technique ideas and measurements.
Print
Best Soft Gluten Free Sandwich Bread
A reliable and forgiving gluten-free sandwich bread recipe with a soft, tender crumb that’s perfect for slicing.
- Total Time: 120 minutes
- Yield: 12 slices 1x
Ingredients
- 250 g gluten-free flour/starch blend (e.g., tapioca, potato starch, sorghum)
- 1 tsp instant yeast
- 1 large egg
- 1 egg white
- 1/4 cup neutral oil (such as canola or light olive oil)
- 1 tbsp sugar
- 1 tsp xanthan gum
- 1 cup warm liquid (100–110°F)
Instructions
- In a bowl, combine the gluten-free flour/starch blend and xanthan gum.
- In a separate bowl, whisk together the warm liquid, instant yeast, egg, egg white, oil, and sugar until smooth.
- Combine the wet and dry ingredients and mix until the batter is smooth and slightly thick.
- Transfer the batter to a greased 9×5-inch loaf pan.
- Let it rise in a warm place until domed, about 40–60 minutes.
- Bake in a preheated oven at 350°F (175°C) for 35–45 minutes until the internal temperature reaches 200–205°F.
- Allow to cool completely for at least 1 hour before slicing.
Notes
For best texture, use a scale for measuring flour and ensure all liquids are warm but not hot. Cool fully before slicing to avoid gummy crumbs.
- Prep Time: 20 minutes
- Cook Time: 40 minutes
- Category: Bread
- Method: Baking
- Cuisine: Gluten-Free
- Diet: Vegan, Dairy-Free Option Available
Nutrition
- Serving Size: 1 slice
- Calories: 120
- Sugar: 1g
- Sodium: 200mg
- Fat: 5g
- Saturated Fat: 0g
- Unsaturated Fat: 5g
- Trans Fat: 0g
- Carbohydrates: 15g
- Fiber: 2g
- Protein: 3g
- Cholesterol: 0mg